February 08, 2019

Strawberry Puliodarai | Strawberry Sadam | Gluten Free and Vegan | Fusion Recipes by Masterchefmom

by , in


Hi Supermoms,

During my husband's recent trip to Pune, he got me four boxes of fresh strawberries. We finished one box immediately. It tasted so fresh and juicy. The other three boxes really tempted me to try new dishes .

I made a batch of Strawberry Thokku/pickle yesterday and it was a super hit . I even mixed some thokku with rice and even that was so yummy. Will share the thokku recipe shortly. 

Taking motivation from the feedback I got for the thokku, I made the Strawberry Puliodarai today . 

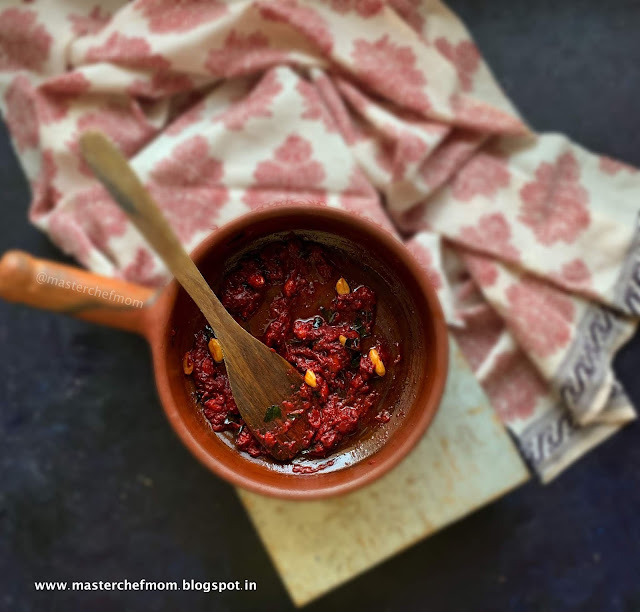
I was so thrilled by the texture of the strawberry pulikaichal ( the gravy) . The oil separated beautifully and the pulikaichal had the right amount of spice and tanginess . It blended beautifully with rice and like the traditional Pulikaichal, it tastes even better when had after a few hours. 


I am so in love with this recipe and I could not resist sharing it with all of you immediately. This recipe is a keeper and I would love if you try and share your feedback with me. 

Strawberry Puliodarai | Strawberry Sadam : 

Preparation time : 5-7 minutes
Cooking time : 20 -25 minutes 
Serves : 2 
1 cup = 250 ml cup 

Ingredients :

2 cups rice ( cooked) 
12 strawberries ( finely chopped)
1/4 teaspoon red chilli powder ( I used Kashmiri Chilli powder) 
1 &1/2 teaspoon lemon juice ( freshly squeezed) 
salt to taste 

For tempering :

1 tablespoon sesame oil
1/2 teaspoon bengal gram / channa dal
1/2 teaspoon urad dal 
10 -12 ground nuts ( roasted ) 
1/4 teaspoon mustard seeds 
2-3 dry red chillies ( halved, adjust quantity depending upon the type of chillies you are using)
4-5 curry leaves ( torn roughly) 

Method : 

1. Heat a wide pan or kadai with oil.
2. Temper with ingredients given for the same .

Chef tip : Add it to oil in the order given .
3. Now add the chopped strawberries and mix well.
4. Add red chilli powder and salt.
Note : Adjust chilli powder quantity according to your spice preference. 
5. Cook the strawberries over low flame till they mash completely and the oil separates at the sides of the pan.

6. When the oil starts to separate, add the lemon juice and continue cooking for another 5 minutes, stirring continuously. 
7. Switch off. 
8. Add rice and mix well.
Chef tip : Add more rice if you find it spicy. For more taste, you can a teaspoon of sesame oil to rice , mix well and then add it to the pan. 
Your strawberry puliodarai is now ready to be served. You can enjoy it with vadam/appalam or  potato chips /wafers. 


If you are looking for more strawberry recipes, you can try my 


Happy Cooking !

With love,

Masterchefmom


from MASTERCHEFMOM
February 08, 2019

Pongal Saapadu | Indian Thali Ideas By Masterchefmom | Gluten Free Recipes

by , in
Pongal Saapadu | Indian Thali Ideas By Masterchefmom

Hi Supermoms,

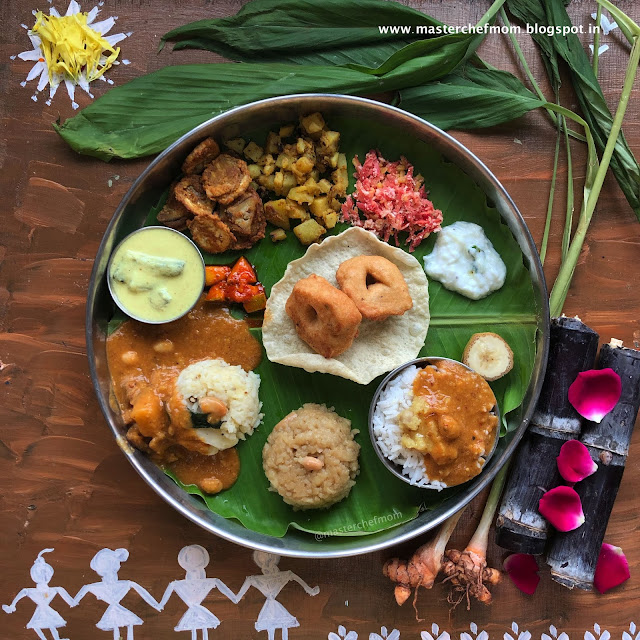
Pongal is the oldest and biggest festival in Tamilnadu. It is the harvest festival and also a way of saying thanks to Nature. I have shared a lot of pongal recipes with you earlier. In this post, I am sharing all the links to the elaborate meal that I cooked on Pongal this year. 

I miss celebrating Pongal in my hometown. So, the main celebration for me is through food. Food memories are the best. I make sure that I cook all the traditional recipes that I grew up eating on the festival day. This way, I feel so connected to my roots. Typically, there will be Ven Pongal ( savoury pongal), Sakkarai Pongal( sweet pongal), Pongal Kuzhambu on the menu. 


This year , we had guests for lunch and so I added a few more dishes, to serve them an extravagant Pongal Meal. 


Pongal Saapadu | Indian Thali Ideas By Masterchefmom

The Pongal Saapadu was delicious and my guests and family enjoyed the meal. 

I hope this compilation helps you plan your festival menu. 


Happy Cooking !

With love,

Masterchefmom


from MASTERCHEFMOM
February 07, 2019

Potato Curry |Cut Aloo Kari Recipe | Home Style Potato Fry | Gluten Free and Vegan Recipe

by , in


Hi Supermoms,

Potato is my family's most favourite vegetable. 

From potato masala for dosai , potato sagu for poori to pakoda, bonda and sandwich filling, there is so much that can be made using potatoes. If you are a potato fan, then you can feel how the taste of each dish you cook automatically elevates when you add potatoes. 

Potatoes are always on the top of my vegetable shopping list . Even if I do not have any other vegetables in stock except potatoes, I feel that I can still cook a very tasty meal . Potato brings back so many memories . 

Simple potato stir fry with curd rice or rasam rice  used to be my favourite school lunch. Finely chopped , soft cooked and lightly roasted potatoes with ghee chapatis always bring back fond memories of numerous train travels. 


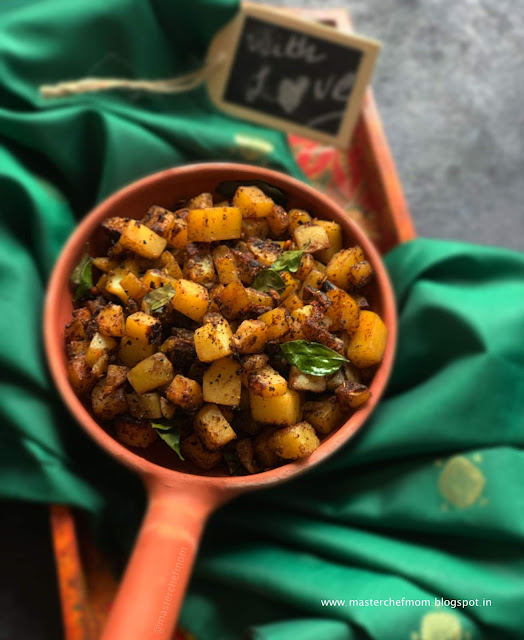
Another potato dish that wins hearts at home is this recipe that I am going to share with you all today. My children call it 'Cut aloo kari' for the simple reason that there are so many different variations of potato sabzi I make and with this name, I can instantly recognise the type of potato they need. Potatoes are chopped into small cubes along with the skin and pan roasted. 

You can get the authentic taste of this Cut Aloo Curry only when you cook in an iron kadai/wok. Sesame oil compliments this dish . You can even use a good sambar masala to spice up the potatoes. 

Potato Curry |Cut Aloo Kari Recipe :

Preparation time : 10 minutes 
Cooking time : 35-40 minutes 
1 cup = 250 ml cup
Serves : 4

Ingredients :

4 medium size potatoes
1/2 teaspoon chilli powder
1/2 teaspoon coriander powder
1/4 teaspoon jeera powder 
1/8 teaspoon turmeric powder
salt to taste

For tempering :

1 tablespoon sesame oil
1/2 teaspoon mustard seeds
1/2 teaspoon urad dal/husked and split black gram
1 sprig curry leaves ( torn roughly)

Method :

1. Heat a pan/kadai with oil and temper with ingredients given for the same. 
2. Add the cubed potatoes .
3. Add all the spice powders, salt and mix well.
4. Allow the potatoes to cook through and turn brown and crispy.
5. Cook over low flame and keep stirring every few minutes so that all the potatoes get 
roasted  uniformly.
 Your delicious Cut Aloo Kari is now ready !

Potato Curry |Cut Aloo Kari Recipe


Happy Cooking !

With love,

Masterchefmom


from MASTERCHEFMOM
February 06, 2019

GRAPES PICKLE RECIPE / INSTANT GRAPES PICKLE RECIPE

by , in

How to do Grapes Pickle Recipe | Easy Instant Grapes Pickle recipe with step by step pics | How to do grapes pickle | Sour Grapes Pickle recipe Bought some grapes and they turned sour? Thinking how to use it? Though we taste grapes before buying for its sweetness, sometimes it does happen that …what comes to our house is sour or tasteless. After paying so much we don’t even feel like throwing it.  One of the dish that comes to rescue to use up sour grapes is this Instant Grapes Pickle . The sweetness tanginess of grapes, hotness from spices  makes this pickle an absolute finger licking . Grapes pickle recipe is also very simple … yes hardly takes 5mins . Other than Grapes pickle . to empty tart tasteless grapes , i do this Pineapple grapes gojju  ( Omit pineappe and add grapes as a major ) or grapes sasime or chutney .. but the simplest and quickest of all is this grapes pickle. My son loves to eat it as such too. Now that grapes are in the season, I am sure you too would want to try this recipe immediately .. and if you do .. like always do share your feedback 🙂 GRAPES PICKLE RECIPE / INSTANT GRAPES PICKLE RECIPE Courseside dish Cuisineindian Prep Time5 mins Cook Time5 mins Ingredients 1 1/2cup […]

The post GRAPES PICKLE RECIPE / INSTANT GRAPES PICKLE RECIPE appeared first on Cook with Smile.


keyword Cook with Smile, Easy Chicken Dinner Recipes
February 04, 2019

Bhel Puri Chutneys by Borosil Nutrifresh Blender

by , in


We all have grown up using Borosil in some or the other way. A brand well known to every household is a symbol of trust, durability, quality and service. I have been personally using Borosil in my routine, be like Katoris, Bowl, Baking dishes, Lunch boxes etc. Borosil is now not just known for it’s dinning wares but also making a mark into electrical kitchen appliances that are economical, easy to use, sheek and stylish and of course trendy along with pocket friendly. Comes in three trendy colors, Black, Red and White to beautify your kitchen.

One such kitchen gadget launched by Borosil India is their Nutrifresh Blender that comes with three jars and 2 blade attachments. It also brings along a jar size cap and a strainer cap that helps your strain your juice and later cap it to refrigerate. The small jar is ideal for grinding dry spices and the long jar is ideal for making chutneys, smoothies etc. Along with this comes a jug attachment as well with measurements marked on it. It surely helps in measuring the volume of the dish prepared. I tried making smoothies, lassi, cold coffee etc using the jar and it was just so convenient for me to measure my exact input in terms of liters and ml.

Today i shall be sharing two of my recipes made using Borosil Nutrifresh Blender. It’s easy and when you have a blender like this, it gets ready in no time. DRY GREEN CHUTNEY AND DRY GARLIC CHUTNEY are the two chutney recipes i’ll be sharing today. I used these chutney for making bhel but you can also have it as a accompaniment with your regular paraths, chilas or it even makes a great par with dosas and idlis.


Note :

Order your BOROSIL NUTRIFRESH BLENDER now using my code SHA15 and get flat 15% discount on your purchase. Offer valid for 3 months.

Multiple users can use this coupon code as well as single user can use the coupon code multiple times also.

You can also order your product from Amazon.in

For Green Chutney :
10 green chillies
4 tbsp Roasted Chana Dal/ Bengal Gram
1 tbsp Fresh Lemon Juice
1 pinch Haldi/ Turmeric powder
salt to taste
Method : 
Collect all ingredients in a jar of Nutrifresh Blender and fix the chutney grinding blade. Set the jar on the machine and coarsely grind to make dry green chutney.
Collect aside in a bowl and proceed making another chutney for your bhelpuri.

For Dry Garlic Chutney :
3-4 tbsp Kashmiri Red Chili Powder
10 cloves garlic
1/2 cup Roasted Skinned Peanuts
rock salt to taste
Method : 
Again collect all the ingredients in Nutrifresh blender jar and grind coarsely.
Use as much as you want and store the rest in an air tight jar or a zip lock pouch in fridge.


Bhel Puri Chutneys by Borosil Nutrifresh Blender
Servings4 people
Prep Time5 minutes
Cook Time5 minutes
Ingredients
For Green Chutney :
For Dry Garlic Chutney :
Instructions
Green Chutney :
  1. Collect all ingredients in a jar of Nutrifresh Blender and fix the chutney grinding blade. Set the jar on the machine and coarsely grind to make dry green chutney.
  1. Collect aside in a bowl and proceed making another chutney for your bhelpuri.
Dry Garlic Chutney :
  1. Again collect all the ingredients in Nutrifresh blender jar and grind coarsely.
  2. Use as much as you want and store the rest in an air tight jar or a zip lock pouch in fridge.
Recipe Notes

Note : You can prepare the dry chutneys in bulk and store in an air tight jar or pack in a zip lock pouch to store in the refrigerator. The shelf life of both the chutneys is around 6-7 months (avoid getting moisture in it).


Keep watching the space for mopre amazing recipes by Borosil India. Till then, happy cooking!

Love : Shaheen

The post Bhel Puri Chutneys by Borosil Nutrifresh Blender appeared first on Spoon Fork And Food.


from Spoon Fork And Food