Showing posts with label Kid Friendly. Show all posts
August 06, 2020

Jam donuts

by , in
Jam doughnuts

Looking for the best jam donuts recipe? Try our recipe then check out more donuts ideas.

Don’t be put off by the idea of making your own donuts. Once you’ve had a bite of your first homemade one, you’ll never look back. Light-as-a-feather dough, caramelised and sugared on the outside and loaded with jam in the middle.


How to make jam donuts

Which yeast is best to make donuts?

Fast-action dried yeast is a superstrong strain that’s been freeze-dried. When mixed with the warmed milk it rehydrates and activates, feeding on the flour, sugar and milk, and creating carbon dioxide to create light, pillowy donuts.

What is enriched dough?

Donuts are made from an enriched dough, which is a normal flour dough that has been enriched with milk, eggs, sugar and butter. These provide extra food for the yeast, creating more rise in the dough. The eggs increase elasticity so the structure is stronger and can better hold the carbon dioxide bubbles.

How do you make light donuts?

Bread flour contains the gluten protein, which when mixed and kneaded aligns into long links within the dough. This is what provides the structure to capture those gases that are released from the yeast. It’s very important to mix the dough really well in the beginning and not rush it. With the addition of the eggs, sugar, milk and butter you’ll find it is a much stickier dough, but this will become smooth and elastic the more you mix it – and your donuts will be all the lighter for it.

Don’t rush the second prove. After knocking back the dough and shaping it, a lot of the lightness will have been knocked out of it. Wait until the balls have doubled in size and look really puffy and aerated – this will ensure the lightest donuts once fried. Don’t worry if the dough balls stick slightly to the baking paper – just ease them off with a palette knife.

How do you add richness to donuts?

Adding the butter gradually will help prevent the dough from splitting and getting greasy. The butter will add richness to the dough once baked, as well as a cake-like texture to the crumb.

How do you pipe the jam into donuts?

When piping, push the nozzle right into the donut, past the middle point – when you squeeze the jam in, the pressure of it filling will push the nozzle back out. It also means you’ll get maximum jam into the donut and a taste of it in every bite.

How do you fry donuts?

Fry the donuts until they are a deep caramel colour. You may worry they look overcooked, but as they cool the steam on the inside of the donuts will escape and soften them so they’re soft and pillowy but with a deep flavour.


Jam donut recipe

You will need a stand mixer for this recipe.

  • 611
  • Total time 1 hours 15 minutes
  • Note + Proving + Cooling
  • Difficulty Easy

Ingredients

  • fast-action dried yeast 2 tsp
  • whole milk 200ml, warmed
  • eggs 2 large
  • strong white bread flour 400g, plus extra for dusting
  • caster sugar 2 tbsp, plus 3 tbsp for coating
  • unsalted butter 50g, softened
  • flavourless oil, for the bowl and deep-frying
  • ground cinnamon ¼ tsp
  • seedless raspberry jam 400g

Method

  • Step 1

    Tip the yeast into the bowl of a stand mixer fitted with the hook attachment, pour in the milk and mix gently. Crack in the eggs and mix again. Tip in the flour, sugar and ½tsp of fine sea salt, and mix for 5 minutes until combined. With the mixer running, add a small piece of butter, adding more once it has been incorporated. Repeat until all of the butter is used. Tip the dough into a lightly oiled bowl, cover with a clean tea towel and leave to prove for 1-2 hours or until doubled in size.

    Step 2

    Lightly knock back the dough, then tip out onto a lightly floured worksurface and divide into 12 pieces. Roll into tight balls and put onto baking-paper-lined trays dusted with flour, with a few centimetres gap between each. Cover with a clean tea towel and leave to prove again until doubled in size.

    Step 3

    Heat a deep, wide pan no more than a third full with oil to 180C or until a cube of bread browns in 30 seconds. In a large bowl, mix the ground cinnamon and 3 tbsp of caster sugar, and prepare a tray lined with kitchen paper. Cook the doughnuts, in batches, in the oil for 1-2 minutes on each side, flipping when they are deep golden, then carefully remove with a slotted spoon and drain on the kitchen paper. After 1-2 minutes, carefully toss lightly in the cinnamon-sugar mix, then cool completely on a wire rack.

    Step 4

    Tip the jam into a bowl and beat well, then put into a piping bag with a nozzle. Make a small hole in the doughnut with a skewer, then push the nozzle into the middle of the doughnut and pipe a good amount of jam into each before serving. Kept in an airtight jar they will keep for one to two days.

Check out our best donut recipes here

[image id="54704" size="landscape_thumbnail" align="none" title="Cream Donut Recipe with Strawberry Jam" alt="Cream Donut Recipe with Strawberry Jam" classes=""]

Nutritional data

  • kcals 320
  • fat 8.1g
  • saturates 2.9g
  • carbs 54.5g
  • sugars 29.5g
  • fibre 1.2g
  • protein 6.7g
  • salt 0.3g


from olivemagazine https://ift.tt/3id9btj
via IFTTT
August 05, 2020

Banoffee fridge cake

by , in
Banoffee fridge cake

Try our banoffee fridge cake then check out our Oreo fridge cake and more no-bake cakes.

  • 57
  • Total time 30 minutes
  • Note + Overnight setting
  • Difficulty Easy

Ingredients

  • oil, for the tin
  • double cream 750ml
  • vanilla extract 1 tsp
  • icing sugar 2 tbsp
  • Nestlé Carnation Caramel ½ x 397g tin
  • digestive biscuits 30-32 (about 450g)
  • bananas 6 small, sliced
  • milk chocolate 50g

Method

  • Step 1

    Lightly oil a deep 23cm springform tin, then line it with clingfilm (the oil will help the clingfilm stick to the tin).

    Step 2

    Whip the cream, vanilla and icing sugar until soft peaks. Scrape the caramel into a bowl and beat with a spoon to loosen it.

    Step 3

    Put a layer of digestives in the bottom of the lined tin – you should get about seven in a 23cm tin. Break up another biscuit to fill in the cracks.

    Step 4

    Dollop over a quarter of the cream and spread out. Top with a layer of banana slices then drizzle over 1 tbsp of caramel sauce.

    Step 5

    Repeat with another layer of biscuit, another quarter of cream, banana slices and another tbsp of caramel. Repeat again with a third layer.

    Step 6

    Add one more layer of biscuits but this time only add the rest of the cream, swirling it into a nice pattern. Put in the fridge to chill overnight. Chill the remaining caramel sauce, too.

    Step 7

    Unclip the tin and carefully peel away the clingfilm. Transfer to a flat cake plate. Just before serving, drizzle over more caramel (warm it a little first so it’s drizzle-able) and then sprinkle with chocolate shavings. Cut into wedges to serve.

Check out out best summer desserts here

[image id="74190" size="landscape_thumbnail" align="none" title="Peach Pavlova Recipe with Mascarpone Cream" alt="Peach Pavlova Recipe with Mascarpone Cream" classes=""]

Nutritional data

  • kcals 604
  • fat 43.9g
  • saturates 25.1g
  • carbs 45.7g
  • sugars 27.6g
  • fibre 2.1g
  • protein 5.2g
  • salt 0.6g


from olivemagazine https://ift.tt/2PqC1Kz
via IFTTT
August 05, 2020

Easy Egg Muffins

by , in

Egg Muffins are one of the most versatile breakfast recipes. You can never go wrong, and you can create a number of variations. Super easy and a big batch can be ready in 30 minutes!

If you love make ahead breakfast recipes, try our freezer friendly potato veggie frittata, chocolate chip zucchini muffins, easy granola bars and breakfast burritos.

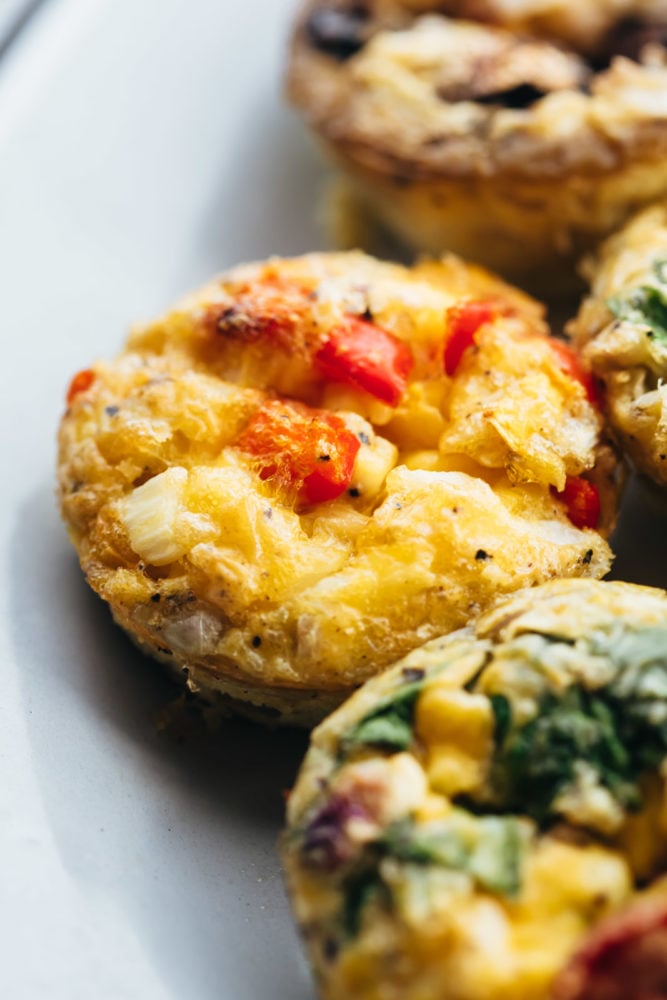
Closeup of baked egg muffins

Easy Baked Egg Muffins

Whether you have a big family to feed or its just the two of you, these egg muffins can forever come to your rescue. They are a great make-ahead breakfast that can be prepped quickly. You can make these ahead with lots of different variations, so a repeat breakfast during the week doesn’t feel boring or freeze them for later! They are so fun to eat because you can just grab and go. And nutritious, healthy and super tasty. It doesn’t get better than this!

These muffins are absolutely delicious! And they can really feed a hungry crowd! Plus everyone can pick their favourite toppings and make their own favourite egg muffins. Which for me is a win-win!

Toppings:

Start with prepping all your ingredients. This is probably the most time consuming part of the recipe, but if you buy pre-cut veggies at the supermarket, this becomes easy peasy. Or better still, get the family together to help you. These are just some ideas. Feel free to go wild and pick what you like!

Here are a bunch of add-ins to choose from:

  • Tomatoes
  • Mushrooms
  • Jalapenos
  • Bell Peppers
  • Spinach
  • Bacon
  • Ham
  • Zucchini
  • Basil
  • Cheeses Like Cheddar, Feta Or Goats Cheese

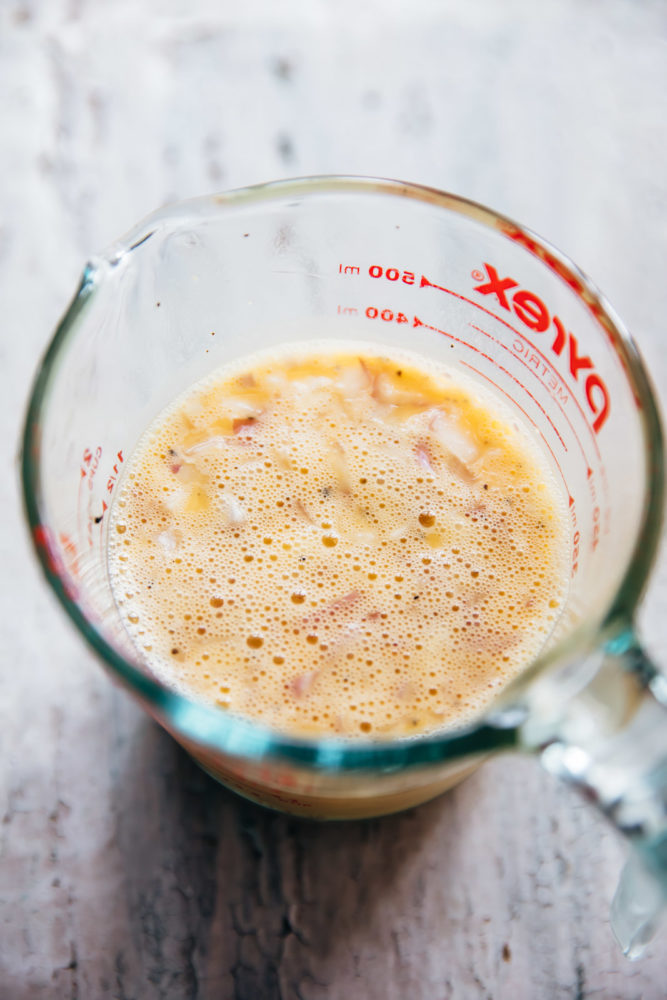
Make the egg mixture next. I like to whisk together eggs, cream, finely chopped onions, salt and pepper. This forms the base and goes with anything you decide to add in your egg muffins.

Egg mixture for egg muffins

Assemble:

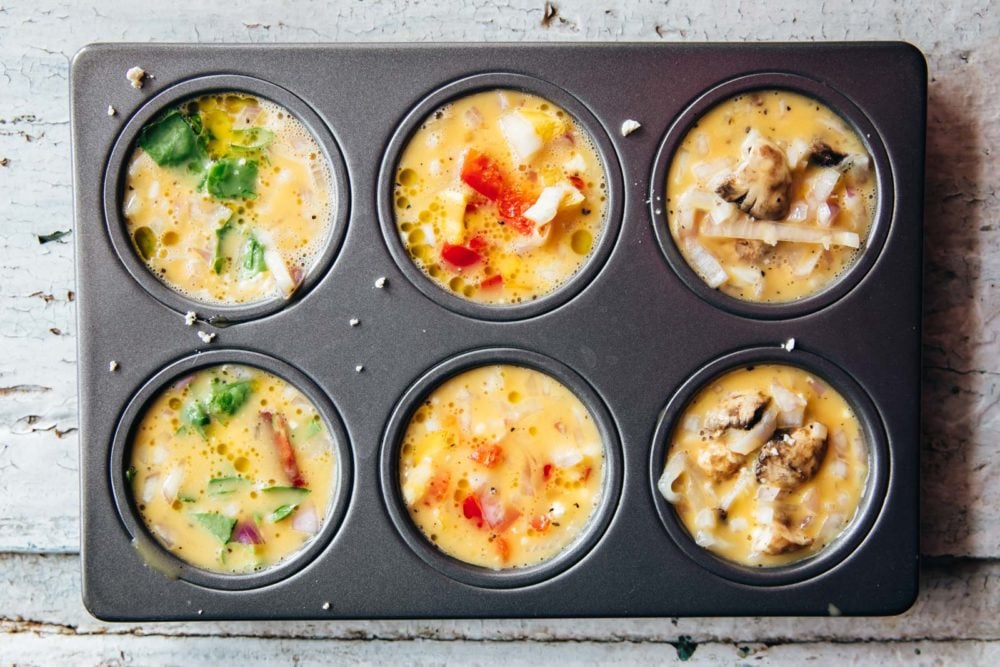
  1. Assembling these is really easy. Take a 6 hole or 12 hole muffin tray and spray it generously with oil or butter, add your toppings and fill it up with the egg mixture.
  2. Bake for 20-25 minutes and this is ready!
  3. You can choose to line the tray with paper liners, but if you spray the tin generously, the muffins just come out easily.
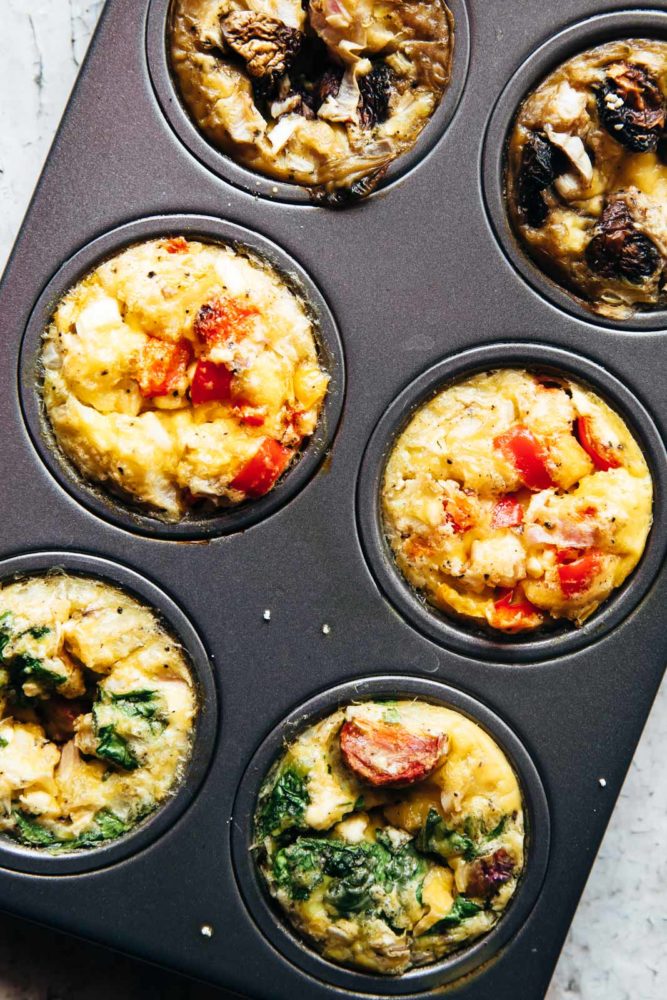
  4. In the pictures, you’ll see that I’ve used mushrooms, spinach and cherry tomatoes and bell peppers for three different combinations. And feta of course!

Egg muffin mixture ready to be baked

Storing Eggs Muffins:

  • Storage: Store these in an airtight container in the fridge for up to 4 days, or wrap them individually and freeze in a ziplock bag for up to 3 months
  • Reheat: To reheat, microwave for 30 secs to a minute till the center is warmed through.

Baked egg muffins in the muffin tray

More Favorite Breakfast Recipes:

Closeup of baked egg muffins
Print

Easy Egg Muffins

Egg Muffins are one of the most versatile breakfast recipes. You can never go wrong, and you can create a number of variations. Super easy and a big batch can be ready in 30 minutes!
Course Breakfast
Cuisine American
Keyword easy egg muffins, egg muffins, egg muffins recipe
Prep Time 15 minutes
Cook Time 20 minutes
Total Time 35 minutes
Servings 6 people
Calories 251kcal
Author Richa Gupta

Ingredients

  • 12 Eggs
  • 4 tablespoons Cream
  • 1 Onion finely chopped
  • 1 1/4 teaspoon Salt
  • 1 teaspoon ground Black Pepper
  • 1/2 cup sliced Mushrooms
  • 1/2 cup Bell Pepper diced
  • 1/2 cup Cherry Tomatoes
  • 1/2 cup Spinach chopped
  • 1/2 cup crumbled Feta
  • 2 tablespoons Oil for brushing or spraying

Instructions

  • Preheat oven to 350 degrees
  • Whisk together eggs, cream, onions, salt and pepper in a pourable jar
  • Generously spray or brush a 12 hole standard sized muffin tin with oil or butter
  • Divide the toppings between the muffin holes. You can choose to divide them whichever way you like. Divide the egg mixture equally in the muffin tin
  • Bake for 20-25 minutes till a toothpick inserted in the center comes clean. Serve immediately or freeze!

Notes

  • Storage: Store these in an airtight container in the fridge for up to 4 days, or wrap them individually and freeze in a ziplock bag for up to 3 months
  • Reheat: To reheat, microwave for 30 secs to a minute till the center is warmed through

Nutrition

Calories: 251kcal | Carbohydrates: 5g | Protein: 14g | Fat: 20g | Saturated Fat: 8g | Cholesterol: 352mg | Sodium: 758mg | Potassium: 256mg | Fiber: 1g | Sugar: 3g | Vitamin A: 1359IU | Vitamin C: 21mg | Calcium: 124mg | Iron: 2mg


from The Recipe Critic https://ift.tt/2PsaQ20
via IFTTT
August 03, 2020

Cream Puff Recipe yummy

by , in
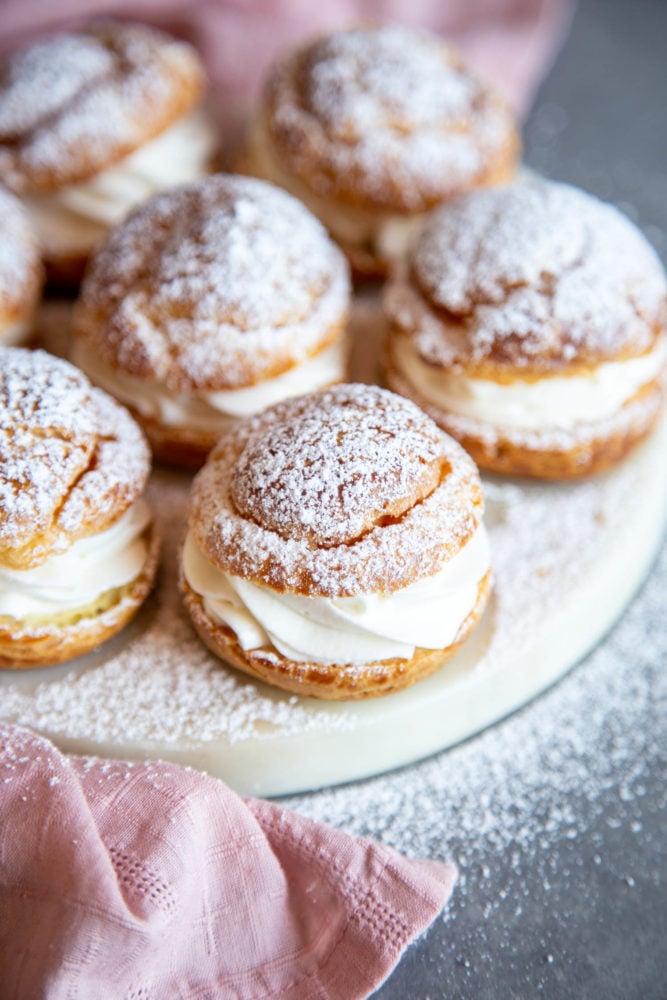
Cream puffs on a serving plate

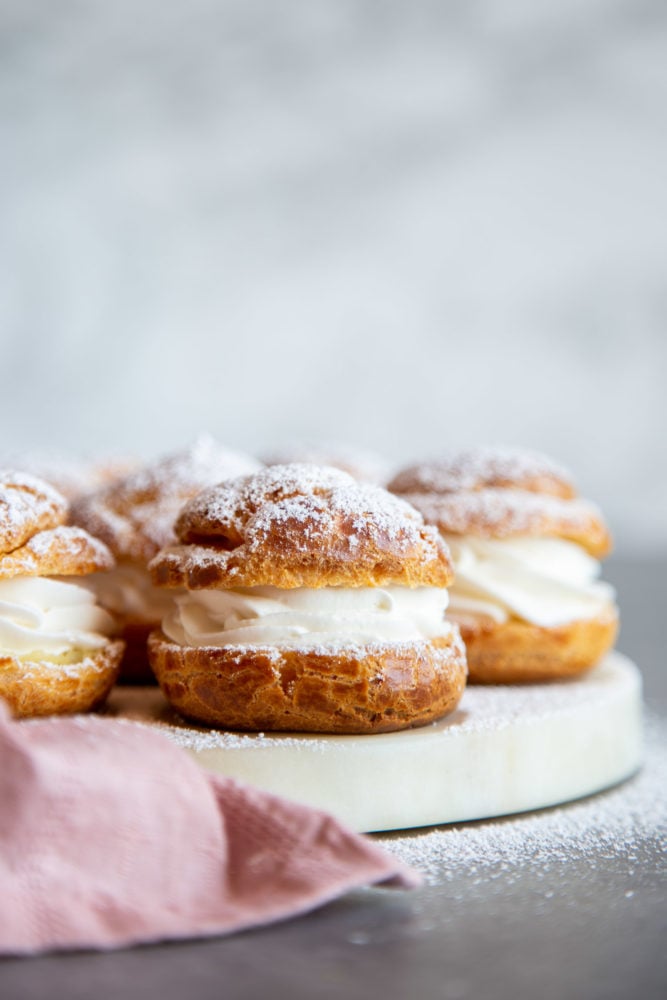
Cream puffs filled with simple vanilla whipped cream and covered in a dusting of powdered sugar are a classic dessert. But once you’ve mastered the recipe for the cream puff shell, it can be customized with all sorts of delicious filling to your heart’s desire!

Experience France without traveling by making this Easy Beignets Recipe, or this elegant yet easy Creme Brulee, or a savory French Onion Soup.

Cream puffs on a serving plate

Cream Puff Recipe

Cream puff is made with a French pastry dough, called choux pastry or pate a choux. To make choux pastry, you actually cook the flour in water and butter to form a paste, then beat in the eggs at the end. When baked, the dough expands in the oven creating a hollow shell, to be filled with all sorts of delicious fillings.

In this recipe, I used milk instead of water for more richness along with some salt and sugar for flavor. But most of the flavor in cream puffs will come from the filling, which you can customize to your liking. Once you’ve mastered making the cream puff shells, the sky’s the limit!

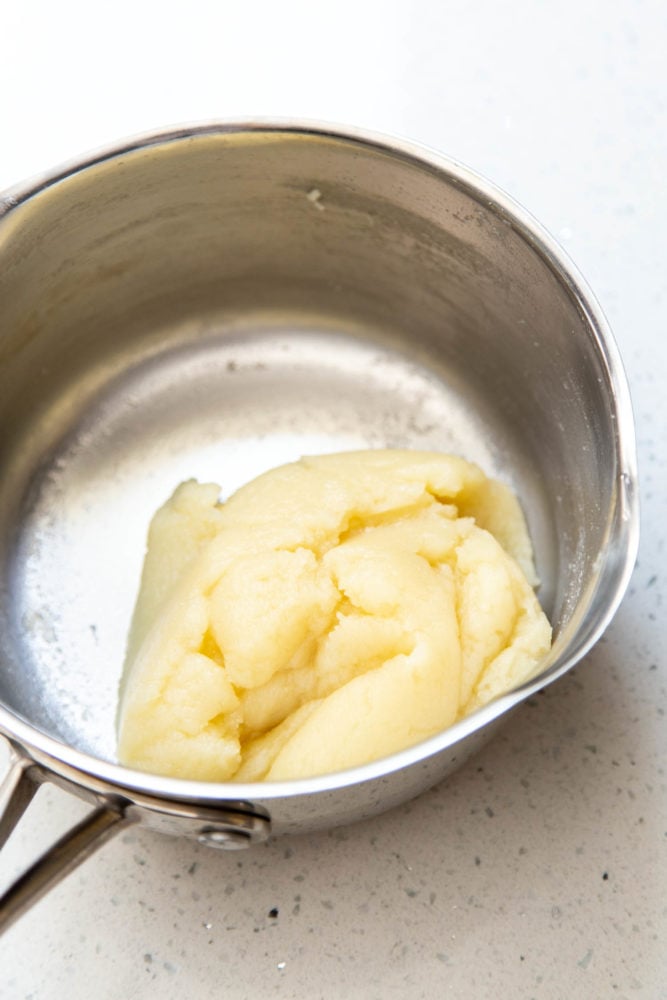
Cooked flour paste for cream puff dough

Cream Puff Ingredients:

Cream puff starts with 6 simple ingredients:

  • Milk – traditional choux pastry is made with just water but I used milk for more richness and flavor.
  • Unsalted butter – butter adds more flavor to the cream puff shell.
  • Salt – for flavor.
  • Sugar – traditional choux pastry doesn’t include sugar but I like mine a little bit on the sweeter side. Reduce, omit or increase to your taste.
  • Flour – all purpose flour is cooked with all of the above ingredients.
  • Egg – gets beaten into the cooked dough.

Making Cream Puff From Scratch:

  1. First, heat the milk, butter, salt and sugar in a saucepan over medium heat until simmering but not boiling.
  2. Take the saucepan off the heat and mix in the flour to form a paste. Put the saucepan back on medium heat and cook the flour mixture, stirring constantly, until the dough forms and pulls away from the sides and bottom of the pan.
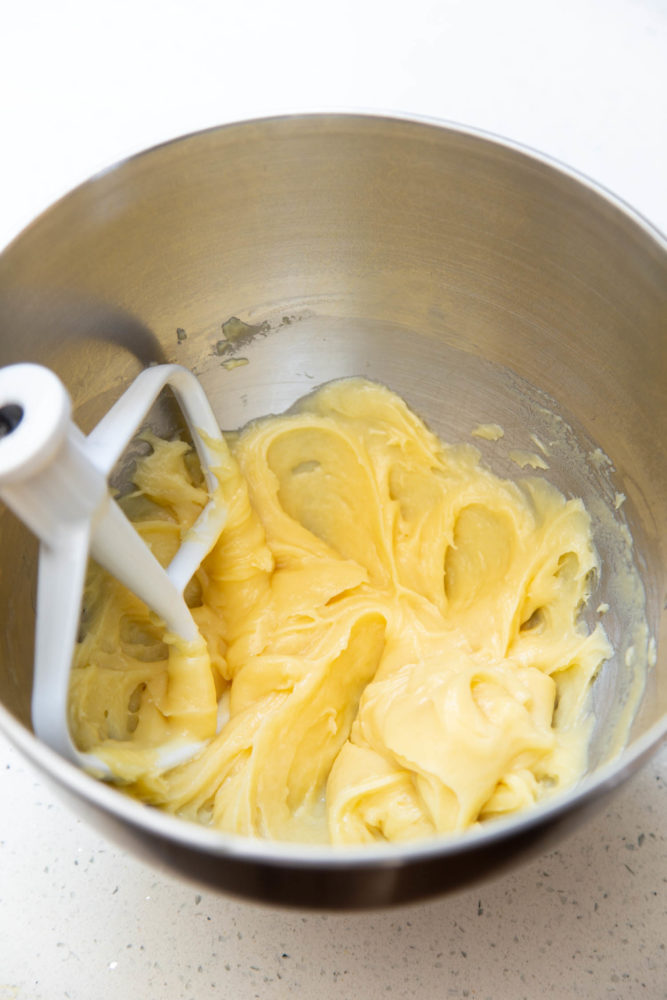
  3. Transfer the cooked dough to a stand mixer bowl and beat with the paddle attachment to cool it down. Add 1 egg at a time and continue beating until each is completely incorporated before adding another.
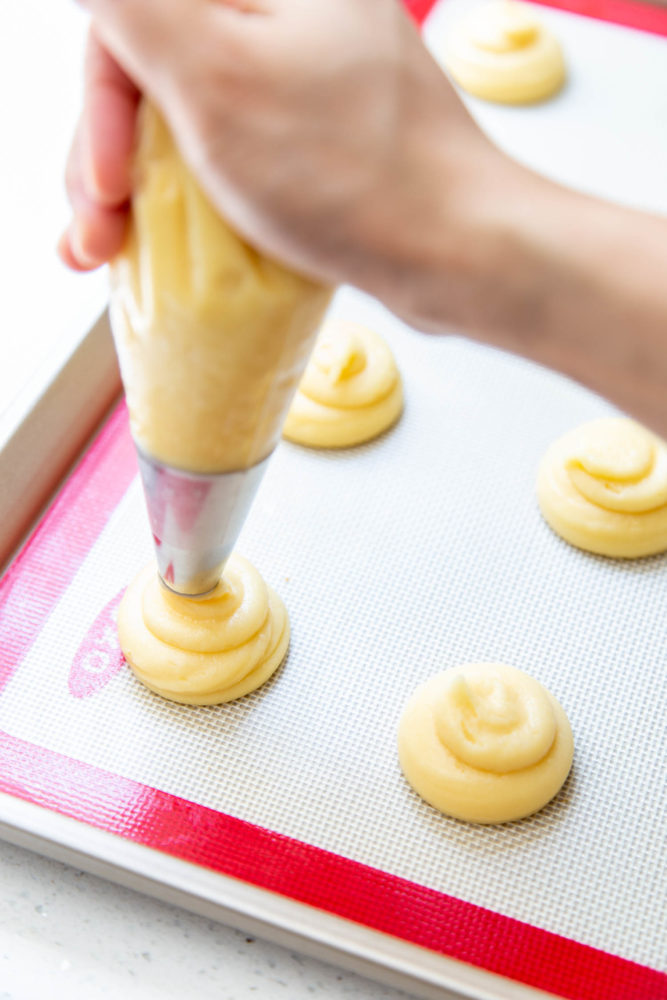
  4. Transfer the dough into a piping bag and pipe 12 equal portions, about 1 ½” – 2” in diameter, on a lined baking sheet. Dip your fingers in water and smooth out each mound of dough so there are no peaks and spikes.
  5. Gently apply an egg wash and bake for about 22 – 25 minutes at 375°F. Turn off the oven and crack the door open, allowing the cream puffs to cool inside the oven for at least 15 minutes before removing them.

Cream puff dough after adding eggs

Cream Puff Filling:

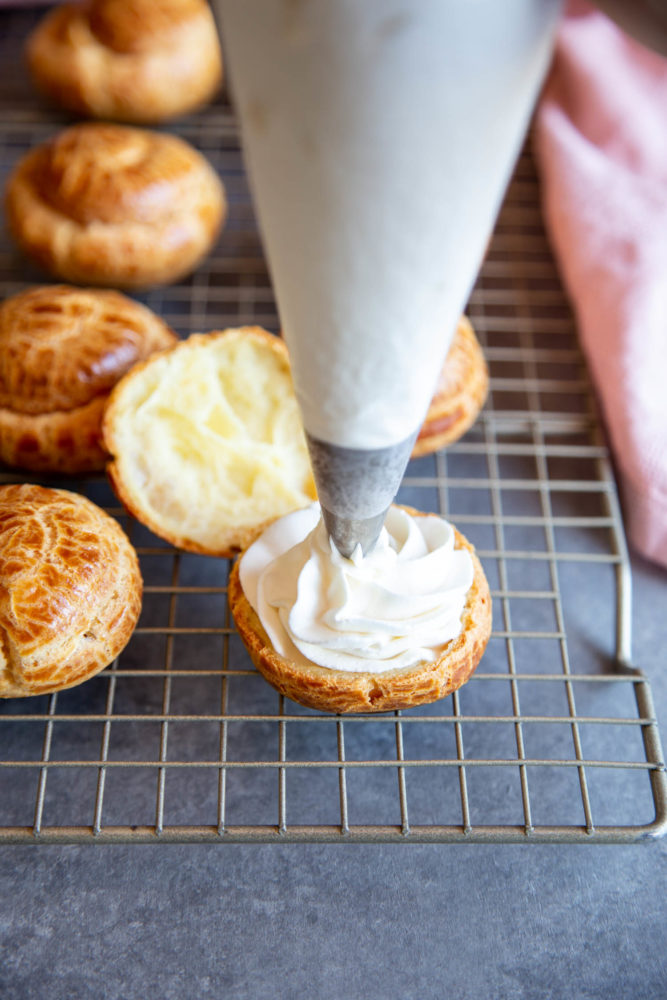
Traditionally, cream puffs are filled with pastry cream, but for this recipe I opt to use a simple homemade whipped cream as filling to keep things simple. Split the shells open, fill with cream, replace the top and dust them with powdered sugar, and they are ready for the dessert bar.

To customize your cream puffs, you can add different flavor to your whipped cream using extracts or fill them with:

Piping choux pastry for baking

Storing Homemade Cream Puffs:

Cream puffs are best served fresh, especially when filled with cream filling. However, you can store leftovers in an airtight container in the refrigerator for up to 3 days. They can be served cold or just let them come to room temperature before serving.

The cream puff shells without filling can be stored at room temperature for 2 – 3 days if you plan to make them ahead of time or keep them frozen up to 2 weeks. Thaw the shells before adding filling or you can toast them in the oven at a lower temperature around 300°F – 325°F for 5 minutes to crisp them up before adding filling.

Adding whipped cream filling to cream puffs

More French and French Inspired Recipes:

Cream puffs dusted with powdered sugar

Cream puffs on a serving plate
Print

Cream Puffs

Cream puffs filled with simple vanilla whipped cream and covered in a dusting of powdered sugar are a classic dessert. But once you’ve mastered the recipe for the cream puff shell, it can be customized with all sorts of delicious filling to your heart’s desire!
Course Dessert
Cuisine French
Keyword cream puff, cream puff recipe, cream puffs
Prep Time 15 minutes
Cook Time 25 minutes
Total Time 40 minutes
Servings 12 cream puffs
Calories 159kcal
Author Trang Doan

Ingredients

Cream puff shell

  • ½ cup milk
  • 2 oz unsalted butter
  • 1 tablespoon granulated sugar
  • ¼ teaspoon kosher salt
  • ½ cup all-purpose flour
  • 2 large eggs

Filling

  • 1 cup heavy whipping cream
  • ¼ cup granulated sugar
  • 1 teaspoon vanilla extract

Egg wash

  • 1 large egg
  • 1 tablespoon water

Instructions

  • Heat the milk, butter, salt and sugar in a saucepan over medium heat until simmering but not boiling, about 3 minutes.
  • Take the saucepan off the heat and mix in the flour to form a paste. Put the saucepan back on medium heat and cook the flour mixture, stirring constantly, until the dough forms and pulls away from the sides and bottom of the pan, about 2 minutes.
  • Transfer the cooked dough to a stand mixer bowl and beat with the paddle attachment to cool it down. Add 1 egg at a time and continue beating until each egg is completely incorporated before adding another.
  • Transfer the dough into a piping bag fitted with a large round tip and pipe 12 equal portions, about 1 ½” - 2” in diameter, on a lined baking sheet. Dip your fingers in water and smooth out each mound of dough so there are no peaks and spikes.
  • Preheat the oven to 375°F.
  • Beat an egg with a tablespoon of water to make egg wash. Gently apply the egg wash on top of the dough using a pastry brush.
  • Bake for about 22 - 25 minutes until the shells are puffed and golden. Observe through the oven door but do not open the oven during baking. Turn off the oven and crack the door open, allowing the cream puffs to cool inside the oven for at least 15 minutes before removing them and let them cool completely on a wire rack.

Whipping Cream:

  • To make the whipped cream, add heavy whipping cream, sugar and vanilla to a stand mixer bowl and beat with the balloon whip until stiff peaks form. Store in the refrigerator until ready to use.
  • When the cream puff shells are completely cool, split them open and fill with whipped cream, replace the top of dust with powdered sugar before serving.

Notes

  • This recipe makes a dozen small cream puffs but it can be doubled or tripled easily to make more.
  • Because the cream puffs are baked at a high oven temperature, use a light color baking sheet or an air insulated baking sheet to decrease the chances of the bottoms burning.

Nutrition

Calories: 159kcal | Carbohydrates: 10g | Protein: 2g | Fat: 12g | Saturated Fat: 7g | Cholesterol: 66mg | Sodium: 71mg | Potassium: 44mg | Fiber: 1g | Sugar: 6g | Vitamin A: 466IU | Vitamin C: 1mg | Calcium: 30mg | Iron: 1mg
August 03, 2020

Pasta with Creamy Zucchini Sauce

by , in
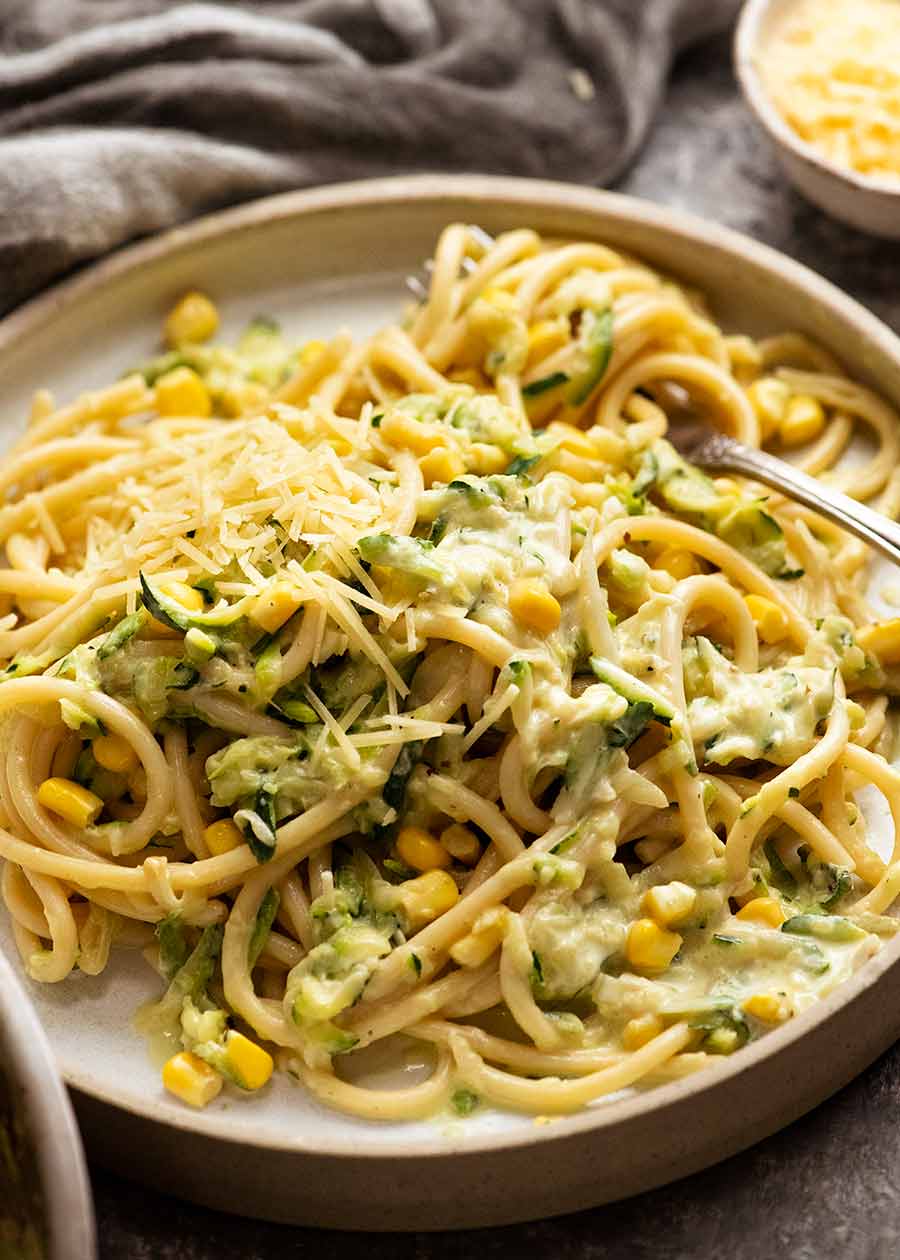
Plate with spaghetti with Creamy Zucchini Pasta Sauce (Courgette)

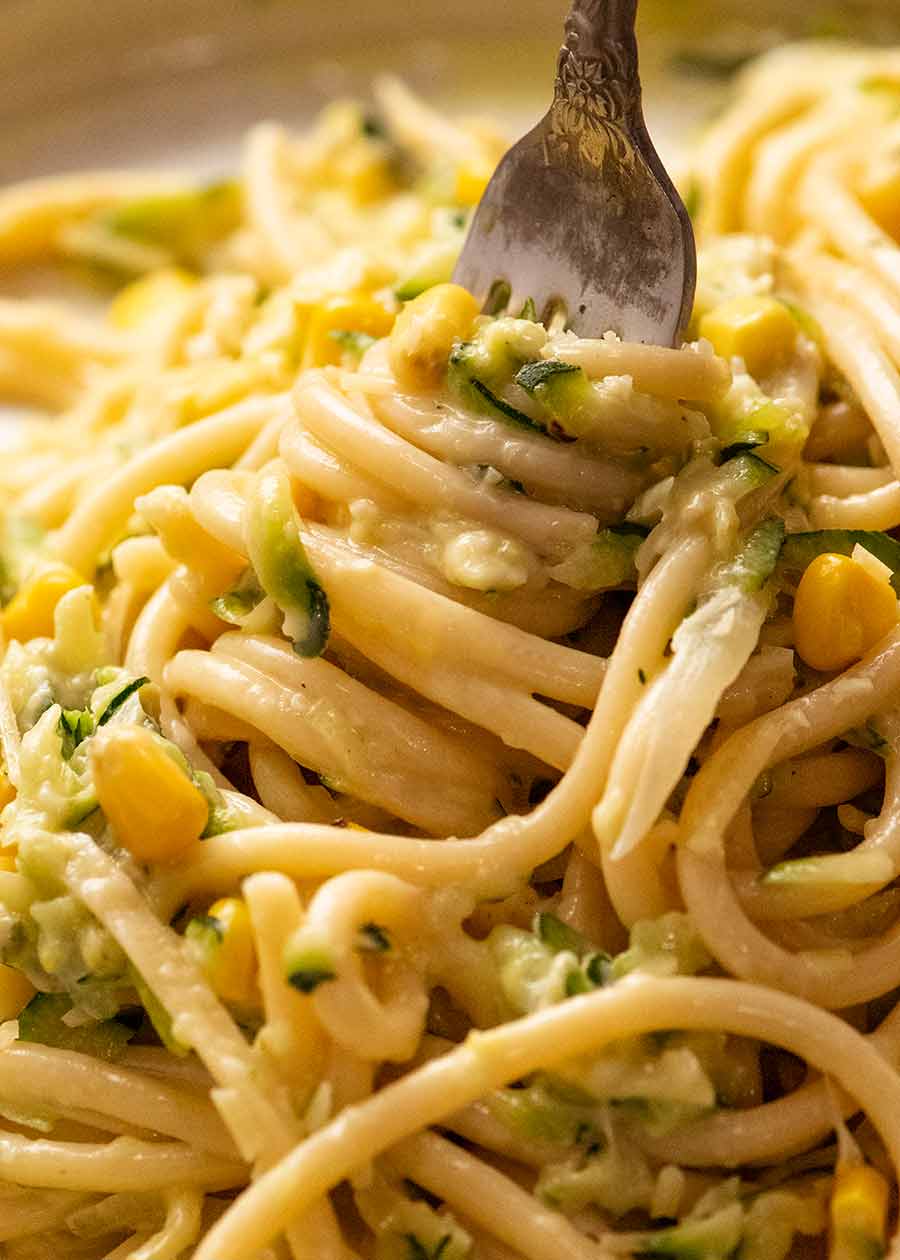
This Pasta with Creamy Zucchini Sauce may well become your new favourite zucchini recipe. Quick, easy, economical and a great way to use zucchinis to make a luscious pasta dinner!

Plate with spaghetti with Creamy Zucchini Pasta Sauce (Courgette)

Real Pasta with Creamy Zucchini Sauce – NOT “Zoodles”!

If you landed here expecting one of those low carb “zoodle” recipes, you’re going to be sorely disappointed because this is about as far as you can get from a health food trend. It’s real spaghetti all the way, in all it’s carb loaded glory, and the zucchini pasta sauce is swimming in cream.

Low carb? Absolutely not. Low fat? Nope.

100% delicious? YES!

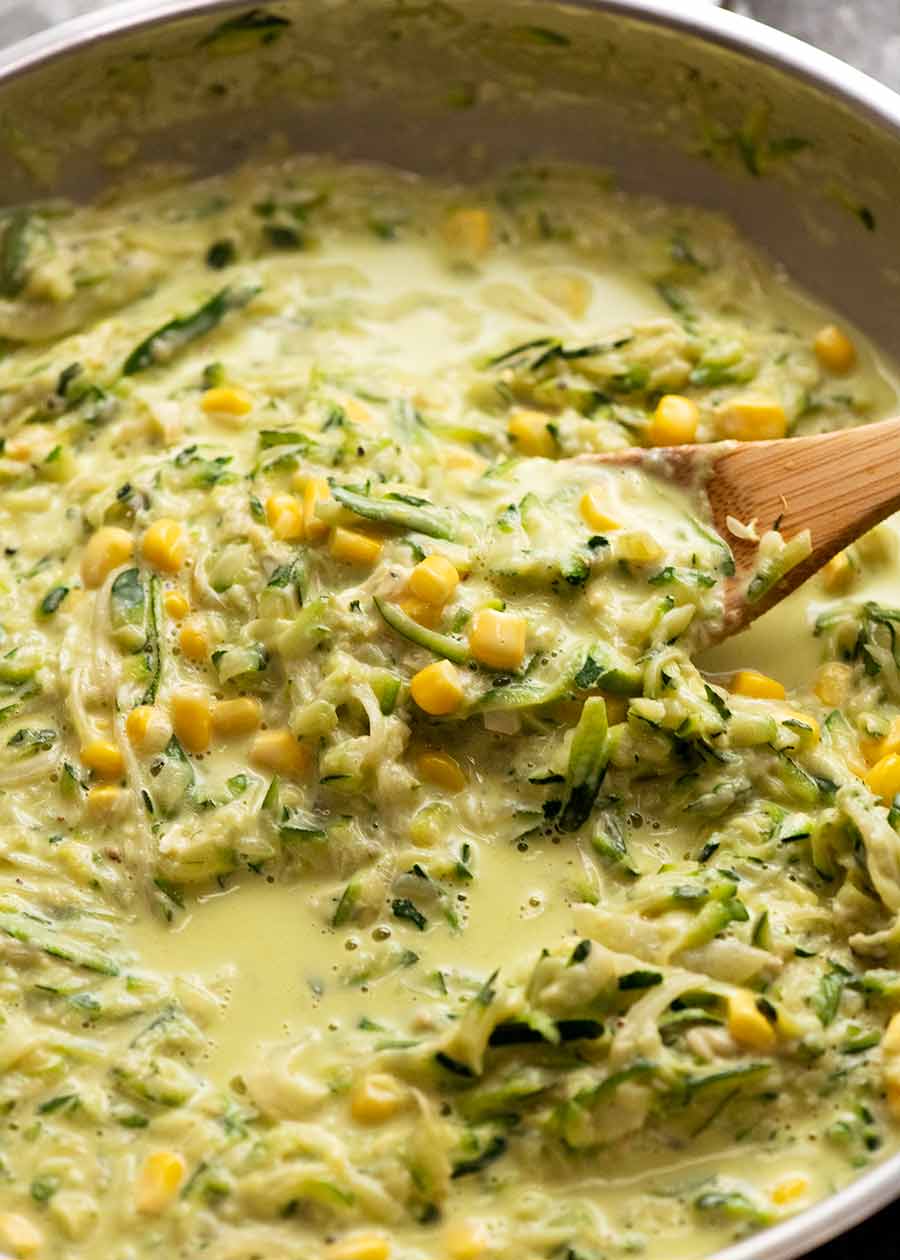
Skillet filled with creamy Zucchini pasta sauce

What you need for Creamy Zucchini Pasta Sauce

Here’s what you need to make this pasta:

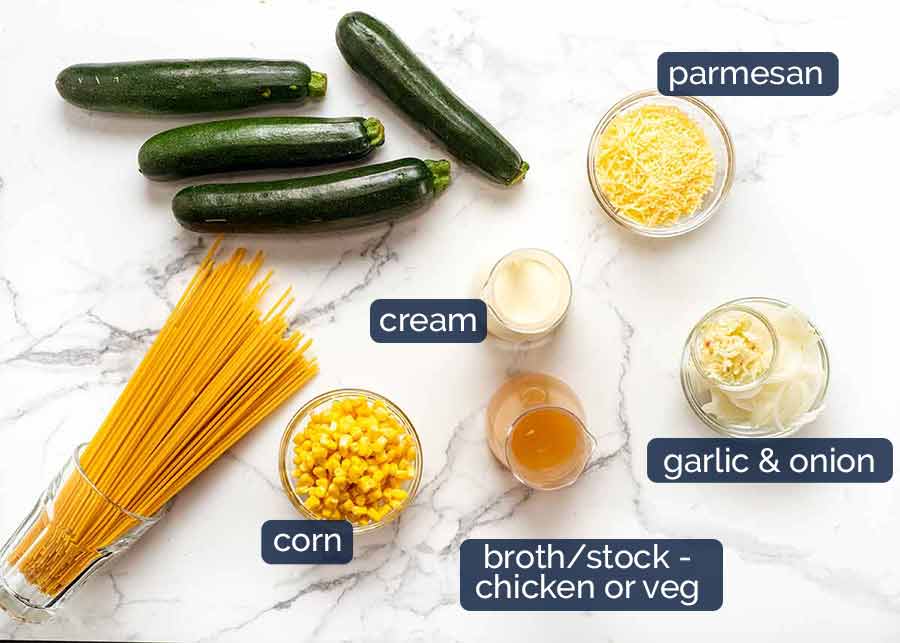
  • Zucchinis – called courgettes in some parts of the world. 600g/1.2lb or so – bit more or less works fine;
  • Pasta – this can actually be made with any pasta at all, short or long. But it does work particularly well with long pasta because the shredded zucchini kind of “clings” to it. For the photos and video, I used bucatini, the spaghetti that’s hollow inside, just for something different. Loved the extra thick pasta strands, not so fond of the strange sensation of sucking on a straw when I’m slurping up the pasta;
  • Garlic and onion – essential flavour base for this simple pasta sauce;
  • Parmesan – adds umami (savoury flavour) into this otherwise very simple pasta sauce. Best to use freshly grated if you can because it melts into the sauce better, but store bought grated works fine too. Don’t have parmesan? Use any cheese you have!
  • Chicken or vegetable broth/stock – as above with parmesan, adds flavour into this sauce. Without it, it does lack a bit of flavour; and
  • Corn isn’t essential, but it does add cheerful little pops of colour and bursts of sweetness into this pasta dish.

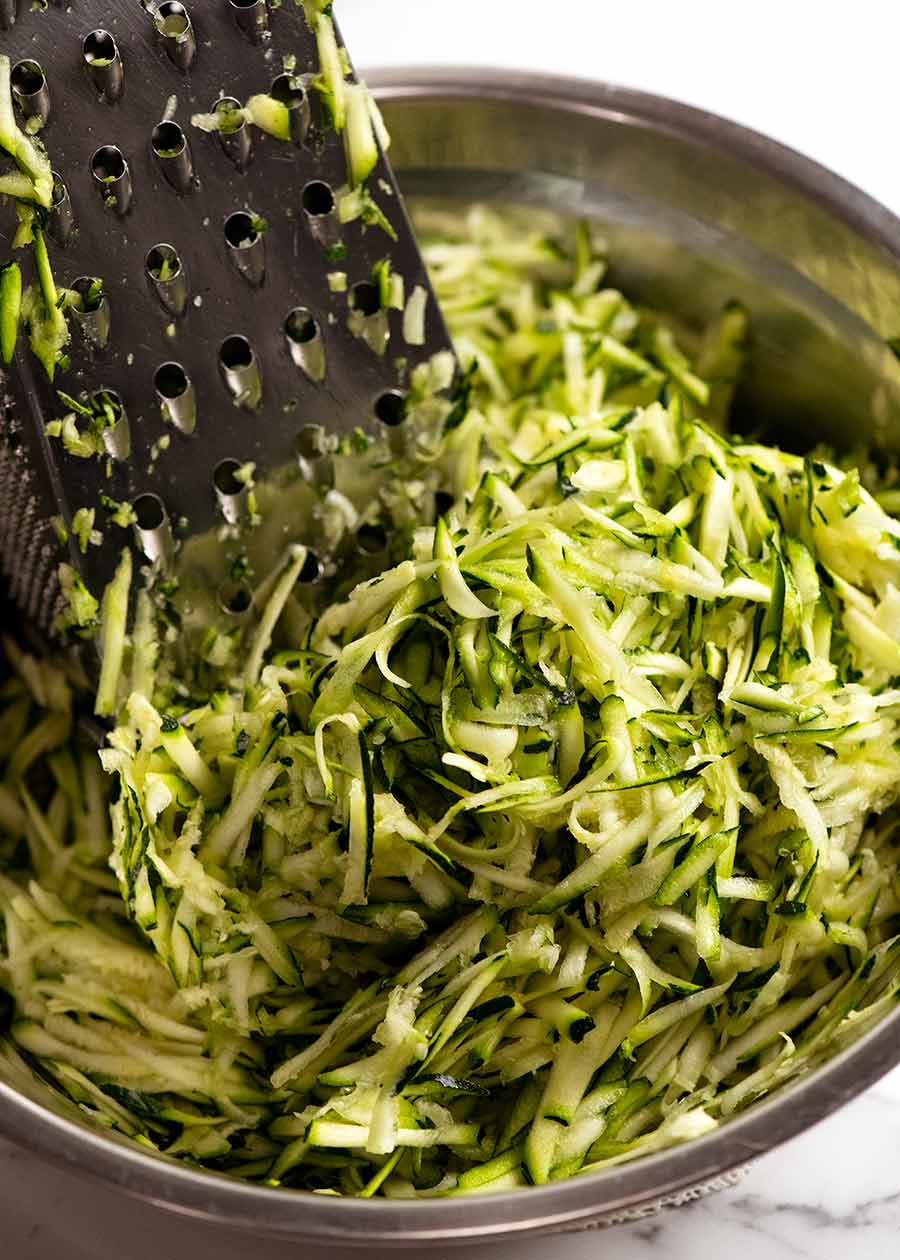
Grating zucchini

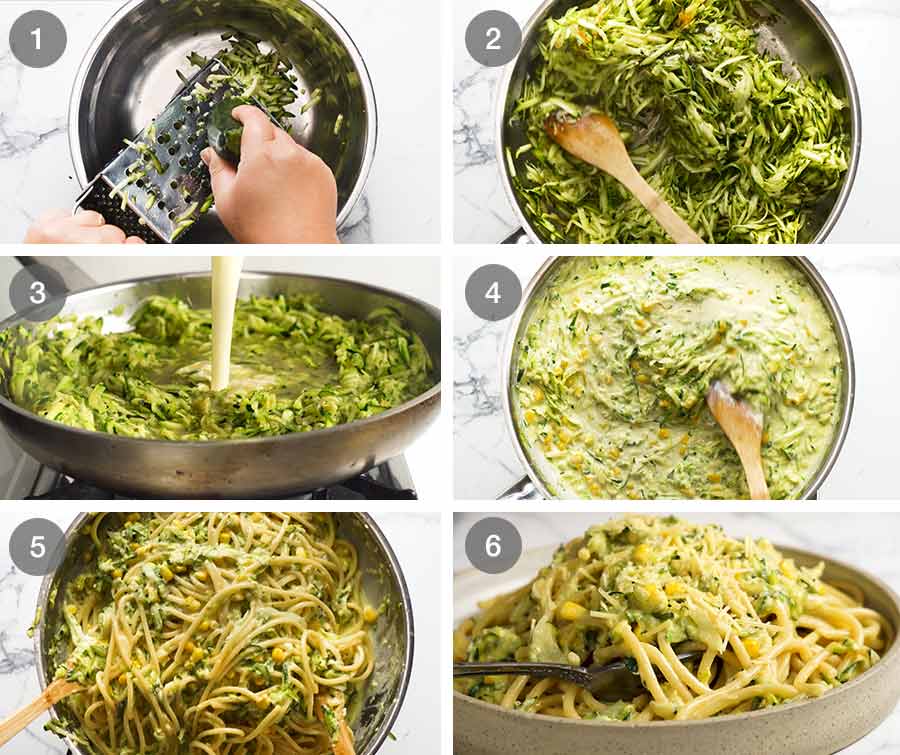
How to make Pasta with Creamy Zucchini Sauce

Grating the zucchini is ideal to make a lovely creamy sauce that clings to the pasta. When you grate it, you might feel somewhat alarmed (or perhaps virtuous) at the enormous mound of zucchini. But don’t fret! It shrinks a LOT when cooked.

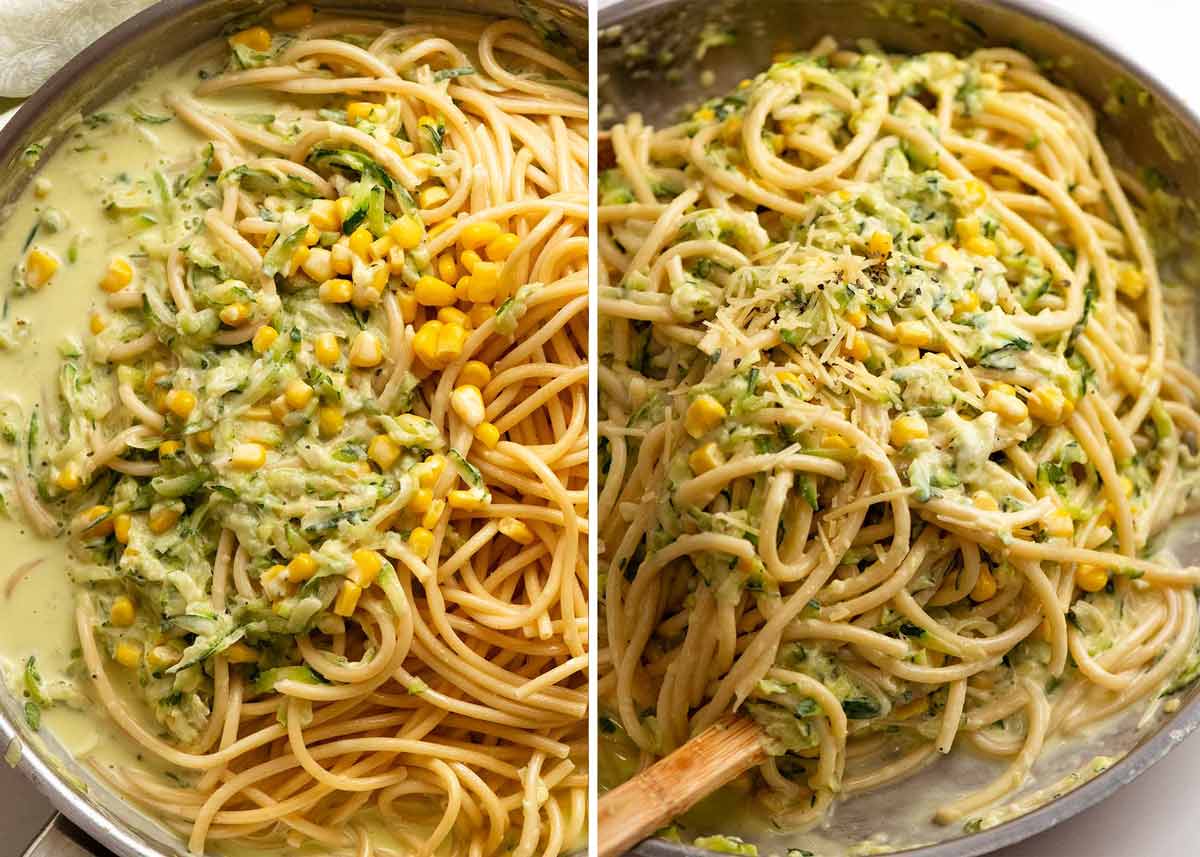
Key Step – tossing pasta with sauce

The creamy zucchini sauce will seem somewhat thin because the water coming out of the zucchini dilutes the cream. But don’t be concerned – once the pasta is added, the recipe calls for you to (enthusiastically) toss the pasta in the sauce for around 2 minutes on the stove which reduces the sauce and makes it cling to the pasta rather than pooling in the skillet.

The photo on the left is just when the pasta is added – you see how the sauce is just pooled in the skillet – then on the right is after 2 minutes of tossing. See how there’s no sauce left in the skillet? It’s all on the pasta!

Fork twirling pasta with Creamy Zucchini Pasta Sauce (Courgette)

Who ever would’ve thought you could make something so amazing from just a few drab looking zucchinis??

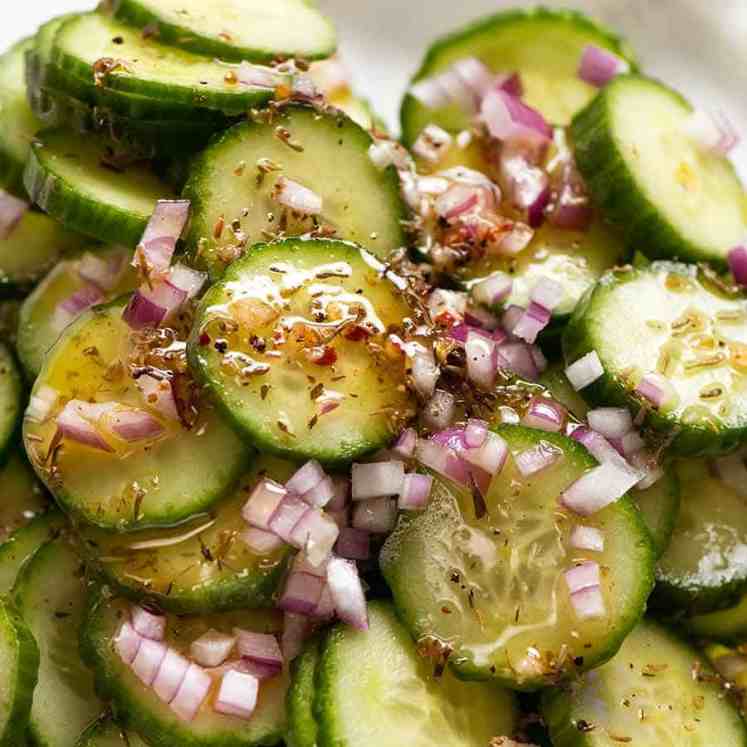
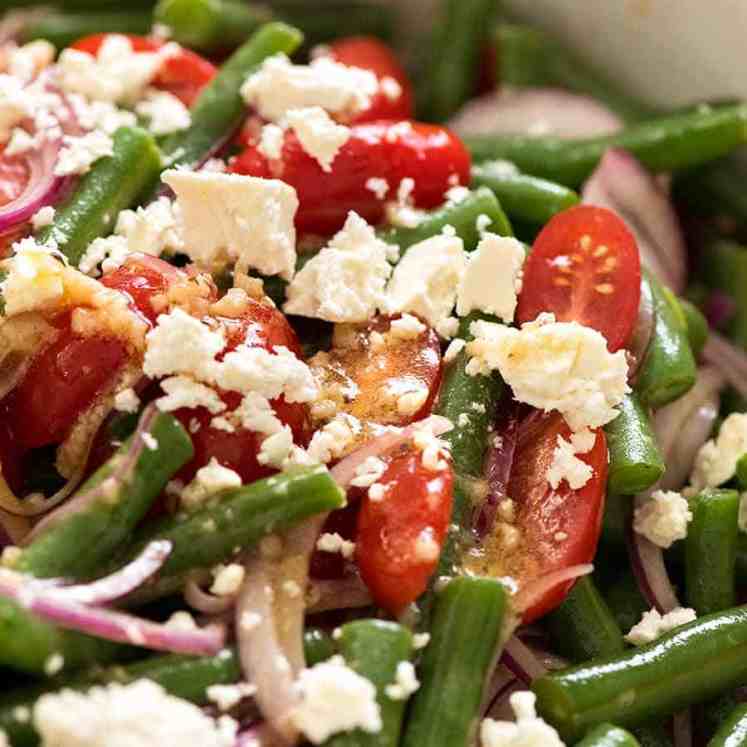
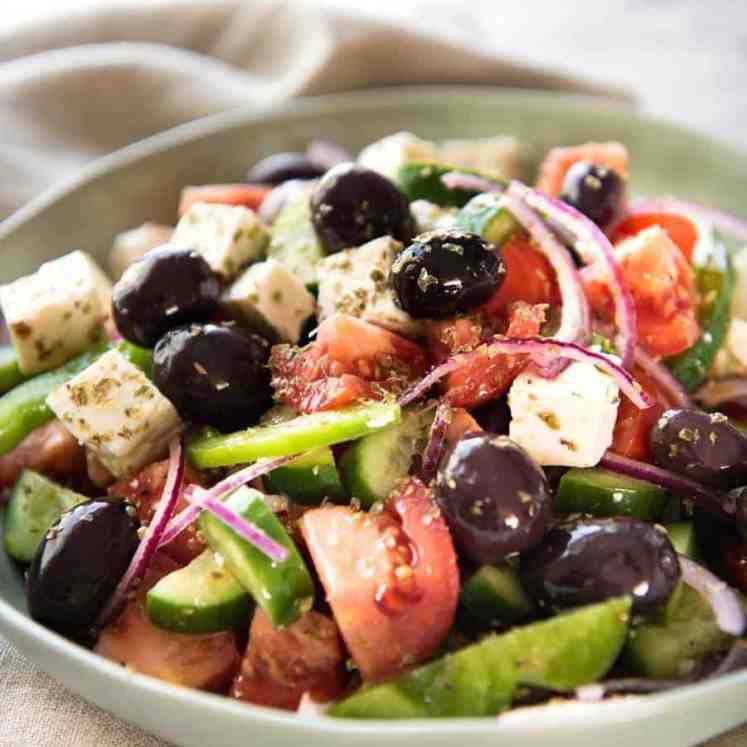
Being that this is loaded with zucchinis, you can totally justify not adding a side salad to your meal. But something fresh and crunchy wouldn’t go astray – try one of these:

And if you’re cooking to impress, add a side of Garlic Bread or Cheesy Garlic Bread. Carb overload? Totally. But sometimes, you’ve just gotta live a little! 😉 – Nagi x


Watch how to make it

Skillet with Creamy Zucchini Pasta Sauce (Courgette)
Print

Pasta with Creamy Zucchini Sauce

Recipe video above. Put the pasta when you start sautéing the zucchini - this way it will be ready at the right time.
Course Mains, Pasta
Cuisine Italian, Western
Keyword courgette pasta sauce, pasta with courgette, pasta with zucchini, zucchini pasta sauce
Prep Time 10 minutes
Cook Time 15 minutes
Servings 4
Calories 631kcal
Author Nagi

Ingredients

  • 50g / 3 tbsp unsalted butter
  • 2 garlic cloves , minced
  • 1/2 onion , finely sliced (brown, white, yellow)
  • 600g / 1.2 lb zucchini (courgette), grated using standard box grater
  • 1/2 tsp EACH salt and pepper
  • 1 cup thickened/heavy cream
  • 3/4 cup chicken or vegetable stock/broth , low sodium
  • 3/4 cup parmesan , finely grated using microplane (Note 1 for store bought)
  • 300g/ 10oz spaghetti, fettucini or other long strand pasta (I used bucatini)

Instructions

Pasta:

  • Bring a large pot of water to the boil with 1 tablespoon of salt.
  • Cook pasta per packet directions MINUS 2 minutes (yes, 2 whole minutes!) - pasta should be a bit too firm in the middle.
  • Scoop out a big mug of pasta cook water, set aside (for sauce loosening, just in case), then drain.

Creamy zucchini sauce:

  • Melt butter in a large skillet or pot over medium high heat.
  • Add garlic and onion, cook for 1 1/2 minutes until onion is slightly golden.
  • Add zucchini, cook for 1 minute. Then add salt and pepper, then stir for 2 minutes until it reduces in volume by about 1/2.
  • Stir in cream, chicken stock and parmesan. Bring to simmer, then reduce heat to medium and simmer for 3 minutes. It will still seem watery because water comes out of the zucchini - don't worry, it cooks down in the next step.
  • Add pasta, then use two wooden spoons to toss well for 2 minutes, or until sauce reduces and is coating the pasta instead of pooling in the skillet. If it gets too thick, add a splash of reserved pasta cooking water. Pasta will finish cooking in this step.
  • Remove from stove, serve immediately, garnished with extra parmesan.

Notes

1. Parmesan - if you grate your own, make sure you either weight the parmesan or pack the cup when measuring. This is because freshly grated parmesan is much fluffier than store bought.
If using store bought parmesan, add it in with the pasta, don't try to melt it in the sauce because it won't melt through the sauce, you'll end up with chunks of melted cheese in the sauce.
2. Nutrition per serving.

Nutrition

Calories: 631kcal | Carbohydrates: 62g | Protein: 18g | Fat: 35g | Saturated Fat: 21g | Cholesterol: 112mg | Sodium: 547mg | Potassium: 729mg | Fiber: 4g | Sugar: 7g | Vitamin A: 1572IU | Vitamin C: 33mg | Calcium: 233mg | Iron: 2mg

Life of Dozer

Yesterday. Poor Geoff – he just wants to enjoy his Chili Mac and Cheese in peace, without Dozer staring at him with rivers of drool down his chest!!

(For those who are new here, Geoff is the local who lives at the Bayview dog beach. He looks after the park like its his own backyard. We are very lucky to have him as part of our community!)

Dozer-watching-Geoff-eat

The post Pasta with Creamy Zucchini Sauce appeared first on RecipeTin Eats.