Showing posts with label Easy Recipes. Show all posts
August 06, 2020

Fennel salad

by , in
Fennel salad

Try our fennel salad recipe then check out more fennel recipes.

  • 571
  • Total time 20 minutes
  • Prep time 20 minutes
  • Note + Soaking
  • Difficulty Easy

Ingredients

  • fennel 2 bulbs, very thinly sliced
  • extra-virgin olive oil 2 tbsp
  • pomegranate molasses 1 tbsp
  • lemon ½, juiced
  • sumac 1 tbsp
  • mint a handful of leaves

Method

  • Step 1

    Put the thinly sliced fennel into a bowl full of iced water to soak for 10 minutes, then drain really well – this makes it super crunchy and crisp. Tip onto a platter or serving plate.

    Step 2

    Whisk together the oil, pomegranate molasses, lemon juice, ½ the sumac and some seasoning. Pour all over the fennel and then sprinkle over the remaining sumac and scatter with mint leaves.

*This recipe is gluten free according to industry standards


Click here for more fennel recipes

[image id="110967" size="landscape_thumbnail" align="none" title="Broad Bean Salad Recipe" alt="Broad bean, peach and fennel salad" classes=""]

Nutritional data

  • kcals 103
  • fat 6g
  • saturates 0.9g
  • carbs 8.4g
  • sugars 7.6g
  • fibre 3.9g
  • protein 1.9g
  • salt 0.3g


from olivemagazine https://ift.tt/3a2WZbG
via IFTTT
August 05, 2020

Stovetop Coconut Caramel Custard

by , in

Here’s a vegan version of the decadent coconut caramel custard. A twist on the classic caramel custard, this recipe is eggless, dairy-free and so easy to whip up!

I love caramel custard! But I’m not a big fan of that eggy aftertaste that can remain sometimes if its not made well. So I came up with a 100% vegan caramel custard recipe. It turned out so rich and creamy, sets well, and doesn’t have that aftertaste! I’d say this is my newfound love in eggless recipes. Second only to the Intense Eggless Chocolate Mousse of course! Nothing beats that.
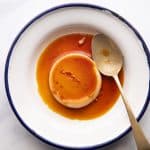
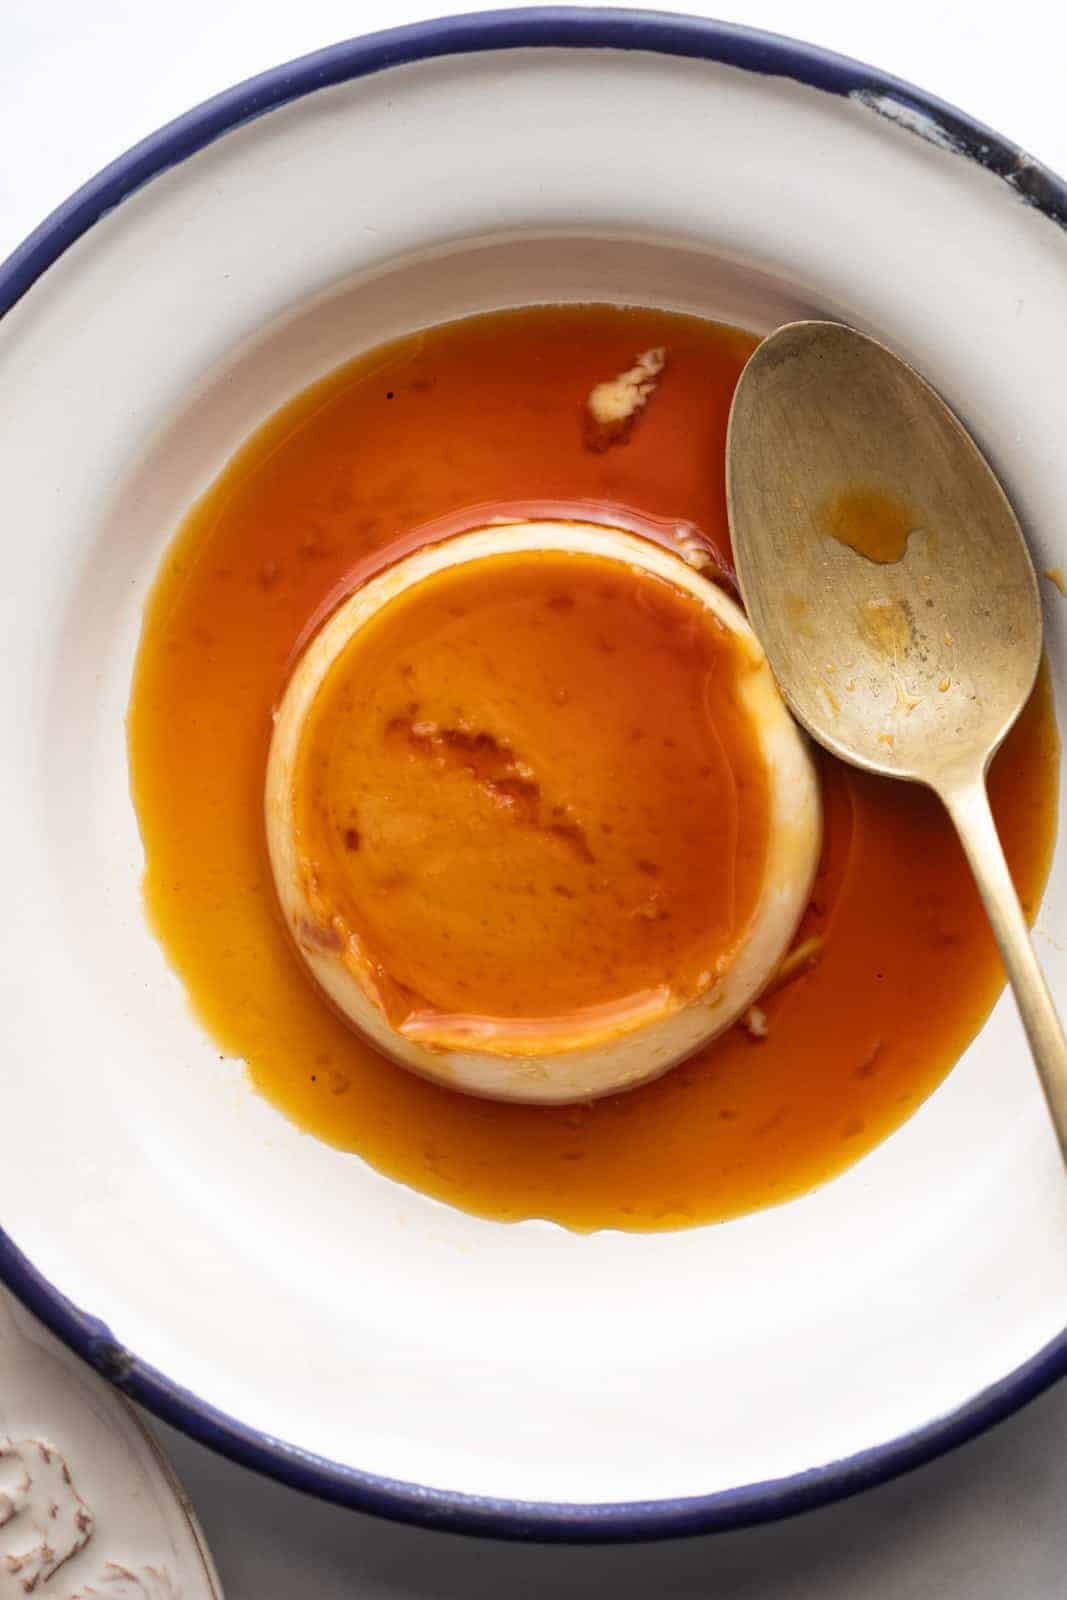
Closeup of coconut caramel custard served on a white plate with a blue edging and a spoon

How to Veganize Caramel Custard

I substituted the dairy with freshly extracted coconut milk. Coconut milk, apart from tasting amazing, is also super healthy and light on the tummy. The coconutty flavour comes through in the custard, and it is GOOOOOD. Add a few drops of vanilla extract to the coconut milk, and it’s perfect. Cans of coconut milk are also readily available in any Indian supermarkets. If you are worried that the coconut milk will split on heating, the key is to keep it on a low flame and stir continuously till the custard thickens.

The Thickener

Traditionally, it’s the eggs in caramel custard that act as the main thickener. But they also leave an undesired after-taste. So I simply substituted it with the next best thickening agent – cornflour! Mix the cornflour in along with the coconut milk and whisk it well so there are no lumps. Don’t worry, this eggless caramel custard will not compromise on the texture of the custard! And since cornflour has no distinct taste, problem solved!
Closeup of the texture of coconut caramel custard after taking a bite

The Burnt Sugar or Caramel

For the caramel in this recipe, I like using refined granulated sugar. You can also choose other sweeteners like jaggery, coconut sugar or palm sugar. The sugar is heated on a low flame, and stirred continuously so that there are no clumps. You’ll see it start to melt around the edges first. It’s important to watch this closely as caramel can go from dark to burnt in seconds – that’s a little harder to tell if you are using anything apart from granulated white sugar. The idea is to caramelise it and take it just a little far so that there is a sweet bitter flavour, but not take it so far that it gets burnt and inedible. Pour the hot syrup onto the base of the ramekins and allow it to cool for 2 to 3 minutes before pouring in the coconut custard. This dish is all about simplicity. And there are so many simple ways to pack in flavours. Don’t forget to add a pinch of salt, it brings life into the dish like nothing else would! A few drops of vanilla extract go a long way. Next time, I plan to add a little bit of desiccated coconut in the mixture for some extra texture and taste. Garnishes can range from berries to coconut shavings to chopped dry fruits!

Top Tips for perfect Coconut Caramel Custard

Here are some extra tips to get that perfect creamy and light coconut caramel custard:
  • Pour warm coconut custard into the ramekins. This heats up the cooled caramel so that when you unmold the caramel custard, you’ll be rewarded with sweet, syrupy caramel as topping
  • If your coconut custard cools down completely and looks lumpy, just bring it back to flame, heat it gently and keep whisking till it’s lump free. You can also add a splash of milk or coconut milk while you do this. Just a tablespoon or two is enough.
  • Pour the caramel into moulds immediately. Caramel cools down really fast, and as it cools, it’ll thicken and become stringy, which will make it near impossible to pour it.
  • I would recommend a minimum of 6 to 8 hours in the fridge. This way the custard is set perfectly and when you flip it, that glorious caramel will melt all over the caramel custard!
  • To demold, just run a knife around the edges to loosen it slightly. There is no need to place it in warm water.
Overhead picture of two plates with coconut caramel custard ready to be served
So there you have it, my foolproof vegan caramel custard without compromising on taste or texture! This recipe is such a stunner. Looks fantastic on the table, especially that aha moment when you demould it and all the caramel comes pouring around the sides. And its lighter on the tummy. Plus that coconut flavour will transport you to the beaches! I promise.

Watch Coconut Caramel Custard Recipe Video

Overhead picture of coconut caramel custard served on a white plate with a blue edging and a spoon
Print

Vegan Coconut Caramel Custard

A delicious recipe for coconut caramel custard that's vegan and made on the stovetop in a steamer. It's a stunning dessert that's light and creamy.
Course Desserts
Cuisine Indian
Keyword caramel custard, coconut caramel custard, easy desserts, no bake
Prep Time 10 minutes
Cook Time 40 minutes
Total Time 50 minutes
Servings 6 Portions
Calories 166kcal
Author Richa

Equipment

  • 6 small Ramekins

Ingredients

Custard

  • 200 ml Coconut Milk thick (see note 1)
  • 3 tablespoons Sugar
  • 2 tablespoons Cornflour
  • 1 1/2 teaspoons Vanilla Extract

Caramel

  • 1/2 cup Sugar

Instructions

  • Whisk together all the ingredients under custard in a saucepan till smooth and lump free. Place the saucepan on heat and keep whisking till the mixture thickens - approx 4 minutes. Set aside.
  • Take another saucepan and add sugar in it. Place it on a medium heat and wait till the sugar starts to melt around the edges (watch the video above). Use a spatula to stir it around. It'll look clumpy at first but will become smooth as the sugar melts. Continue to cook the sugar, stirring till the colour changes to a dark amber. The change in colour happens very quickly so pay close attention (no Instagram please!). Remove from the flame and divide between ramekins (about 1 1/2 tbsp between each ramekin) making sure that caramel coats the bottom of the ramekins completely. Let this cool for 2-3 minutes until just set.
  • Pour warm custard over the cooled caramel in ramekins. At this point, if the custard has cooled and looks lumpy, quickly place it back on heat to warm it, and keep whisking to get rid of any lumps. Cover the ramekins with aluminium foil.
  • Bring 2 cups of water to boil in a steamer. Once the water starts boiling, reduce the heat and place ramekins in a steamer basket or a rack. Close the steamer and steam on low heat for 15 minutes. Then turn off the flame and let the ramekins sit in the steamer for another 20 minutes.
  • Bring the ramekins to room temperature, take off the foil and refrigerate for 6-8 hours.
  • To unmold, run a knife around the edges of the custard and invert it over a serving dish. Enjoy!

Video

Notes

  1. Coconut Milk: I prefer store bought coconut milk that's available in tetra packs or cans for this recipe, since they are more stable and less prone to splitting
  2. Storage: These are best enjoyed the same day, or the next day. Any longer in the fridge and they start to dry slightly

Nutrition

Calories: 166kcal | Carbohydrates: 26g | Protein: 1g | Fat: 7g | Saturated Fat: 6g | Sodium: 5mg | Potassium: 73mg | Sugar: 23g | Vitamin C: 1mg | Calcium: 6mg | Iron: 1mg

The post Stovetop Coconut Caramel Custard appeared first on My Food Story.


from My Food Story https://ift.tt/2Xw04fx
via IFTTT
August 05, 2020

Bicicletta spritz

by , in
Bicicletta spritz

Try our bicicletta spritz then check out our negroni recipe, Aperol spritz and more summer cocktail recipes.

  • 499
  • Total time 5 minutes
  • Difficulty Easy

Ingredients

  • orange 1, cut into wheels
  • dry white wine (a light Italian variety such as pinot grigio or gavi) 3 tbsp
  • Campari 3 tbsp
  • soda water

Method

  • Step 1

    For each drink, fill a glass with ice and an orange wheel. Add the wine and Campari, stir, then top up with a splash of soda.

Fancy another cocktail?

[image id="103909" size="landscape_thumbnail" align="none" title="White Russian Recipe" alt="White Russian Recipe" classes=""]


from olivemagazine https://ift.tt/33viXmO
via IFTTT
August 02, 2020

Easy to Make Tostadas

by , in

These crispy Tostadas are easy to make and layered with flavorful toppings that make this main dish one of the best! Create a delicious dinner right at home within minutes!

Tostadas are similar to tacos, just using a tortilla that is flat rather than movable. Try this best EVER ground beef tacos, easy homemade Navajo tacos or Baja fish tacos for more taco inspired recipes.

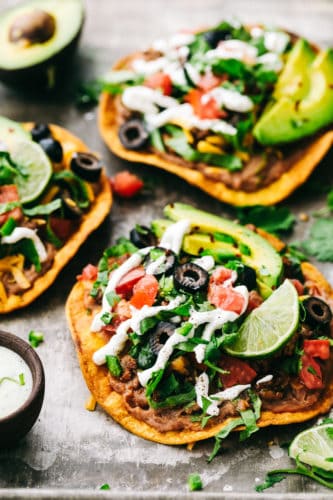
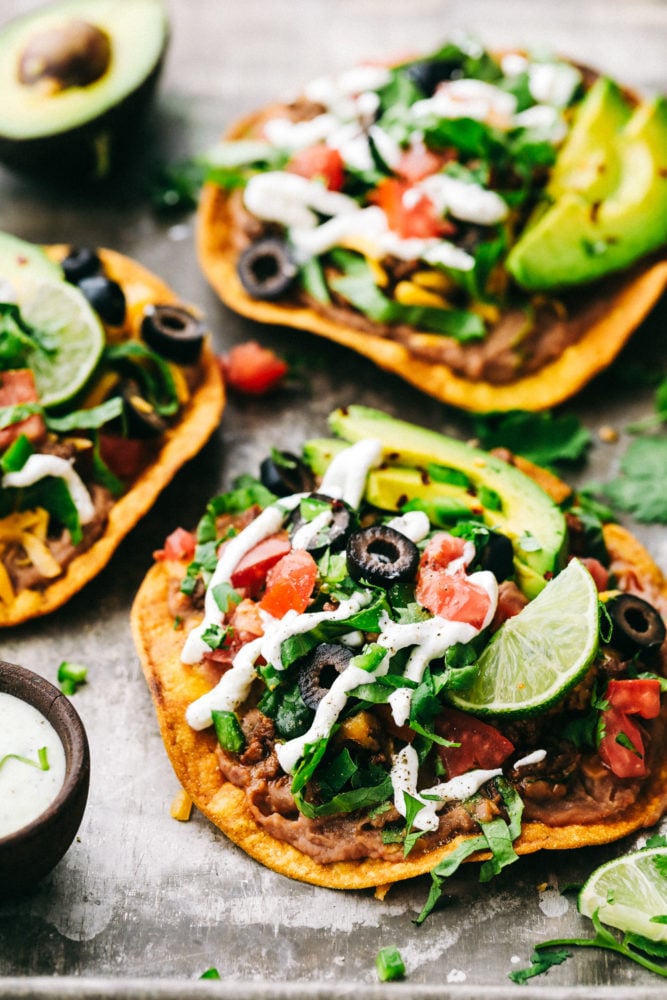
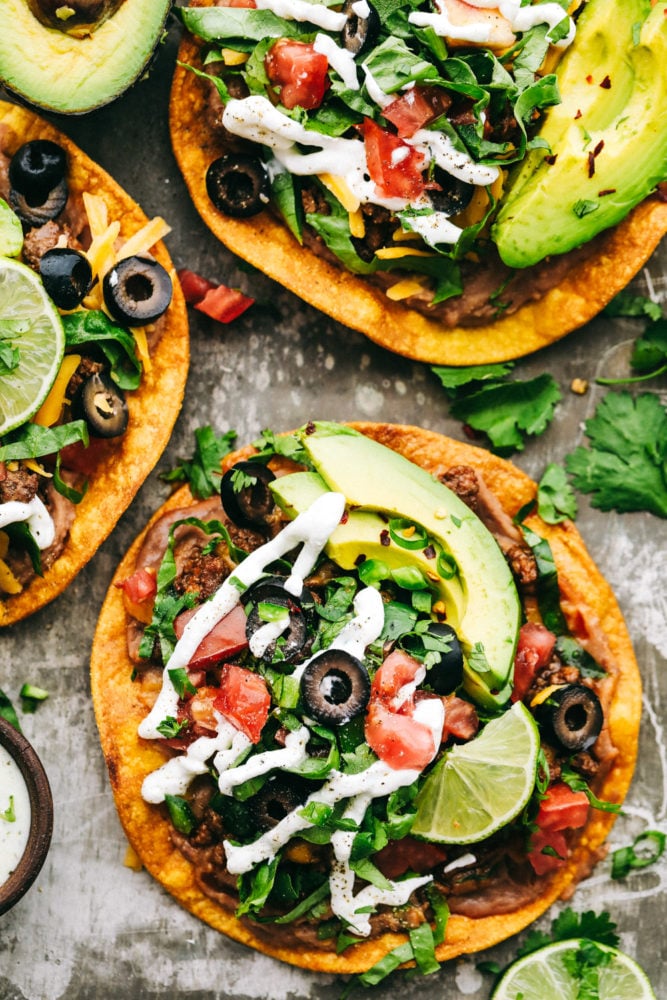
Tostadas with layers of optional toppings.

Easy to Make Tostadas

Quick and easy tostadas are so fun to make and come together perfectly. They have a vibrant color to them with all the fresh vegetables and some sliced fruits. Top them with shredded cheese and refried beans and you have a complete meal. Your family is going to go crazy over!

Pile high your favorite toppings on this homemade fried tostada. They are simple to make and will feed a crowd. The tostada is fried up nicely, giving it a crisp texture to hold all choices of optional toppings. Switch up your tortillas or add a little more topping creating a new and fun tostada each time you get more. The options are endless and the tostadas will keep coming!

What is a Tostadas?

A tostada is a classic Mexican recipe that is one of the favorites! Tostadas name comes from a Spanish word meaning toasted or looking toasted. Usually a tostada is known for being flat and a round tortilla that is deep fried or toasted in oil.

In some places tostadas can be an appetizer or a main dish. The tortilla is cut into small triangles to make chips to dip into extra sides like salsa or guacamole. There are a few different versions of tostadas that are known around the world.

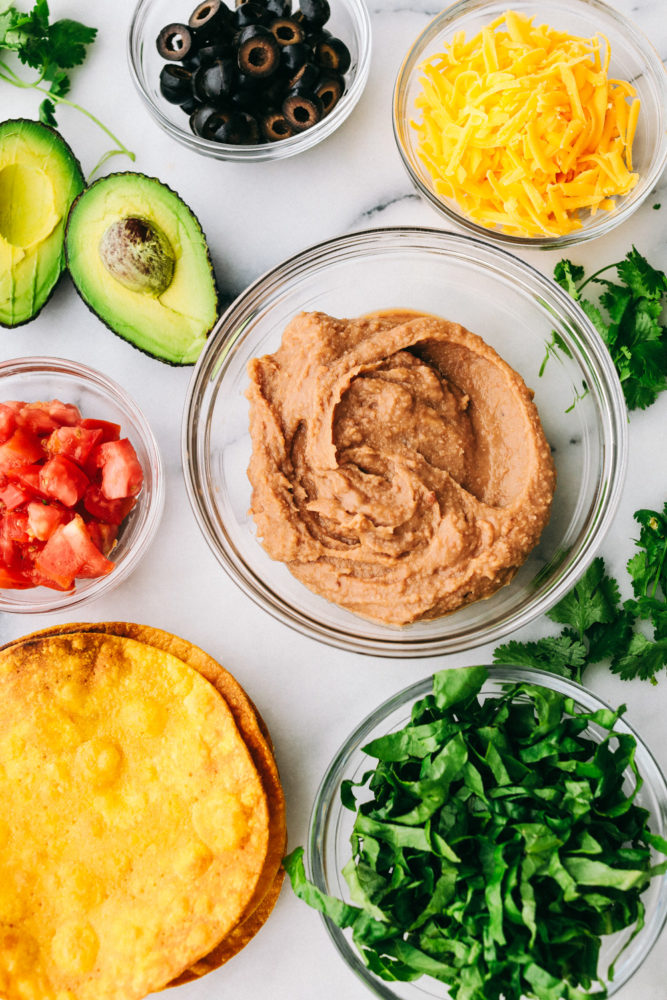
Optional toppings for tostadas in clear, glass bowls.

Tostada Ingredients:

Simple ingredients that blend perfectly together creating the perfect combination. This tostada cooks up quickly and has amazing flavors that all come together. Layer your tostadas just the way you like it!

  • Vegetable Oil: Used for frying the tortillas in a pan.
  • Corn Tortillas: Perfect for frying and using
  • Ground Beef and Taco Seasoning: Cooked up together creating a delicious Mexican flavor.
  • Refried Beans: A Great layer to start off on the tortilla.
  • Cheddar Cheese: Shredded cheese to sprinkle over top and melt a little from the heat of the ingredients.

Optional Toppings:

  • Shredded Lettuce: Fresh and light tasting.
  • Tomato: Gives a sweet taste.
  • Sliced Olives: Love the taste an olive adds to the recipe.
  • Cilantro: A hint of savory and spice.
  • Guacamole: Blend together an avocado making this rich and creamy topping for your tostada
  • Avocado: Creamy slices of avocado right on top equals perfection!

How to Make the Best Tostadas:

These tostadas make the best dinner for everyone in the family. Each person can create and layer their own toppings and make the best tostadas. This is an easy to make, quick dinner for a busy weekday.

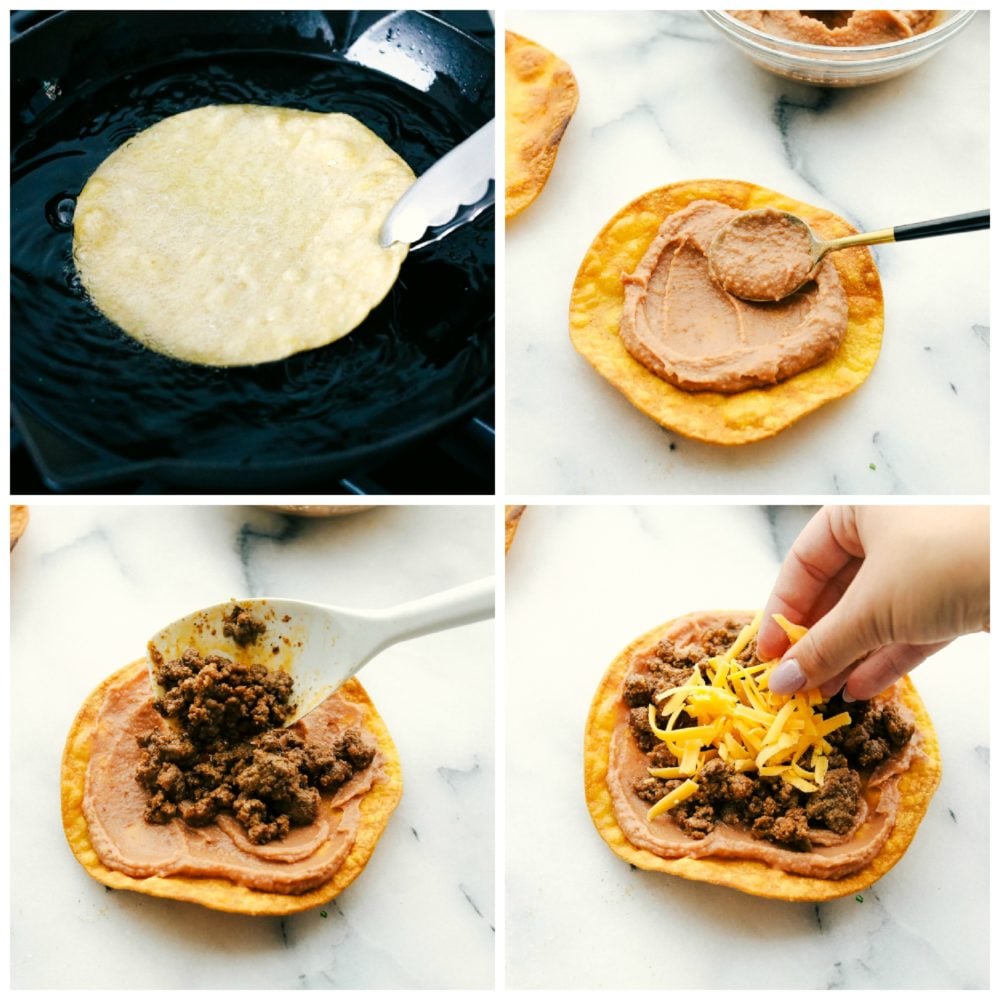
  1. Fry Tortillas: In a medium sized skillet add vegetable oil filling up to about 1/2 inch on the sides. Heat the oil to medium high heat. Poke holes with a fork in the tortilla and add it to the hot oil. Fry on each side until golden brown 1-2 minutes. Remove and set aside.
  2. Cook Beef: In a medium sized skillet over medium high heat cook and crumble the ground beef. Drain the grease. Add in the taco seasoning.
  3. To assemble: Heat the refried beans over the stove or in the microwave until warm. Spread a thin layer on the tortilla followed by the ground beef and cheese. Top with desired toppings.

The process of frying tortillas to make tostadas.

Tips for the Perfect Tostada:

  • Frying: It is best to use a cooking thermometer to check the oil. The oil will need to be around 350 to 375 degrees Fahrenheit. Once they are fried on both sides add the fried tortillas to a plate that is prepared with paper towels on it. The paper towels will help soak up any extra grease that is left on the tortillas.
  • Baking: Preheat oven to 400 degrees. Lay the tortillas on a baking sheet. Brush the tops with olive oil. Bake for 8-10 minutes until crispy and flip half way through.
  • Preparing the Tortilla: Poking holes in the tortilla will help the tortilla stay round and not curl too much while being fried.
  • Tortillas: Corn tortillas are best and the perfect size. I like the smaller round size. When choose a tortilla, choose one that is not already cooked and can be fried. Smaller the size the better and easier to flip over in the pan.
  • Assembling: Once cooled, start layering your tostada. It works best to have the heavier more dense ingredients on bottom like refried beans, meat, then the cheese will melt over top the meat, then continue on to the next optional toppings of choice.

More Filling Ideas:

Fill your tostada up with all the delicious meats, cheeses, vegetables and fruits. This classic Mexican Dinner is always a HUGE hit for a family! Everything comes together quickly and easily making everyone their favorite personal tostada.

Three tostadas layered with optional toppings.

More Mexican Inspired Recipes:

Print

Easy to Make Tostadas

These Tostadas are easy to make and layered with flavorful toppings that make this main dish one of the best! Create a delicious dinner right at home within minutes!
Course Dinner, Main Course
Cuisine Mexican
Keyword easy to make tostadas, tostadas
Prep Time 10 minutes
Cook Time 20 minutes
Total Time 30 minutes
Servings 12 Tostadas
Calories 147kcal
Author Alyssa Rivers

Ingredients

  • vegetable oil
  • 4 12 inch corn tortillas*
  • 1 pound lean ground beef
  • 1 Tablespoon Taco Seasoning
  • 1 15 ounce can refried beans
  • 2 cups cheddar cheese shredded

Optional Toppings:

  • Shredded lettuce
  • Tomato diced
  • sliced olives
  • cilantro chopped
  • avocado sliced
  • sour cream

Instructions

  • In a medium sized skillet add vegetable oil filling up to about 1/2 inch on the sides. Heat the oil to medium high heat. Poke holes with a fork in the tortilla and add it to the hot oil. Fry on each side until golden brown 1-2 minutes. Remove and set aside.
  • In a medium sized skillet over medium high heat cook and crumble the ground beef. Drain the grease. Add in the taco seasoning.

Layering Tostadas:

  • To assemble: Heat the refried beans over the stove or in the microwave until warm. Spread a thin layer on the tortilla followed by the ground beef and cheese. Top with desired toppings.

Notes

* To BAKE: Preheat oven to 400 degrees. Lay the tortillas on a baking sheet. Brush the tops with olive oil. Bake for 8-10 minutes until crispy and flip half way through.

Nutrition

Calories: 147kcal | Carbohydrates: 4g | Protein: 13g | Fat: 8g | Saturated Fat: 5g | Cholesterol: 43mg | Sodium: 163mg | Potassium: 165mg | Fiber: 1g | Sugar: 1g | Vitamin A: 208IU | Vitamin C: 1mg | Calcium: 146mg | Iron: 1mg
May 07, 2016

Black Forest Coffee Recipe

by , in
This drink was an absolute success. You can probably tell what you're in for by looking at the ingredients. I'm glad to report that it's even better than it sounds. The mocha flavor of coffee mixed with whipped cream marries the flavor of chocolate covered cherries. I loved it as an indulgent treat with breakfast. It would also work as the perfect ending to an evening meal. I hope you will enjoy this special treat, its good both with cherry juice and with the cherry liquer...please feel free to use your favourite cherry liquer in this drink.


TOTAL TIME : 20mins
PREP:  5 MINS
COOK:  15 MINS

Ingredients:


6 oz Fresh brewed coffee

2 tb Chocolate syrup

1 tb Maraschino cherry juice

Whipped cream

Shaved chocolate/chips

Maraschino cherries

Directions:


1. Make fresh, hot, strong coffee and keep warm until ready to mix.

2. Place a medium size pot on low and add the chocolate syrup and chocolate milk, stir and keep warm, until needed.

3. With a hand blender mix the heavy cream, cherry liquer and white sugar until it is smooth, thick and creamy.

4. Add the coffee and cherry liquer to the chocolate milk and stir gently.
Pour coffee into a large mug and garnish with the cherry flavored whipped cream, bittersweet chocolate shaving and top with the cherry cluster.
May 07, 2016

Canadian Coffee | How to Make Canadian Coffee

by , in
Learn How to Make Canadian Coffee. Delicious! Hearty enough for a lumberjack! The maple syrup and whipped cream is amazing!!!!


SERVINGS: 4

Ingredients: 

¼ c Maple syrup; pure 
½ c Rye whiskey 
3 c Coffee; hot, black, double strength Topping: 
¾ c Whipping cream 
4 ts Maple syrup; pure 

How To: 


Topping: Whip cream with maple syrup just up until soft mounds; set aside. Divide maple syrup and whiskey among 4 warmed heatproof glass mugs or goblets. Pour in coffee to 1 inch of top; spoon topping over coffee.
October 17, 2014

Egg Curry Recipe (Home-Style)

by , in
"Egg curry recipe is the simple and quick Indian egg dish. it's very tasty recipe made with eggs , potatoes and Indian spices."

Egg Curry Recipe (Home-Style)

Prep time: 15 Minutes
Cook time: 30 Minutes
Serves: 4

Ingredients:

1/2 lbs. boiled potatoes cubed (optional)
4 eggs, boiled and halved
1/2 inch ginger, minced
3-4 flakes of garlic
2 green chillies
1 onion chopped
1/2 teaspoon cumin seeds
1/2 teaspoon turmeric powder
1 teaspoon garam masala
1 tsp. salt or to taste
1/2  teaspoon red chilli powder
1/2 lbs. tomatoes, pureed
Cilantro/coriander leaves
2tablespoon oil

Directions:

1. Make a paste of onion, garlic, ginger and green chilies in a  mixer or chopper.
2. Heat oil in a small non-stick frying pan (or skillet) and fry the cumin seeds for half a minute, add the paste and fry till golden brown.
3. Add the salt, turmeric, chili powder and garam masala and fry for a minute and add tomato puree. Fry  till it starts to leave oil around 5-7 minutes.
4. Add 1/2 cup warm water, boiled eggs & potatoes and simmer, then garnish with
cilantro/coriander and serve.
September 15, 2014

Navratan Korma Recipe

by , in
Navratan Korma Recipe from varsha's recipes"This is a very delicious Indian navratan korma recipe, a rich combination of vegetables with cashew-nuts and raisins. Its very popular mughlai dish, and easy to make."


Serves: 6
Making time: 45 minutes


 Ingredients:

2 cups peas boiled
1 large carrot chopped and boiled
1/2 cup tomato sauce
1/4 cup curd
1/4 cup malai(cream)
3 tbsp. butter
1 small sweet lime
1 small apple
1 banana
2 slices pineapple
10-15 cashew-nuts
20 raisins
2 glaced cherries for decoration
1 tbsp. coriander chopped
1 tbsp. ghee
salt to taste
1 tsp. cuminseeds
2 tsp. khuskhus (poppyseeds)
1 tsp. cardamoms
1 large onion
1/4 cup coconut shredded
3 green chillies

Directions:

1. Grind the all masalas, onion and green chillies, separately.
2. Chop all the fruit fine. Heat ghee and fry cashews, drain and keep aside.
3. Add butter to ghee and heat, add the onion, green chillies, coconut and fry for 2 minutes. Add the masala (cuminseeds, khushkus, and cardamoms) and salt and fry 2 more minutes.
4. Add the carrots and peas, mix together curd and cream and add to gravy. Allow to thicken a bit, add fruit, cashews and raisins and boil till the gravy is thick and the fat separates.
5. Garnish with grated cheese ,coriander and chopped cherries. Serve hot with naan, roti or paratha.
September 13, 2014

Artichoke Pizza Recipe

by , in
"Make the delicious best Artichoke Heart, tomatoes and mozzarella Cheese Pizza with this easy recipe. Its quick & easy and very tasty and healthy recipe for kids."

Artichoke Pizza Recipe


Serves: 4
Prep time: 15 minutes
Rising time: 1½ hours–6 hours
Cooking time: 20 minutes

Ingredients:

FOR THE DOUGH
4 cups (500 g) all-purpose flour
1½ cups (350 ml) lukewarm water
1½ tbsp. (20 ml) extra-virgin olive oil
1½ tsp. (4 g) active dry yeast for 2-hour rising time, or 3/4 tsp. (2 g) for 6-hour rising time
2 tsp. (12 g) salt

FOR THE TOPPING
16-oz. can peeled tomatoes, crushed by hand
14 oz. (400 g) fresh mozzarella cheese, sliced
15 artichoke hearts in oil

Directions:

1. Put the flour onto a clean work surface and make a well in the center. Dissolve the yeast in the water, and pour the yeast mixture into the well. 
2. Gradually start incorporating the yeast mixture into the flour until a loose dough starts to form,
then add the oil and salt. Knead the dough until smooth and elastic. Rub the dough with a little oil, cover with plastic wrap, and let it rest for about 10 minutes.
3. Grease a 12-inch round pizza pan with oil. Transfer the dough to the pan and, using your fingertips, spread the dough to cover the bottom of the pan.
4. If you used 1½ tsp. yeast, let the dough rise for about 40 minutes. If you used 3/4 tsp., cover the dough with a sheet of lightly oiled plastic wrap and refrigerate for at least 5 hours. The dough will rise well in the refrigerator, becoming light and fragrant. When the dough has risen, spread the tomatoes over the surface, then arrange the mozzarella and the artichoke hearts (all at room temperature) on top. Let the dough rise for another 40 minutes. Bake in the oven at 425°F
(220°C) for 20 minutes, or until the crust is golden brown.
September 13, 2014

Italian Picnic Sandwich Recipe

by , in
"WITH JUST THREE CORE INGREDIENTS—prosciutto, arugula, and balsamic vinegar—this is our family’s favorite quick fix for a picnic. Prosciutto is dry-cured Italian ham that is packed with flavor, so a little goes a long way in a sandwich. The arugula, brightened up with the addition of balsamic vinegar, adds a dose of beta-carotene and vitamin C to the mix. If tomatoes are in season, tucking a few slices in the center makes a nice addition. Its great recipe for kids."

Italian Picnic Sandwich For Kids

Ingredients:

2 thin slices prosciutto
One 4-inch piece baguette, preferably whole-wheat, sliced in half horizontally
2/3 cup loosely packed baby arugula
1 teaspoon balsamic vinegar
1 teaspoon extra-virgin olive oil

Directions:

1. Pile the prosciutto on the bottom half of the baguette.
2. In a small bowl, toss the arugula with the balsamic vinegar and olive oil. Pile the arugula on top of the prosciutto and drizzle any dressing remaining over it. Top with the remaining baguette half.
3. Wrap well or store in a snug container.

MAKE-AHEAD NOTES: can be made a day ahead and stored in the refrigerator, but best made the morning before school
September 11, 2014

Vegetable Rice Pilaf

by , in
A pilaf is a rice dish in which the rice is first lightly browned by cooking it with onions in oil or butter, and then adding in fragrant spices and vegetables. Traditionally in India, this dish uses clarified butter (ghee), but I use vegetable oil instead since it is healthier and easily available. You could describe this dish as the Indian version of vegetarian fried rice. I include edamame (green soy beans) in this dish to add protein to this dish. You may eat this one-pot meal rice dish by itself or you may mix in some plain yogurt.

Vegetable Rice Pilaf
Serves 3 to 4
Prep time: 10 minutes
Cook time: 25 minutes + 5 minutes to rest

Ingredients:

1 cup (180 g) uncooked white Basmati rice
4 tablespoons vegetable oil
1 small onion, thinly sliced into half-moons
3 cloves
6 black peppercorns
1 in (2.5-cm) cinnamon stick
1 teaspoon cumin seeds
1 dried bay leaf
3 whole green cardamom pods
½ cup (75 g) green edamame beans or ½ cup (60 g) green beans, fresh or frozen
1½ cups (150 g) fresh or frozen bite-size cauliflower florets
1½ cups (75 g) fresh or frozen bite-size broccoli florets
1 medium russet potato (about ½ lb/225 g), peeled and cut into ½ in (1.25 cm) cubes
2 medium carrots, peeled and cut into matchsticks
2 cups (500 ml) water
1¾ teaspoons salt

Directions:

1. Place the rice in a small bowl. Rinse three or four times by repeatedly filling the bowl with cold water and carefully draining off the water. Try to get the water as clear as you can. Pour the rice into a large sieve to drain.
2. Pour the oil into a large saucepan and place it over medium heat. When the oil is heated, add the onion, cloves, peppercorns, cinnamon stick, cumin seeds, and bay leaf. Open the cardamom pods and add the seeds and the pods. Sauté until the onion is browned and the edges just start to crisp, stirring frequently, about 8 minutes.
3. Add the edamame (or green peas), cauliflower, broccoli, potato, and carrot. Cover the saucepan and cook for 2 minutes, stirring occasionally.
4. Add the rice. Stir thoroughly. Add the water and salt. Stir to combine. Bring to a rolling boil over high heat.
5.Stir and reduce the heat to low. Cover the saucepan. Simmer undisturbed until the water is completely absorbed and you do not see any more water on the bottom of the saucepan if you insert a spoon through the rice, about 10 minutes.
6. Turn off the heat. Let rest, covered, for 5 minutes on the warm stove. Keep covered until ready to serve or let cool to room temperature and refrigerate or freeze. Before serving, gently fluff the rice with a fork to mix the vegetables. Leave in the whole spices in for presentation.
September 11, 2014

Mango Ice Cream Recipe

by , in
"Mangoes are the quintessential fruit of India. They come in many different varieties, shapes, colors and sizes, and are enjoyed in many different ways from chutneys, drinks, ice cream, and of course eaten as a fresh fruit. Mangoes make a wonderful Indian ice cream. Indian ice cream is not churned during freezing resulting in a denser textured ice cream. Mangoes improve digestion and help with constipation. They are also high in iron and good for pregnant women and for people with anemia."

Mango Ice Cream Recipe

Serves: 4 to 6
Prep time: 10 minutes
Cook time: 25 minutes + 25 minutes cooling + 3 hours to set in the freezer
Freezer life: 3 weeks

Ingredients:

2 cups (500 ml) whole milk or plain soy milk
Seeds from 5 whole green cardamom pods, crushed
½ cup (100 g) sugar
1 large fully ripe mango (about 1 lb/500 g)

Directions:

1. Pour the milk into a heavy bottomed, medium-sized saucepan. Bring to a rolling boil over high heat, stirring frequently as it comes to a boil. Don’t let the milk boil over and out of the saucepan! Immediately reduce the heat to medium.
2. Add the crushed cardamom seeds and stir to combine. Simmer the milk until it is reduced to ½ cup (125 ml), stirring frequently, about 20 to 25 minutes. If any skin forms on the surface, simply stir it back in. If there is any scorched milk at the bottom of the saucepan, do not scrape it.
3. Add the sugar and stir until it has all dissolved. Remove from heat and let cool to room temperature to avoid adding fresh mango to hot milk.
4. Wash the mango. Using a vegetable peeler, peel the mango. Cut away all of the flesh from the pit. Place the mango flesh in a blender. Blend until pureed smooth.
5. After the milk has cooled to room temperature, add the pureed mango to the milk. Stir thoroughly to combine. Pour the mixture into ice cream bar molds or an ice cube tray or mini muffin pan tray, or any shape mold you prefer. Put in the freezer until frozen, about 3 hours.
6. Remove the frozen ice cream from the molds by tilting the mold or tray sideways and running under hot water until the ice cream is loose and you can take it out. Enjoy!
September 11, 2014

Melon Balls in Rose Syrup

by , in
"To make this fun, delectable dessert, I use a simple kitchen tool called a melon baller and scoop out colorful little spheres of fresh melon varieties. Then I chill the balled fruit in a sugar syrup infused with rose water. This dish will surely impress your guests visually and with its divine taste. Melons are low in calories and a good source of potassium and vitamin C, which help fight off diseases in our body. I usually ball extra melons and pack them in my daughter's lunchbox so she can enjoy fresh fruit in a fun round shape."

Melon Balls in Rose Syrup  Recipe

Serves: 7
Prep time: 10 minutes
Cook time: 15 minutes + 25 minutes cooling + 2 hours to chill
Refrigerator life: 1 day
Reheating Method: None. Serve chilled.

Ingredients:

1 cup (200 g) sugar
2 cups (500 ml) water
1 cantaloupe
1 honey dew melon
1 small seedless watermelon
2 tablespoons rose water

Directions:

1. To make the syrup, bring the sugar and water to a rolling boil in a medium saucepan over high heat.
2. Reduce the heat to medium. Simmer for 15 minutes. Remove from the heat and let cool to room temperature.
3. To ball the cantaloupe, cut it in half crosswise. Using a spoon, scoop out any seeds and strings and discard. Using a melon baller, scoop out 9 balls. Cover the rest of the cantaloupe with plastic wrap and refrigerate for up to 3 days to enjoy later.
4. Ball the honey dew melon the same way as the cantaloupe and scoop out 9 balls. Cover the rest of the honey dew melon with plastic wrap and refrigerate for up to 3 days to enjoy later
5. To ball the watermelon, cut it in half crosswise. Using a melon baller, scoop out 10 balls. Cover the rest of the water-melon with plastic wrap and refrigerate for up to 3 days to enjoy later.
6. When the syrup has cooled to room temperature, add the rose water. Stir to combine. Add the cantaloupe, honeydew melon, and watermelon balls. Cover and place in the refrigerator until chilled, or up to one day. When serving, place 4 melon balls per person in a dessert bowl, and add plenty of the rose syrup. Enjoy.

NOTE: A cantaloupe and a honeydew melon yield about 40 balls each. A small watermelon yields about 60 balls total. You may choose any combination of fruits to ball for your dessert.
September 11, 2014

Strawberry Lassi (smoothie) Recipe

by , in
A lassi is an Indian smoothie, which is a refreshing drink made from fruit and yogurt, with mango lassi being the most popular. It can be served for breakfast, as a cocktail, a dessert, or anytime you wish. I keep my strawberries for up to five days in the refrigerator; after that they tend to shrivel or mold. Strawberries have lots of vitamin C, which is an effective antioxidant that can help prevent cancer and helps heal cuts and wounds.

Strawberry Lassi (smoothie) Recipe

Serves: 2
Prep time: 5 minutes
Refrigerator life: 2 days, shake before using

Ingredients:

½ lb (225 g) strawberries (about 15 strawberries)
4 tablespoons plain yogurt or plain soy yogurt (regular or fat free)
4 tablespoons sugar (you can use less sugar if the strawberries are very sweet)
¼ cup (65 ml) water
5 ice cubes plus crushed ice to half fill 2 tall glasses

Directions:

1. Wash the strawberries. Cut off the leafy stems and discard.
2. Place the strawberries, yogurt, sugar, water, and 5 ice cubes in a blender. Blend until smooth and the ice is crushed. If you are making this drink for later, store in the refrigerator now and shake vigorously before serving.
3. Fill 2 tall glasses half-way with the crushed ice. Pour the lassi into the glasses and enjoy with a straw.
September 07, 2014

Matar Paneer Recipe (Indian Cheese And Pea Curry)

by , in
A childhood favorite dish of mine, this is made with a firm style of Indian cheese (paneer) that is cut into cubes, lightly pan-fried, and then simmered with peas in a savory curry. You may serve this dish with the Indian bread or Plain rice or Rice with Cumin and Peas. When serving this dish, keep an eye out to make sure everyone gets an equal amount of cheese (paneer) cubes, instead of being taken all by one person. Firm tofu may be substituted for the cheese.

Matar Paneer Recipe (Indian Cheese And Pea Curry)


Serves 3 to 4
Prep time: 10 minutes
Cook time: 25 minutes

Ingredients:

3 tablespoons vegetable oil
1½ teaspoons peeled and finely grated fresh ginger
½ small onion, shredded on the largest grating holes of a box grater
1 fully ripe tomato, cut into 4 pieces
½ teaspoon ground turmeric
1 teaspoon garam masala
¼ teaspoon ground red pepper (cayenne)
½ teaspoon salt
½ teaspoon ground black pepper
½ cup (60 g) frozen or fresh green peas
250gm (paneer) Indian Cheese Block, cubed and pan-fried
1¼ cups (300 ml) water

Directions:

1. Pour the oil into a medium saucepan and place over medium heat. When the oil is heated, add the ginger and onion. Sauté until the onion is golden brown, stirring frequently, about 5 minutes.
2. Reduce the heat to medium-low. Add the tomato and cover the saucepan. Cook until the tomato becomes completely soft and mashed and is combined with the onion to form a coarse paste, stirring every minute or so and lightly mashing the tomato, about 5 minutes.
3. Add the turmeric, red pepper, salt, garam masala and black pepper. Stir to combine. Cook uncovered for 6 minutes, stirring frequently.
4. Add the peas, pan-fried cheese cubes (or tofu), and water. Stir to combine. Bring to a rolling boil over high heat.
5. Stir and reduce the heat to medium. Simmer uncovered for 5 minutes, stirring occasionally. Enjoy now or let cool to room temperature and refrigerate or freeze for later!

September 07, 2014

Potato Cutlets Recipe

by , in
Potato cutlets are breaded patties often served in restaurants in India. They make excellent appetizers at a dinner party. You may serve these cutlets with Fresh Coriander Chutney or even with ketchup. My mom used to pack me a vegetarian burger for my school lunch with a potato cutlet, lettuce, tomato, cheese, ketchup, and mustard between a hamburger bun. Potatoes are rich in carbohydrates, thus giving us an energy boost. Learn how to make potato cutlets.

Potato Cutlets Recipe

Makes 8 cutlets
Prep time: 5 minutes + 35 minutes to boil the potatoes (can be done 1 day in advance)
Cook time: 9 minutes

Ingredients:

2 medium potatoes (total 1 lb/500 g), boiled and peeled
¼ teaspoon ground red pepper (cayenne)
1 teaspoon salt
¾ teaspoon ground black pepper
½ teaspoon cumin seeds
1 fresh finger-length green chili pepper, finely diced (any variety)
1 handful fresh coriander leaves (cilantro) (about ¼ cup/10 g packed leaves), rinsed and chopped
¼ cup (30 g) plain bread crumbs
5 tablespoons vegetable oil

Directions:

1. In a medium bowl, mash the peeled potatoes with one hand or a potato masher until there are no lumps. Add the red pepper, salt, black pepper, and cumin seeds. Mix to combine.
2. Add the green chili pepper and coriander leaves. Using one hand, mix to combine. Taste a small bit of the potato mixture to make sure the seasonings and spices are to your liking and add more if desired.
3. Divide the mixture into 8 equal parts. Using your palms, form 8 oval patties about ½ inch (1.25 cm) thick each. Make sure to compress the patties tightly in your palms so they will not fall apart while cooking.
4. Place the bread crumbs on a small plate. Generously dip all sides of each patty in the breadcrumbs. Discard left over crumbs.
5. Spread 2 tablespoons of the oil into a large nonstick skillet and place over medium heat. When the oil is heated, add the cutlets. Cook for 2 minutes.
6. Add 1 more tablespoon of the oil to the skillet, around the bottom of the cutlets Cook for 2 more minutes and then, using a spatula, gently flip the cutlets. The flipped side will be golden to dark brown and a bit crisp.
7. Add 2 tablespoons more of the oil to the skillet around the bottom of the cutlets. Cook for 4 minutes.
8. Flip the cutlets once more and cook for an additional 1 minute. Enjoy!