Showing posts with label Recipes For Kids. Show all posts
August 03, 2020

Cream Puff Recipe yummy

by , in
Cream puffs on a serving plate

Cream puffs filled with simple vanilla whipped cream and covered in a dusting of powdered sugar are a classic dessert. But once you’ve mastered the recipe for the cream puff shell, it can be customized with all sorts of delicious filling to your heart’s desire!

Experience France without traveling by making this Easy Beignets Recipe, or this elegant yet easy Creme Brulee, or a savory French Onion Soup.

Cream puffs on a serving plate

Cream Puff Recipe

Cream puff is made with a French pastry dough, called choux pastry or pate a choux. To make choux pastry, you actually cook the flour in water and butter to form a paste, then beat in the eggs at the end. When baked, the dough expands in the oven creating a hollow shell, to be filled with all sorts of delicious fillings.

In this recipe, I used milk instead of water for more richness along with some salt and sugar for flavor. But most of the flavor in cream puffs will come from the filling, which you can customize to your liking. Once you’ve mastered making the cream puff shells, the sky’s the limit!
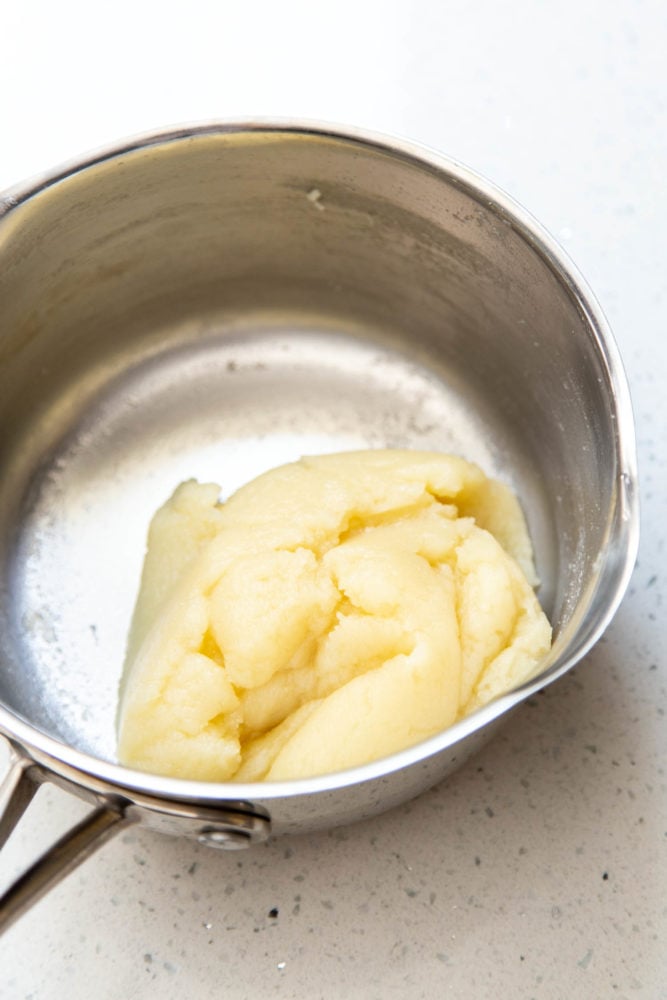
Cooked flour paste for cream puff dough

Cream Puff Ingredients:

Cream puff starts with 6 simple ingredients:

  • Milk – traditional choux pastry is made with just water but I used milk for more richness and flavor.
  • Unsalted butter – butter adds more flavor to the cream puff shell.
  • Salt – for flavor.
  • Sugar – traditional choux pastry doesn’t include sugar but I like mine a little bit on the sweeter side. Reduce, omit or increase to your taste.
  • Flour – all purpose flour is cooked with all of the above ingredients.
  • Egg – gets beaten into the cooked dough.

Making Cream Puff From Scratch:

  1. First, heat the milk, butter, salt and sugar in a saucepan over medium heat until simmering but not boiling.
  2. Take the saucepan off the heat and mix in the flour to form a paste. Put the saucepan back on medium heat and cook the flour mixture, stirring constantly, until the dough forms and pulls away from the sides and bottom of the pan.
  3. Transfer the cooked dough to a stand mixer bowl and beat with the paddle attachment to cool it down. Add 1 egg at a time and continue beating until each is completely incorporated before adding another.
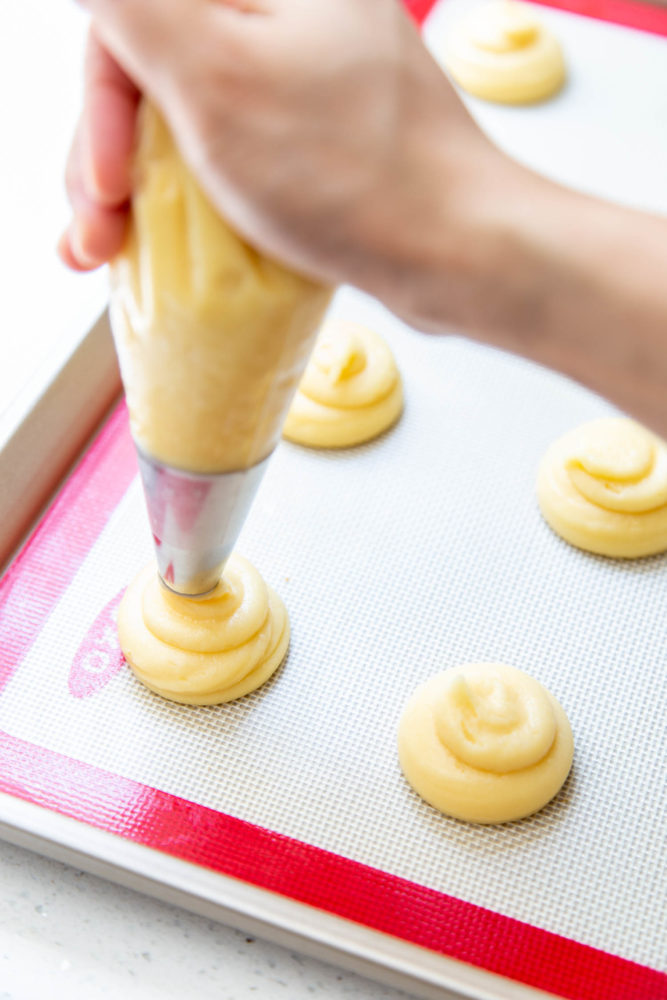
  4. Transfer the dough into a piping bag and pipe 12 equal portions, about 1 ½” – 2” in diameter, on a lined baking sheet. Dip your fingers in water and smooth out each mound of dough so there are no peaks and spikes.
  5. Gently apply an egg wash and bake for about 22 – 25 minutes at 375°F. Turn off the oven and crack the door open, allowing the cream puffs to cool inside the oven for at least 15 minutes before removing them.
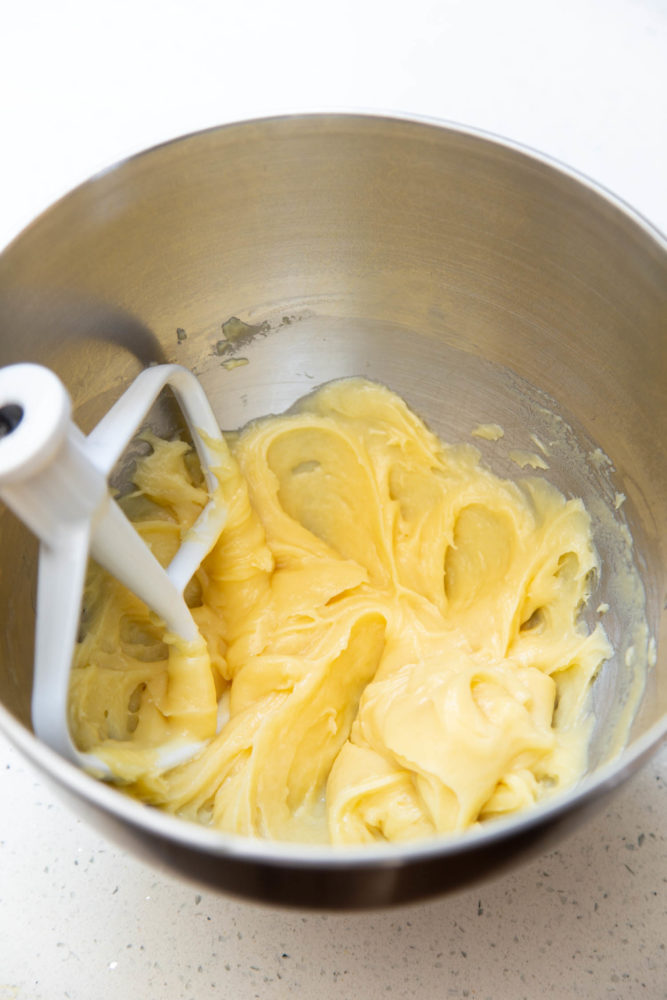
Cream puff dough after adding eggs

Cream Puff Filling:

Traditionally, cream puffs are filled with pastry cream, but for this recipe I opt to use a simple homemade whipped cream as filling to keep things simple. Split the shells open, fill with cream, replace the top and dust them with powdered sugar, and they are ready for the dessert bar.

To customize your cream puffs, you can add different flavor to your whipped cream using extracts or fill them with:

Piping choux pastry for baking

Storing Homemade Cream Puffs:

Cream puffs are best served fresh, especially when filled with cream filling. However, you can store leftovers in an airtight container in the refrigerator for up to 3 days. They can be served cold or just let them come to room temperature before serving.

The cream puff shells without filling can be stored at room temperature for 2 – 3 days if you plan to make them ahead of time or keep them frozen up to 2 weeks. Thaw the shells before adding filling or you can toast them in the oven at a lower temperature around 300°F – 325°F for 5 minutes to crisp them up before adding filling.
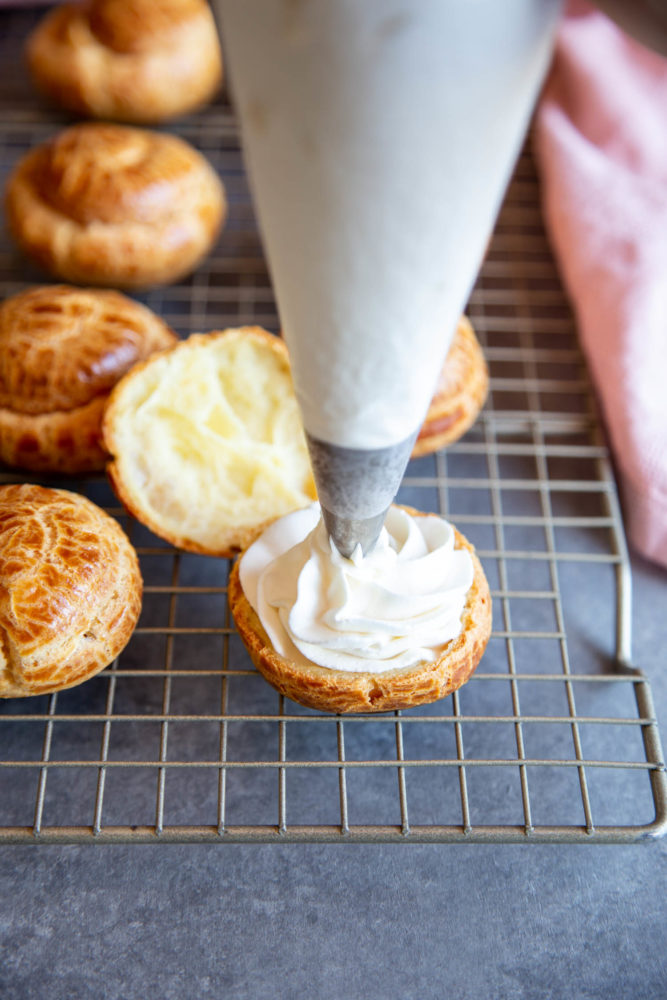
Adding whipped cream filling to cream puffs

More French and French Inspired Recipes:

Cream puffs dusted with powdered sugar

Cream puffs on a serving plate
Print

Cream Puffs

Cream puffs filled with simple vanilla whipped cream and covered in a dusting of powdered sugar are a classic dessert. But once you’ve mastered the recipe for the cream puff shell, it can be customized with all sorts of delicious filling to your heart’s desire!
Course Dessert
Cuisine French
Keyword cream puff, cream puff recipe, cream puffs
Prep Time 15 minutes
Cook Time 25 minutes
Total Time 40 minutes
Servings 12 cream puffs
Calories 159kcal
Author Trang Doan

Ingredients

Cream puff shell

  • ½ cup milk
  • 2 oz unsalted butter
  • 1 tablespoon granulated sugar
  • ¼ teaspoon kosher salt
  • ½ cup all-purpose flour
  • 2 large eggs

Filling

  • 1 cup heavy whipping cream
  • ¼ cup granulated sugar
  • 1 teaspoon vanilla extract

Egg wash

  • 1 large egg
  • 1 tablespoon water

Instructions

  • Heat the milk, butter, salt and sugar in a saucepan over medium heat until simmering but not boiling, about 3 minutes.
  • Take the saucepan off the heat and mix in the flour to form a paste. Put the saucepan back on medium heat and cook the flour mixture, stirring constantly, until the dough forms and pulls away from the sides and bottom of the pan, about 2 minutes.
  • Transfer the cooked dough to a stand mixer bowl and beat with the paddle attachment to cool it down. Add 1 egg at a time and continue beating until each egg is completely incorporated before adding another.
  • Transfer the dough into a piping bag fitted with a large round tip and pipe 12 equal portions, about 1 ½” - 2” in diameter, on a lined baking sheet. Dip your fingers in water and smooth out each mound of dough so there are no peaks and spikes.
  • Preheat the oven to 375°F.
  • Beat an egg with a tablespoon of water to make egg wash. Gently apply the egg wash on top of the dough using a pastry brush.
  • Bake for about 22 - 25 minutes until the shells are puffed and golden. Observe through the oven door but do not open the oven during baking. Turn off the oven and crack the door open, allowing the cream puffs to cool inside the oven for at least 15 minutes before removing them and let them cool completely on a wire rack.

Whipping Cream:

  • To make the whipped cream, add heavy whipping cream, sugar and vanilla to a stand mixer bowl and beat with the balloon whip until stiff peaks form. Store in the refrigerator until ready to use.
  • When the cream puff shells are completely cool, split them open and fill with whipped cream, replace the top of dust with powdered sugar before serving.

Notes

  • This recipe makes a dozen small cream puffs but it can be doubled or tripled easily to make more.
  • Because the cream puffs are baked at a high oven temperature, use a light color baking sheet or an air insulated baking sheet to decrease the chances of the bottoms burning.
Nutrition

Calories: 159kcal | Carbohydrates: 10g | Protein: 2g | Fat: 12g | Saturated Fat: 7g | Cholesterol: 66mg | Sodium: 71mg | Potassium: 44mg | Fiber: 1g | Sugar: 6g | Vitamin A: 466IU | Vitamin C: 1mg | Calcium: 30mg | Iron: 1mg
August 03, 2020

Pasta with Creamy Zucchini Sauce

by , in
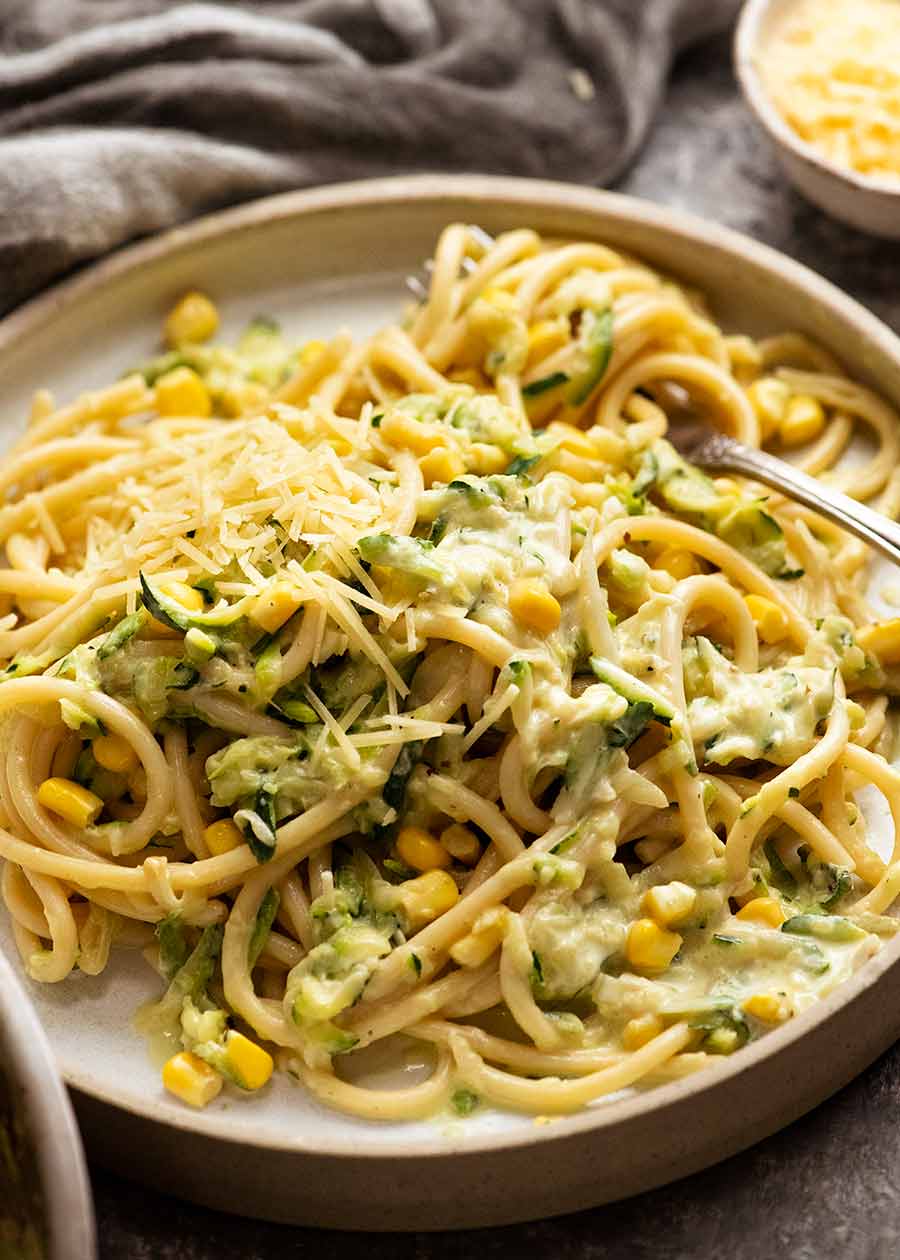
Plate with spaghetti with Creamy Zucchini Pasta Sauce (Courgette)

This Pasta with Creamy Zucchini Sauce may well become your new favourite zucchini recipe. Quick, easy, economical and a great way to use zucchinis to make a luscious pasta dinner!

Plate with spaghetti with Creamy Zucchini Pasta Sauce (Courgette)

Real Pasta with Creamy Zucchini Sauce – NOT “Zoodles”!

If you landed here expecting one of those low carb “zoodle” recipes, you’re going to be sorely disappointed because this is about as far as you can get from a health food trend. It’s real spaghetti all the way, in all it’s carb loaded glory, and the zucchini pasta sauce is swimming in cream.

Low carb? Absolutely not. Low fat? Nope.

100% delicious? YES!

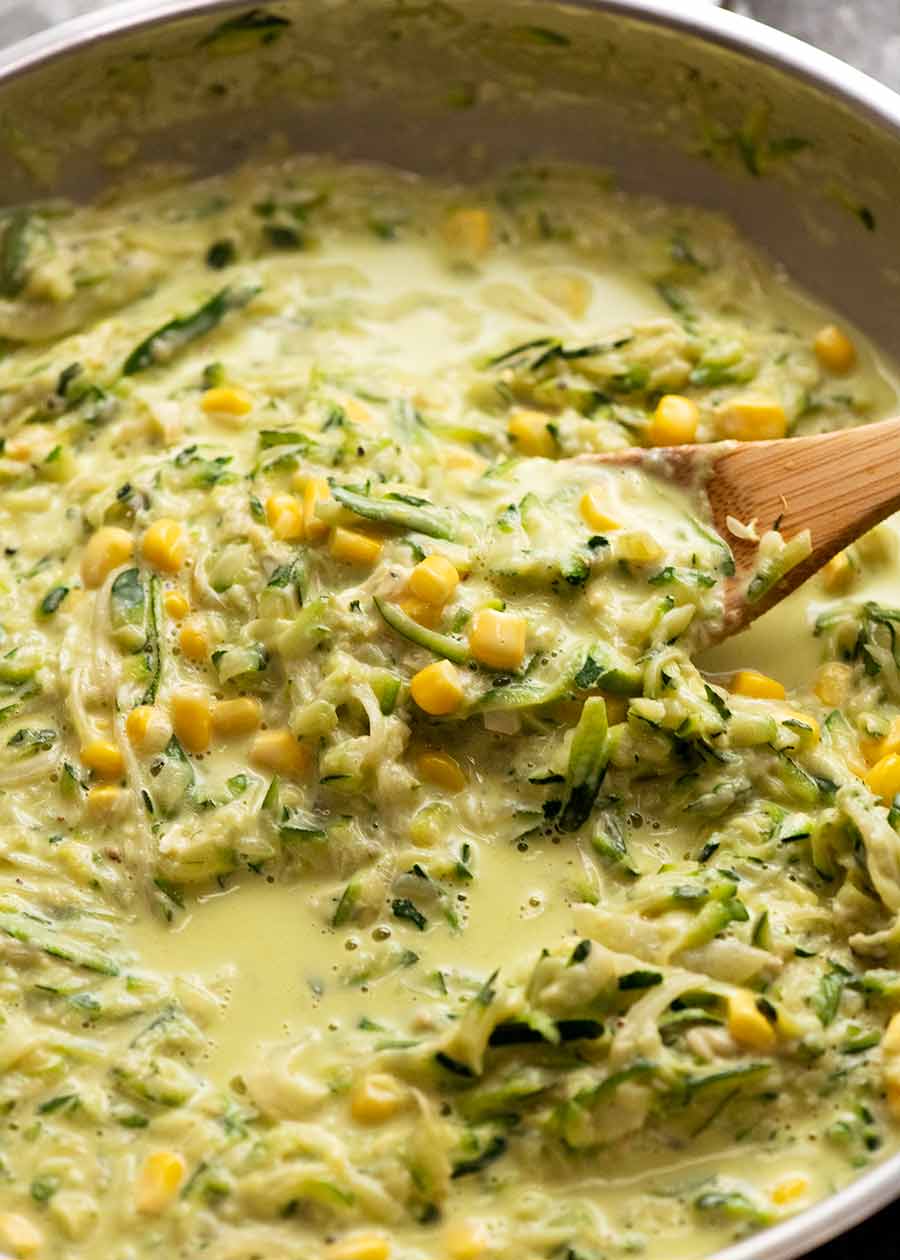
Skillet filled with creamy Zucchini pasta sauce

What you need for Creamy Zucchini Pasta Sauce

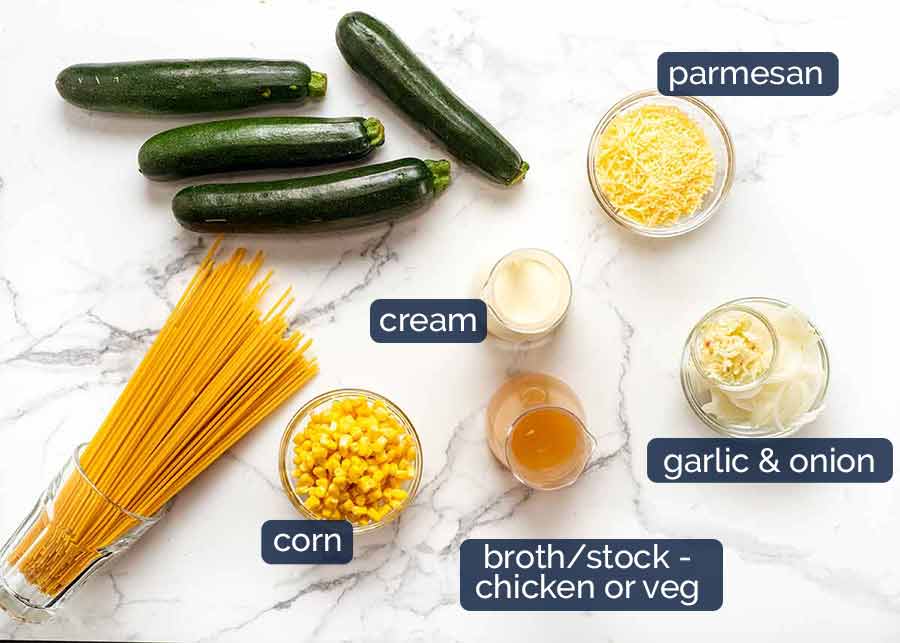
Here’s what you need to make this pasta:

  • Zucchinis – called courgettes in some parts of the world. 600g/1.2lb or so – bit more or less works fine;
  • Pasta – this can actually be made with any pasta at all, short or long. But it does work particularly well with long pasta because the shredded zucchini kind of “clings” to it. For the photos and video, I used bucatini, the spaghetti that’s hollow inside, just for something different. Loved the extra thick pasta strands, not so fond of the strange sensation of sucking on a straw when I’m slurping up the pasta;
  • Garlic and onion – essential flavour base for this simple pasta sauce;
  • Parmesan – adds umami (savoury flavour) into this otherwise very simple pasta sauce. Best to use freshly grated if you can because it melts into the sauce better, but store bought grated works fine too. Don’t have parmesan? Use any cheese you have!
  • Chicken or vegetable broth/stock – as above with parmesan, adds flavour into this sauce. Without it, it does lack a bit of flavour; and
  • Corn isn’t essential, but it does add cheerful little pops of colour and bursts of sweetness into this pasta dish.

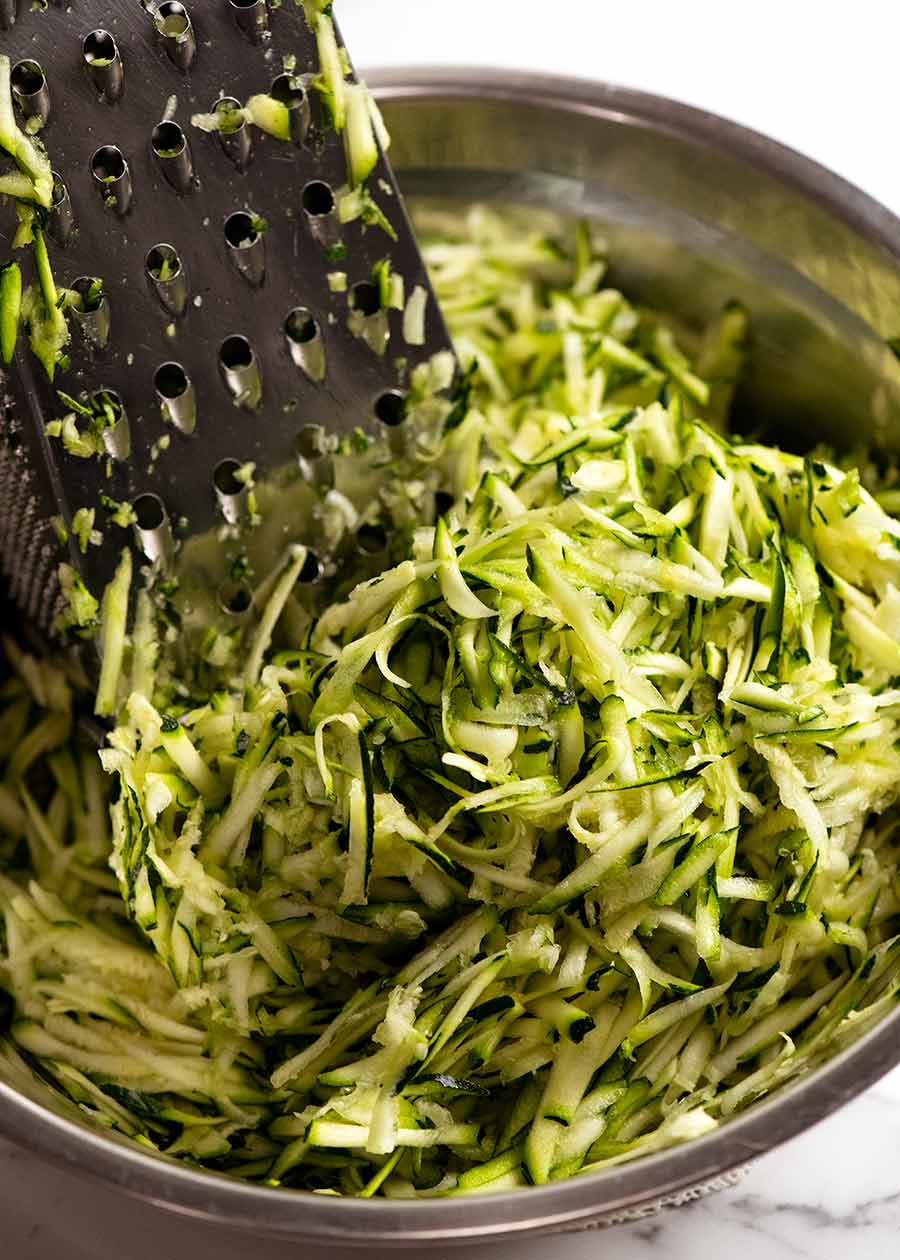
Grating zucchini

How to make Pasta with Creamy Zucchini Sauce

Grating the zucchini is ideal to make a lovely creamy sauce that clings to the pasta. When you grate it, you might feel somewhat alarmed (or perhaps virtuous) at the enormous mound of zucchini. But don’t fret! It shrinks a LOT when cooked.

Key Step – tossing pasta with sauce

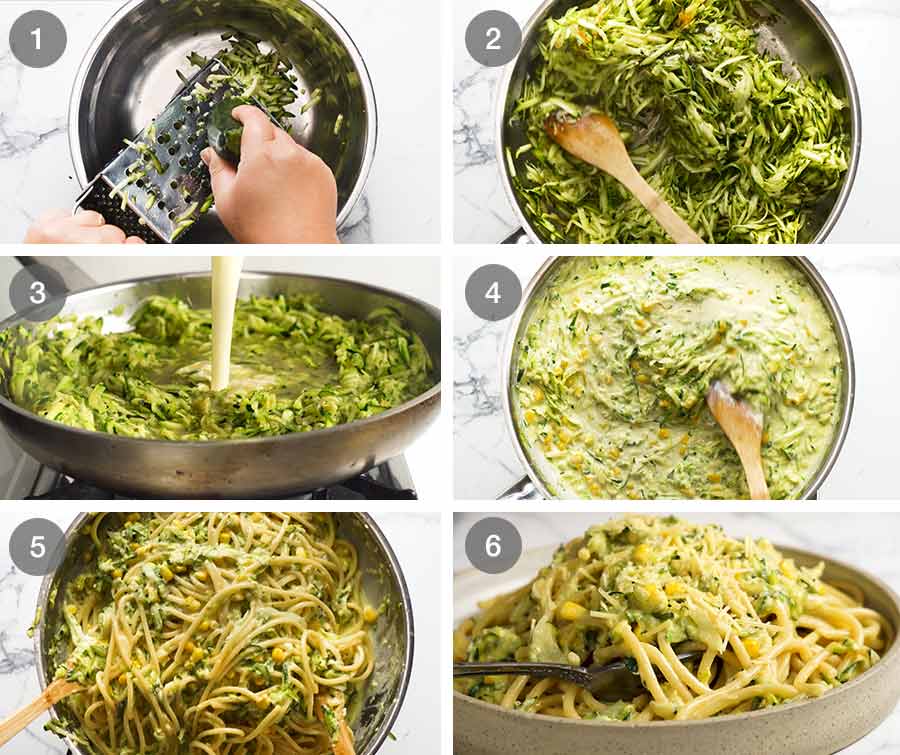
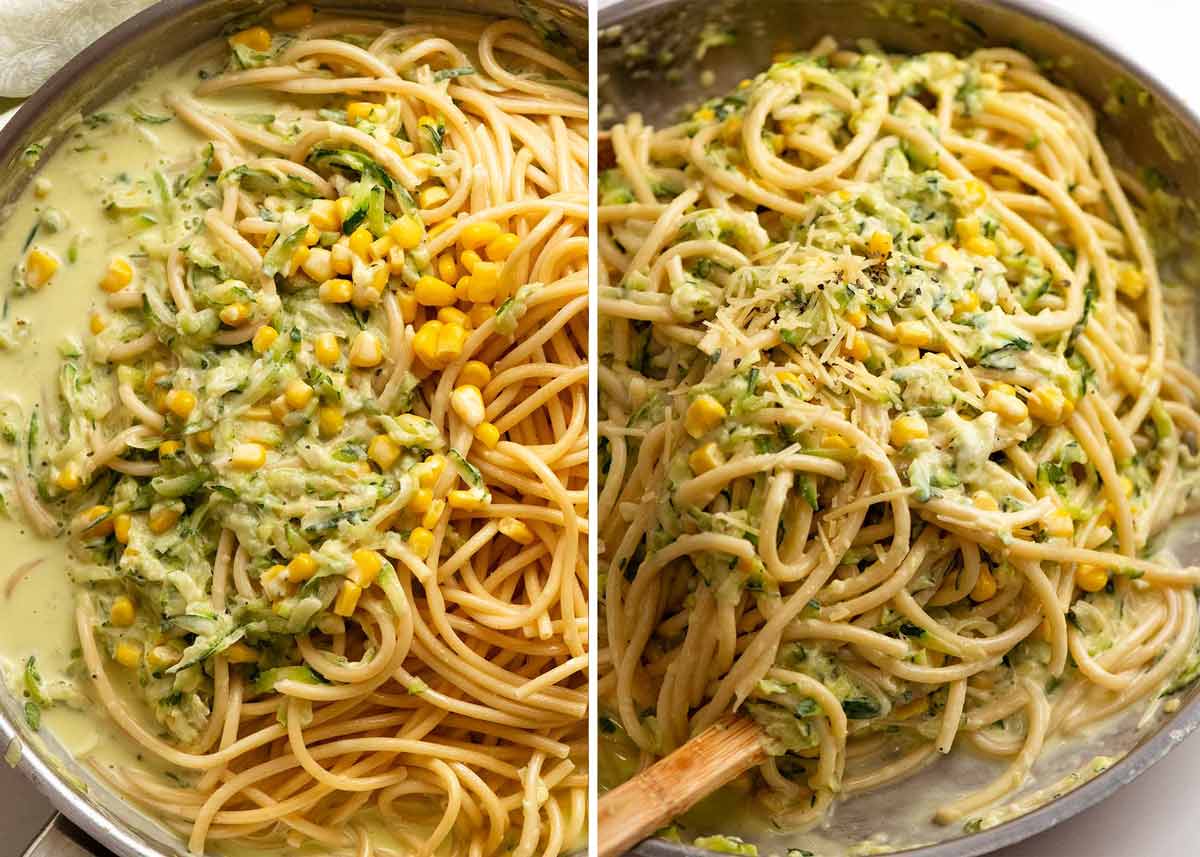
The creamy zucchini sauce will seem somewhat thin because the water coming out of the zucchini dilutes the cream. But don’t be concerned – once the pasta is added, the recipe calls for you to (enthusiastically) toss the pasta in the sauce for around 2 minutes on the stove which reduces the sauce and makes it cling to the pasta rather than pooling in the skillet.

The photo on the left is just when the pasta is added – you see how the sauce is just pooled in the skillet – then on the right is after 2 minutes of tossing. See how there’s no sauce left in the skillet? It’s all on the pasta!

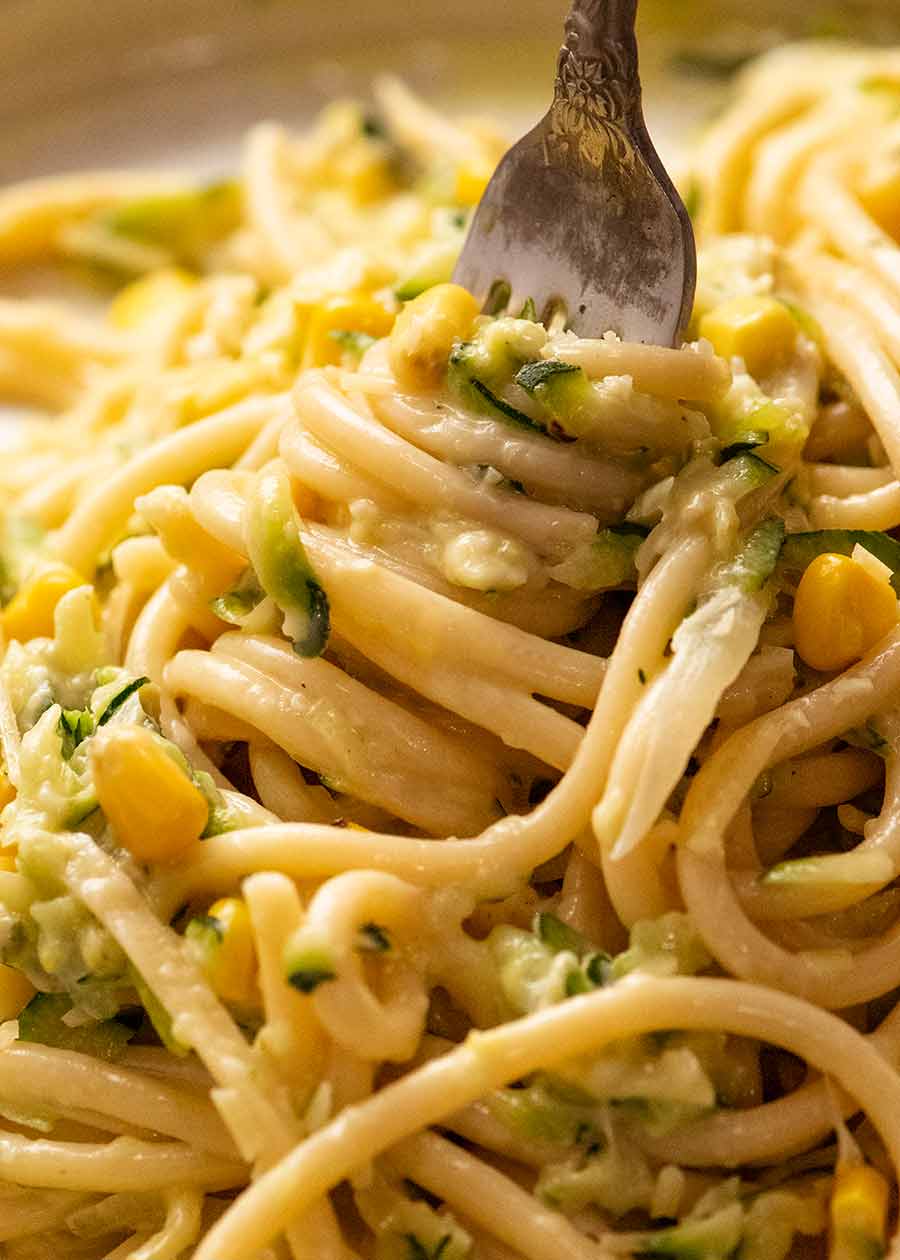
Fork twirling pasta with Creamy Zucchini Pasta Sauce (Courgette)

Who ever would’ve thought you could make something so amazing from just a few drab looking zucchinis??

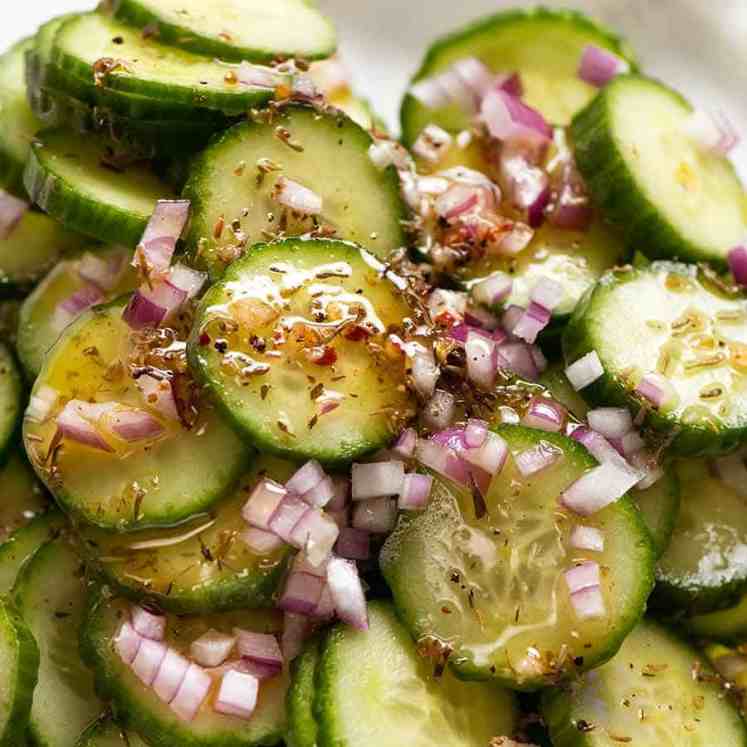
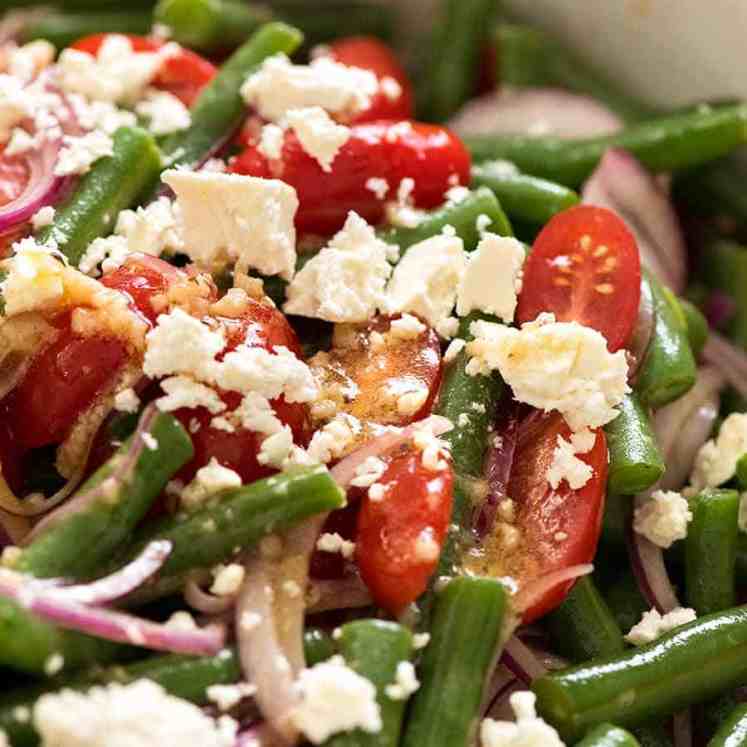
Being that this is loaded with zucchinis, you can totally justify not adding a side salad to your meal. But something fresh and crunchy wouldn’t go astray – try one of these:

And if you’re cooking to impress, add a side of Garlic Bread or Cheesy Garlic Bread. Carb overload? Totally. But sometimes, you’ve just gotta live a little! 😉 – Nagi x


Watch how to make it

Skillet with Creamy Zucchini Pasta Sauce (Courgette)
Print

Pasta with Creamy Zucchini Sauce

Recipe video above. Put the pasta when you start sautéing the zucchini - this way it will be ready at the right time.
Course Mains, Pasta
Cuisine Italian, Western
Keyword courgette pasta sauce, pasta with courgette, pasta with zucchini, zucchini pasta sauce
Prep Time 10 minutes
Cook Time 15 minutes
Servings 4
Calories 631kcal
Author Nagi

Ingredients

  • 50g / 3 tbsp unsalted butter
  • 2 garlic cloves , minced
  • 1/2 onion , finely sliced (brown, white, yellow)
  • 600g / 1.2 lb zucchini (courgette), grated using standard box grater
  • 1/2 tsp EACH salt and pepper
  • 1 cup thickened/heavy cream
  • 3/4 cup chicken or vegetable stock/broth , low sodium
  • 3/4 cup parmesan , finely grated using microplane (Note 1 for store bought)
  • 300g/ 10oz spaghetti, fettucini or other long strand pasta (I used bucatini)

Instructions

Pasta:

  • Bring a large pot of water to the boil with 1 tablespoon of salt.
  • Cook pasta per packet directions MINUS 2 minutes (yes, 2 whole minutes!) - pasta should be a bit too firm in the middle.
  • Scoop out a big mug of pasta cook water, set aside (for sauce loosening, just in case), then drain.

Creamy zucchini sauce:

  • Melt butter in a large skillet or pot over medium high heat.
  • Add garlic and onion, cook for 1 1/2 minutes until onion is slightly golden.
  • Add zucchini, cook for 1 minute. Then add salt and pepper, then stir for 2 minutes until it reduces in volume by about 1/2.
  • Stir in cream, chicken stock and parmesan. Bring to simmer, then reduce heat to medium and simmer for 3 minutes. It will still seem watery because water comes out of the zucchini - don't worry, it cooks down in the next step.
  • Add pasta, then use two wooden spoons to toss well for 2 minutes, or until sauce reduces and is coating the pasta instead of pooling in the skillet. If it gets too thick, add a splash of reserved pasta cooking water. Pasta will finish cooking in this step.
  • Remove from stove, serve immediately, garnished with extra parmesan.

Notes

1. Parmesan - if you grate your own, make sure you either weight the parmesan or pack the cup when measuring. This is because freshly grated parmesan is much fluffier than store bought.
If using store bought parmesan, add it in with the pasta, don't try to melt it in the sauce because it won't melt through the sauce, you'll end up with chunks of melted cheese in the sauce.
2. Nutrition per serving.

Nutrition

Calories: 631kcal | Carbohydrates: 62g | Protein: 18g | Fat: 35g | Saturated Fat: 21g | Cholesterol: 112mg | Sodium: 547mg | Potassium: 729mg | Fiber: 4g | Sugar: 7g | Vitamin A: 1572IU | Vitamin C: 33mg | Calcium: 233mg | Iron: 2mg

Life of Dozer

Yesterday. Poor Geoff – he just wants to enjoy his Chili Mac and Cheese in peace, without Dozer staring at him with rivers of drool down his chest!!

(For those who are new here, Geoff is the local who lives at the Bayview dog beach. He looks after the park like its his own backyard. We are very lucky to have him as part of our community!)

Dozer-watching-Geoff-eat

The post Pasta with Creamy Zucchini Sauce appeared first on RecipeTin Eats.

August 02, 2020

Zucchini Bread Recipe yummy

by , in

My favorite zucchini bread recipe is a sweet and savory, full of flavor, moist bread! Slice a piece of heaven and enjoy this delicious quick bread with your family and friends.

Zucchini is in abundance right now and no better way than to enjoy fresh quick bread this season! Try this chocolate zucchini bread, blueberry zucchini bread or pistachio zucchini bread for more great zucchini recipes.

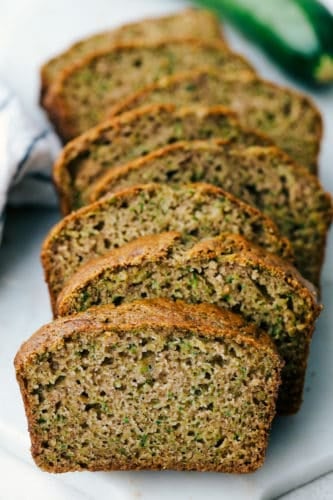
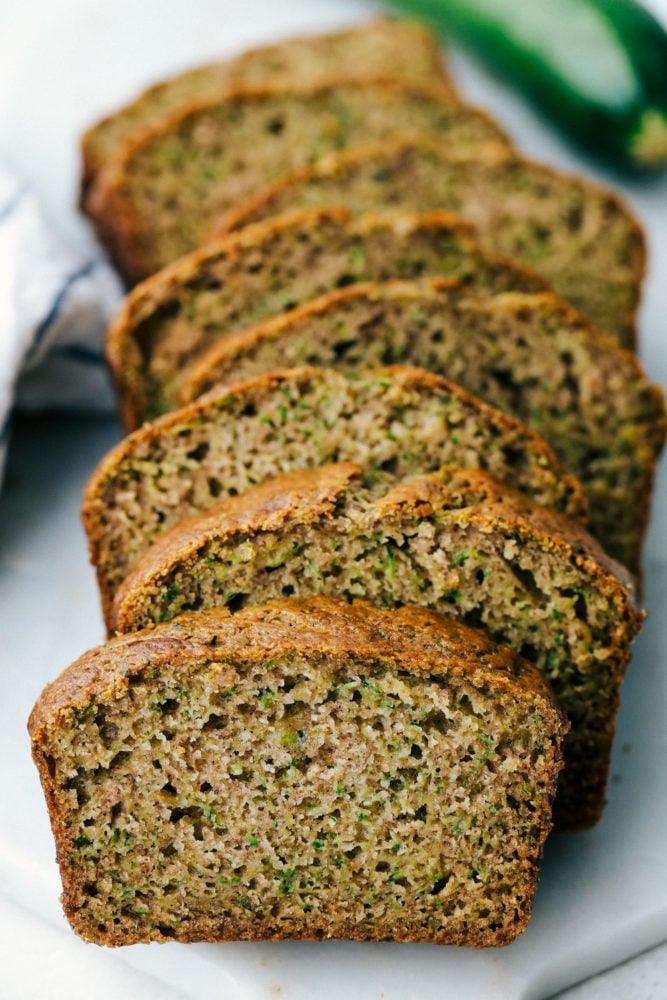
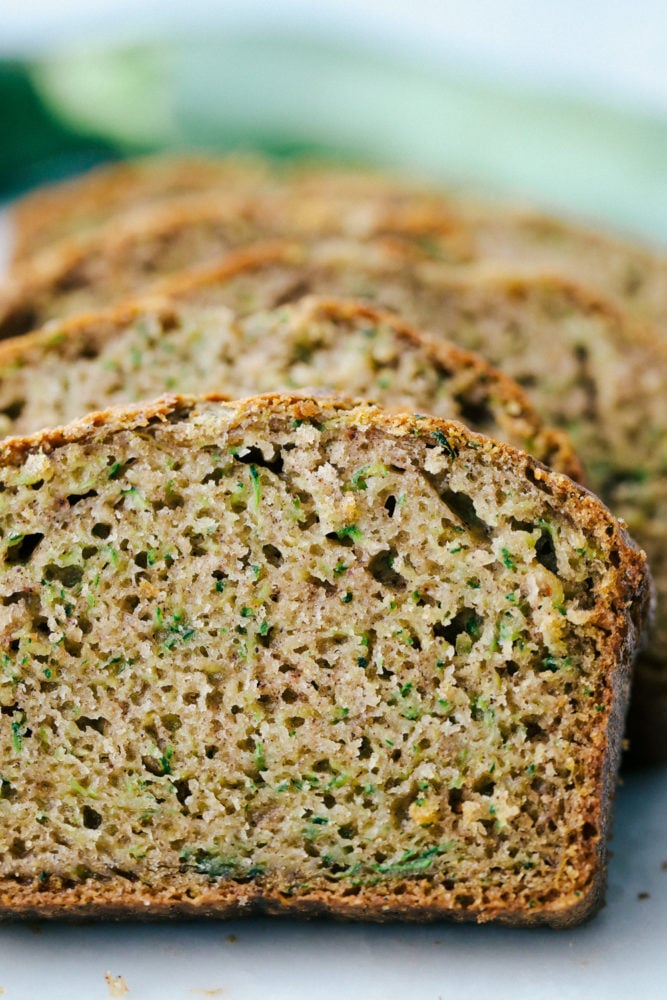
Zucchini bread sliced up in a photo on a white plate.

Zucchini Bread Recipe

I promise this is the only zucchini bread recipe that you will ever need! It has been perfected and is a tried and true recipe that everyone raves about. This zucchini recipe is a MUST make and so delicious! The fresh zucchini creates a hidden flavor that makes this bread sweet and savory. Add in a hint of cinnamon and vanilla for extra flavoring. Then finish the mixture off with a blend of sour cream in the bread mix. Blend together and you will have the perfect combination of zucchini bread!

This tried and true favorite zucchini bread is a family favorite! Be ready to make several loafs of bread just to keep it on hand. It is going to go fast and loved by all. My kids love homemade zucchini bread and beg me to make this every year. It is the ultimate zucchini bread recipe and comes together quickly. The texture is soft, moist and full of green speckles showing all the zucchini hidden inside. You can’t go wrong with this zucchini quick bread!

Easy Zucchini Bread Ingredients:

I just love how quick and easy this zucchini bread is to make. The ingredients are simple and all in the pantry. Mix them all together to create the perfect zucchini bread for your family this summer!

  • Flour: Helps thick the bread and lifts it with the help of baking soda.
  • Cinnamon: Just a hint for a slight spice in the mixture.
  • Salt: Add a pinch!
  • Baking Soda: Raises the loaf of bread as it is baking.
  • Canola Oil: Is best for baking bread.
  • Sugar: Sweetness is added in the bread mix.
  • Brown Sugar: Moistens the bread with sweetness.
  • Eggs: Creates a higher rise when baking.
  • Vanilla: Great for flavoring!
  • Sour Cream: Making the inside moist and savory.
  • Zucchini: Grated and strained for best results.

How to Make the Best Zucchini Bread:

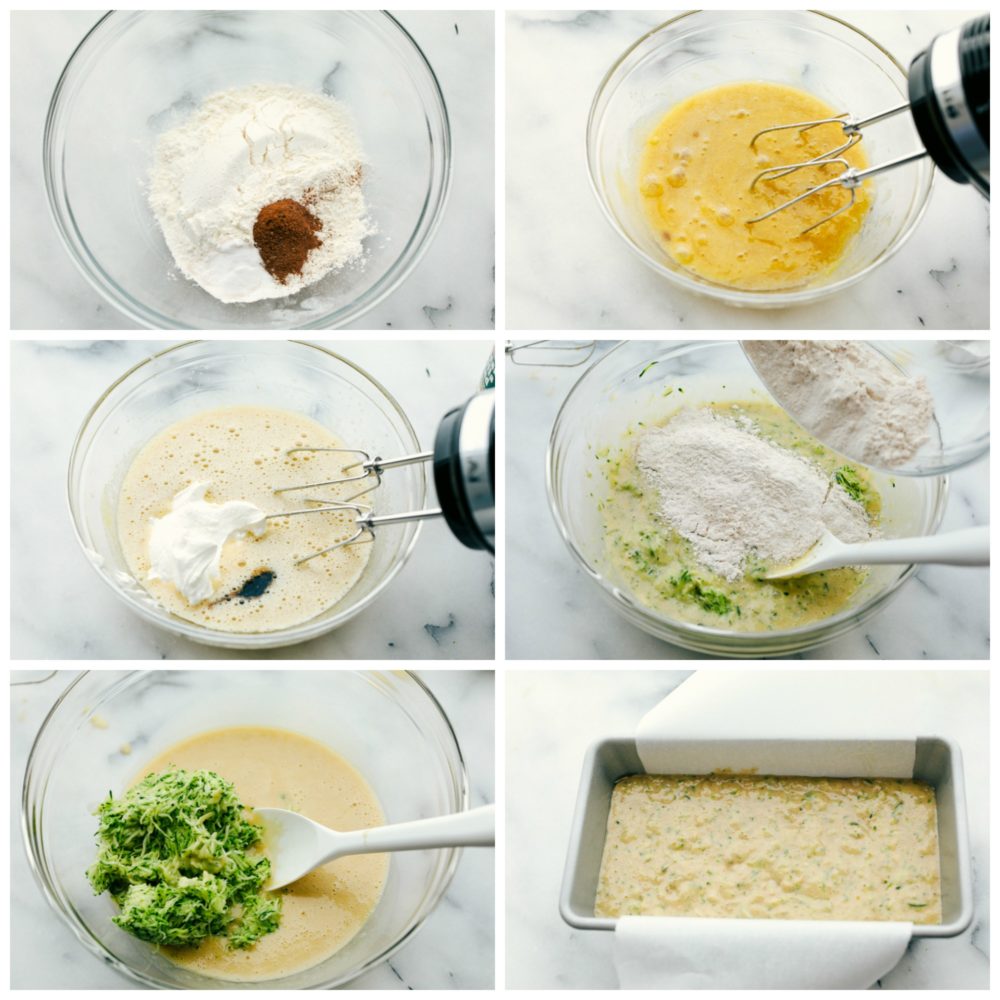
Mix the dry ingredients together first. Then blend together the wet and dry. Simply add in zucchini and bake. This homemade bread will smell so good as it is baking in your oven. One of the best breads you will ever make!

  1. Whisk Dry Ingredients: Preheat oven to 350 degrees. Butter and flour a large 9″ bread pan and set aside. Whisk together flour, cinnamon, baking soda, and salt in a small bowl until combined. Set aside.
  2. Blend Ingredients: In a stand mixer or using a hand mixer, beat together sugars, oil, and eggs for about 1-2 minutes until slightly fluffy. Add vanilla and sour cream.
  3. Add in Zucchini: Fold in the grated zucchini. Lastly, add the remaining dry flour ingredients. Stir to combine and pour into prepared 9″ bread pan. Bake for 50-60 minutes. I set a time for 45 minutes and mine was done at that time. Oven temperatures vary, so just make sure a toothpick entered in the center comes clean.
  4. Serve Slightly Warm: Let cool for about 5-10 minutes and remove from pan. Delicious served a little warm, even with a little butter on top.

The process of making zucchini bread in six photo steps.

Tips and Variations:

Here are a few tips and variations to use when making zucchini bread. It is always fun to add in or create a recipe that is your own. Try these ideas or add-ins for extra help while you are baking in the kitchen.

  • Zucchini: Wash the zucchini and cut of both ends. Leaving the skin on the zucchini, grate the zucchini the best that you can using a paper towel or strainer. Once the water has been released place in the bowl to be blended in the bread mix.
  • Fresh Zucchini: It is best to use garden fresh zucchini. Store bought zucchini has been sitting in several trucks and boxes before it arrives in a store to be sold. It is not as fresh and moist as a garden zucchini is.
  • Add Ins: Chocolate chips or nuts are always a fun add in to put in the zucchini bread. Add in 1/2 cup to 3/4 cup chocolate chips or nuts into the blended mixture before baking.
  • Baked Bread: For best results use a toothpick to insert into the center of the bread. If the toothpick comes out clean that is the best indication that your bread is fully cooked through.

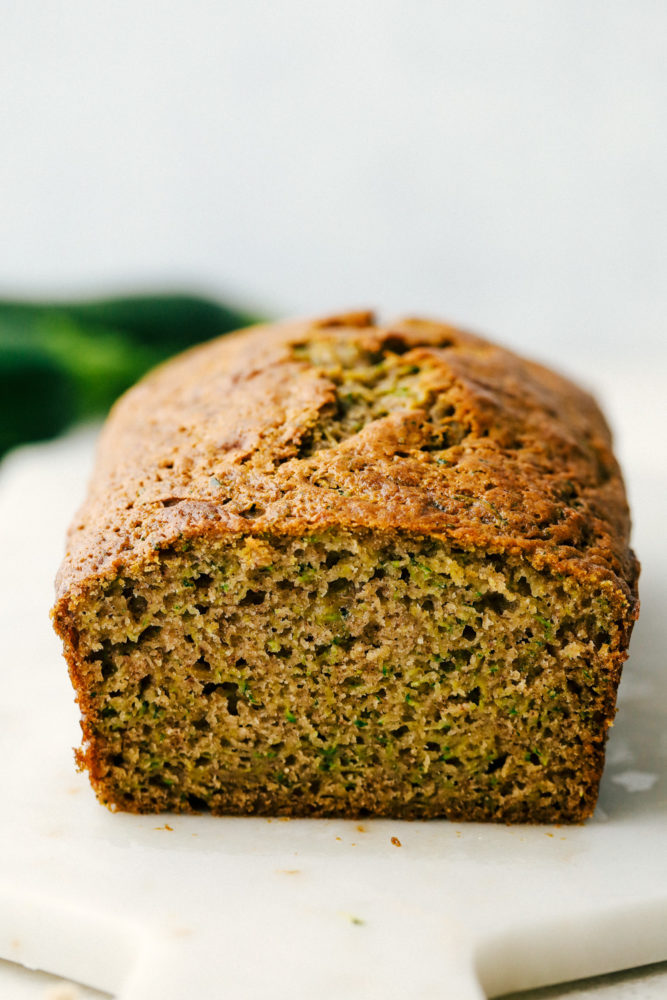
Zucchini bread facing out with the bread sliced.

Storing Quick Bread:

This zucchini bread is not going to last long. It is a favorite family recipe and quickly gone before I am ready to store it. Usually doubling the recipe helps me be able to store a few slices for a day, hopefully!

  • Storing Zucchini Quick Bread: Store the homemade baked bread in a ziplock bag. Leave out in room temperature for about 3 to 4 days long. Slice when ready to serve.
  • Freezing Zucchini Bread: Follow the instructions to make the best zucchini bread. Once it has completely cooled, wrap tightly in plastic wrap and then aluminum foil. Add it to a ziplock or freezer bag. Place in the freezer up to 1 month long. When ready to thaw, place in the refrigerator over night and unwrap to serve.

Photo facing the zucchini bread sliced and laying back.

More Ways to Enjoy Zucchini:

Print

My Favorite Zucchini Bread Recipe (Tried and True!)

My favorite zucchini bread recipe is a sweet and savory, full of flavor, moist bread! Slice a piece of heaven and enjoy this delicious quick bread with your family and friends.
Course Appetizer, Bread, Side Dish, Snack
Cuisine American
Keyword zucchini bread
Prep Time 10 minutes
Cook Time 1 hour
Total Time 1 hour 10 minutes
Servings 12 Slices
Calories 150kcal
Author Alyssa Rivers

Ingredients

  • 1 Cup All Purpose flour
  • 1 teaspoon cinnamon
  • 1/4 teaspoon salt
  • 3/4 teaspoon baking soda
  • 1/4 Cup canola oil
  • 1/2 Cup sugar
  • 1/4 Cup brown sugar
  • 2 eggs
  • 1 teaspoon vanilla
  • 1/4 Cup sour cream
  • 1 1/2 Cups zucchini grated and strained

Instructions

  • Preheat oven to 350 degrees. Butter and flour a large 9" bread pan and set aside. Whisk together flour, cinnamon, baking soda, and salt in a small bowl until combined. Set aside.
  • In a stand mixer or using a hand mixer, beat together sugars, oil, and eggs for about 1-2 minutes until slightly fluffy. Add vanilla and sour cream.
  • Fold in the grated zucchini. Add the remaining dry flour ingredients. Stir to combine and pour into prepared 9" bread pan. Bake for 50-60 minutes. I set a time for 45 minutes and mine was done at that time. Oven temperatures vary, so just make sure a toothpick entered in the center comes clean.
  • Let cool for about 5-10 minutes and remove from pan. Delicious served a little warm, even with a little butter on top. 🙂

Nutrition

Calories: 150kcal | Carbohydrates: 21g | Protein: 2g | Fat: 6g | Saturated Fat: 1g | Cholesterol: 30mg | Sodium: 133mg | Potassium: 34mg | Fiber: 1g | Sugar: 13g | Vitamin A: 69IU | Calcium: 16mg | Iron: 1mg


EntryImageUrl https://therecipecritic.com/wp-content/uploads/2020/07/zucchini_bread2-333x500.jpg