Showing posts with label Ice Cream Recipes. Show all posts
August 08, 2020

Pistachio Ice Cream

by , in

This easy homemade Pistachio Ice Cream recipe is luxuriously creamy with the perfect balance of sweet vanilla flavor and hints of nuttiness from crushed pistachios.

If you enjoy homemade ice cream as much as I do, don’t miss my Orange Ice cream, or this Strawberry Cheesecake Ice Cream recipe that doesn’t require an ice cream maker!
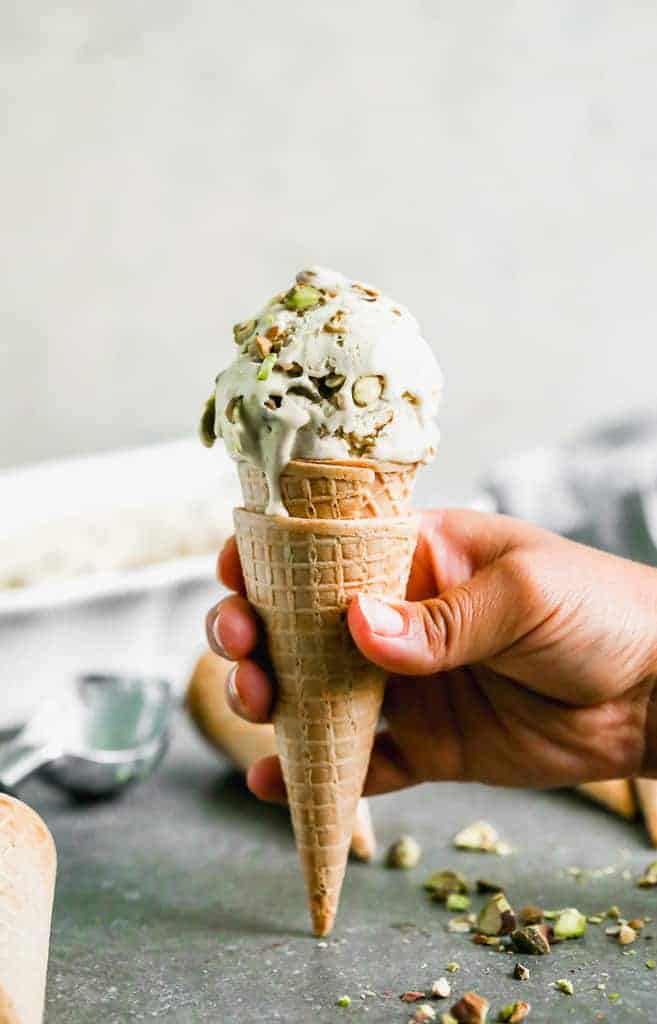
A waffle cone with a scoop of homemade pistachio ice cream in it.

If you’ve tried Pistachio Ice Cream before, chances are good that it’s your FAVORITE flavor, and making it homemade is easier than ever. I use my Kitchen Aid Ice Cream Maker attachment, but I’ve also tested this recipe in a Cuisinart Ice Cream Maker.

If you’re wondering what Pistachio Ice Cream tastes like, rest assured that it’s sweet and creamy like ice cream should be, with subtle hints of savory nuttiness from the pistachios. The vanilla extract and almond extract really give the flavor a delicious boost, and the egg yolks help the texture to be extra creamy and custard-like, like you’d find at a high quality ice cream parlor.

Ingredients for Pistachio Ice Cream:

  • Egg yolks – are essential for the soft and creamy texture in the ice cream and added thickness.
  • Granulated sugar
  • Heavy cream and evaporated milk – the cream and evaporated milk give the ice creamy it’s soft, creamy taste and texture. You can replace the evaporated milk with whole milk (or 2%, but it won be as creamy).
  • Salt – to bring out flavors.
  • Vanilla extract and almond extract – the best highlight flavors with pistachio.
  • Whole shelled pistachios – I like to buy them already shelled. We use half of the pistachios to flavor and color the simmering milk, and then stir pistachio pieces into the ice cream at the end.
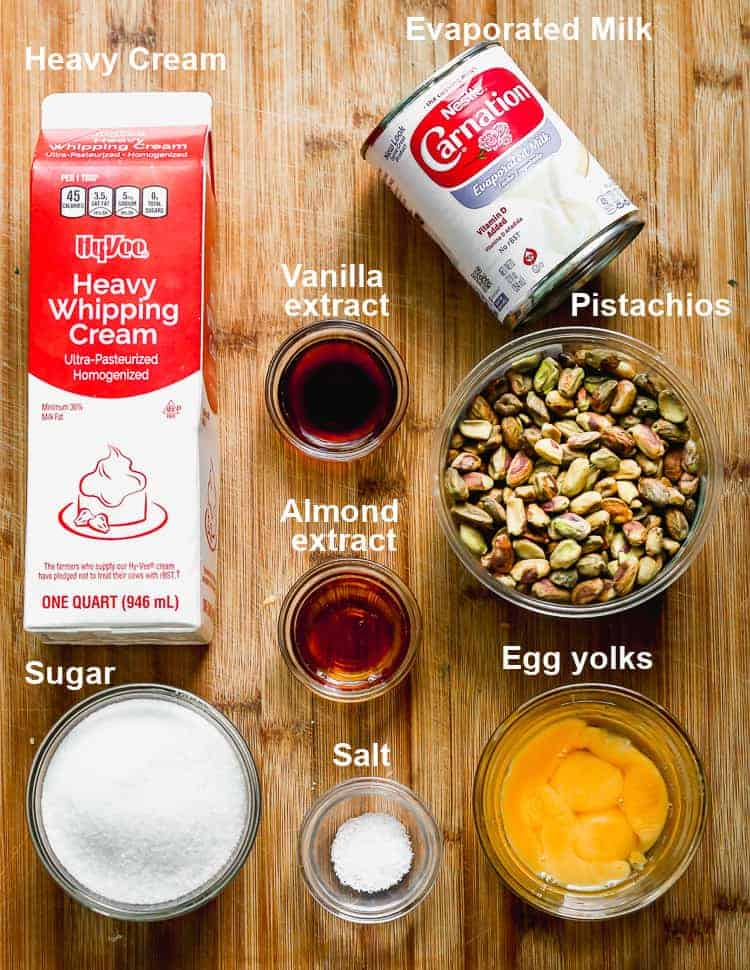
The ingredients needed to make Pistachio ice cream.

How to make Pistachio Ice Cream:

  • Add ½ cup pistachios and ¾ cup sugar to a food processor and process until finely chopped and blended.
  • Add evaporated milk and cream to a saucepan over medium-low heat. Stir in the pistachio mixture. Cook, stirring occasionally, until almost simmering and sugar has dissolved, 3-4 minutes. Remove from heat.
  • Add egg yolks to a bowl and whisk well. Slowly whisk 1 cup of hot milk mixture into the yolks. Pour the egg mixture into the saucepan and cook, stirring continuously, until thickened, about 8-10 minutes. (Do not allow the custard to boil.)
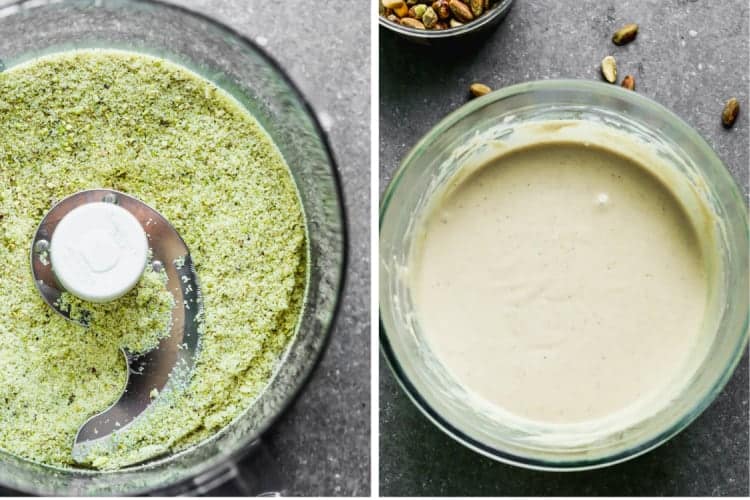
Two process photos for crushing pistachios and sugar, and making custard for pistachio ice cream.

  • Pour the custard through a fine-mesh sieve set over a bowl; discard what’s left in the strainer. Cover mixture and refrigerate for several hours or overnight, until completely chilled. (Depending on the your ice cream maker, you may need to freeze the bowl of the ice cream maker overnight as well).
  • Stir in almond and vanilla extract and then pour the mixture into an ice cream maker and freeze/churn according to the manufacturer’s instructions.
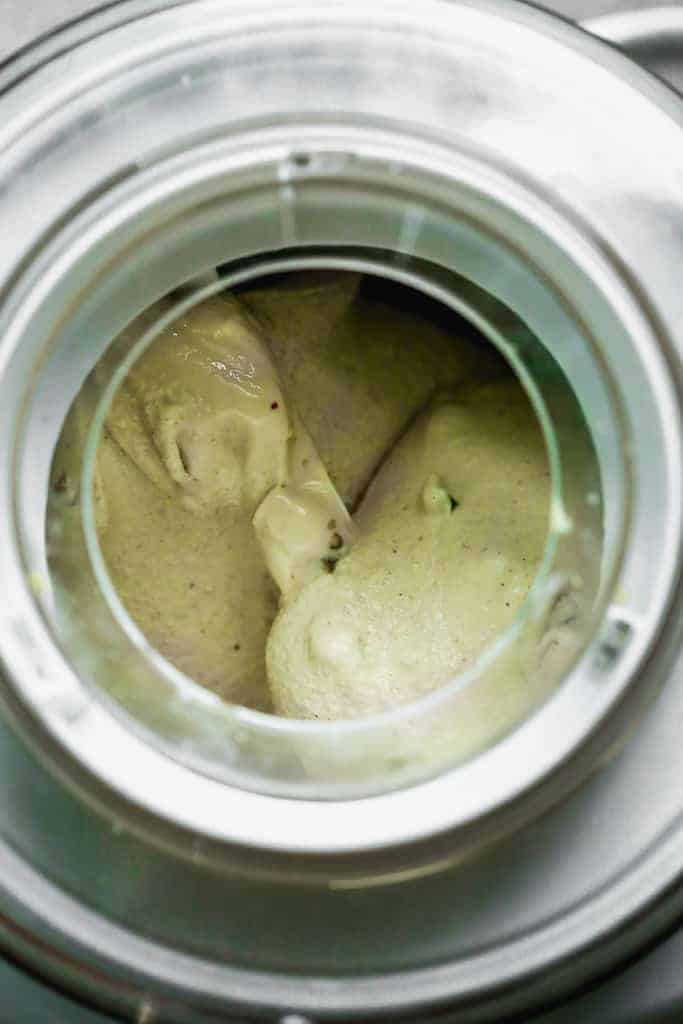
Pistachio ice cream churning in an ice cream maker.

  • Stir in remaining 1/2 cup pistachios. Transfer the ice cream to a container, cover and freeze until firm, at least 3 hours.
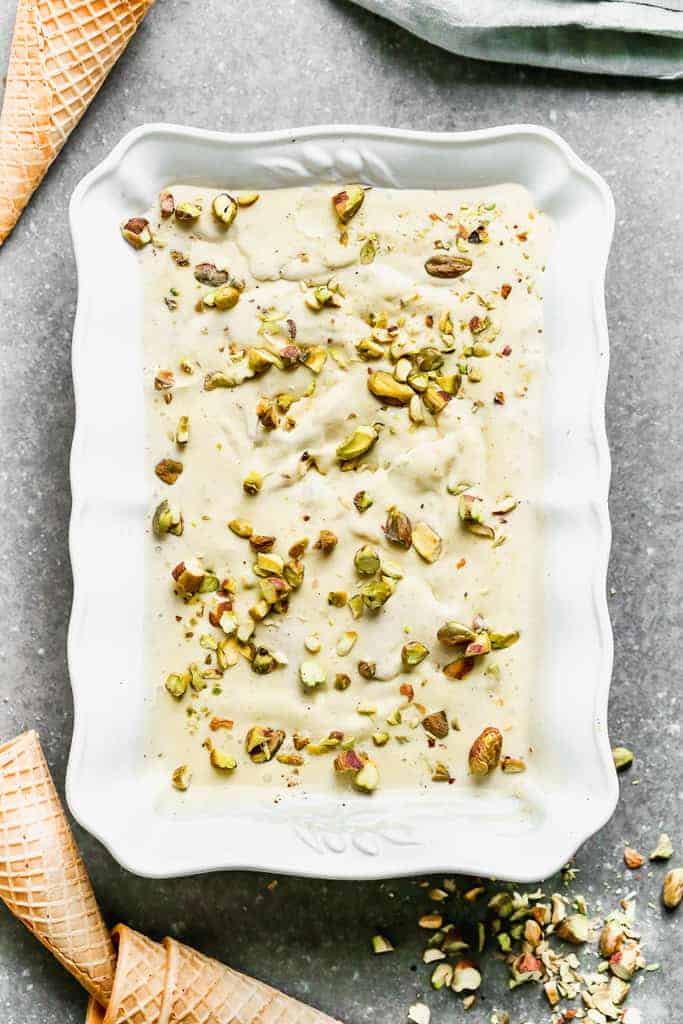
Frozen homemade pistachio ice cream in a rectangle container for serving.

Homemade ice cream will keep in the freezer for 1-2 weeks (much longer than that and it may start to form ice crystals on top).

FOLLOW ME on FACEBOOKTWITTERINSTAGRAM and PINTEREST for more great recipes!

A waffle cone with a scoop of homemade pistachio ice cream in it.
Print Add to Collection

Pistachio Ice cream

This easy homemade Pistachio Ice Cream recipe is luxuriously creamy with the perfect balance of sweet vanilla flavor and hints of nuttiness from crushed pistachios.
Course Dessert
Cuisine American
Prep Time 5 minutes
Cook Time 15 minutes
Chill Time: 8 hours
Total Time 8 hours 20 minutes
Servings 10
Calories 353kcal

Ingredients

  • 4 egg yolks
  • 3/4 cup granulated sugar
  • 2 cups heavy cream
  • 1 cup evaporate milk
  • 1/2 teaspoon salt
  • 2 teaspoons vanilla extract
  • 1 teaspoon pure almond extract
  • 1 cup whole shelled pistachios , roughly chopped, divided

Instructions

  • Add ½ cup pistachios and ¾ cup sugar to a food processor and process until finely chopped and blended.
  • Add evaporated milk and cream to a saucepan over medium-low heat. Stir in the pistachio mixture. Cook, stirring occasionally, until almost simmering and sugar has dissolved, 3-4 minutes. Remove from heat.
  • Add egg yolks to a bowl and whisk well. Slowly whisk 1 cup of hot milk mixture into the yolks. Pour the egg mixture into the saucepan and cook, stirring continuously, until thickened, about 8-10 minutes. (Do not allow the custard to boil.)
  • Pour the custard through a fine-mesh sieve set over a bowl; discard what’s left in the strainer. Cover mixture and refrigerate for several hours or overnight, until completely chilled. (Depending on the your ice cream maker, you may need to freeze the bowl of the ice cream maker overnight as well).
  • Stir in almond and vanilla extract and then pour the mixture into an ice cream maker and freeze/churn according to the manufacturer's instructions.
  • Stir in remaining 1/2 cup pistachios. Transfer the ice cream to a container, cover the surface with plastic wrap, and freeze until firm, at least 3 hours.

Video

Notes

*Homemade ice cream will keep in the freezer for 1-2 weeks (much longer than that and it may start to form ice crystals on top.

Nutrition

Calories: 353kcal | Carbohydrates: 23g | Protein: 6g | Fat: 27g | Saturated Fat: 14g | Cholesterol: 151mg | Sodium: 165mg | Potassium: 247mg | Fiber: 1g | Sugar: 19g | Vitamin A: 916IU | Vitamin C: 1mg | Calcium: 120mg | Iron: 1mg

Have you tried this recipe?! 

RATE this recipe and COMMENT below! I would love to hear your experience.

This post contains affiliate link. I love sharing my favorite products with you!

The post Pistachio Ice Cream appeared first on Tastes Better From Scratch.


from Tastes Better From Scratch https://ift.tt/2PNXVI1
August 06, 2020

How to Make Japanese Mochi Ice Cream

by , in

Does anyone else think that one of the best parts about visiting a great Japanese restaurant is ordering mochi ice cream as dessert? With deliciously refreshing ice cream on the inside and perfectly soft and chewy mochi (a Japanese rice cake) on the outside, it’s no wonder that this popular dessert from Japan is popping up in the frozen aisles of grocery stores everywhere. 

Making homemade mochi ice cream is so much easier than you would think! And a lot more fun than just opting to toss a package of Trader Joe’s mochi ice cream into your shopping cart. 

This mochi ice cream recipe takes just a few minutes to make and is amazingly customizable! I’m using vanilla ice cream, but the sky is the limit here! Feel free to use any storebought ice cream, or my delicious homemade Ube Ice Cream, or even sorbet, to make this dessert truly your own! 

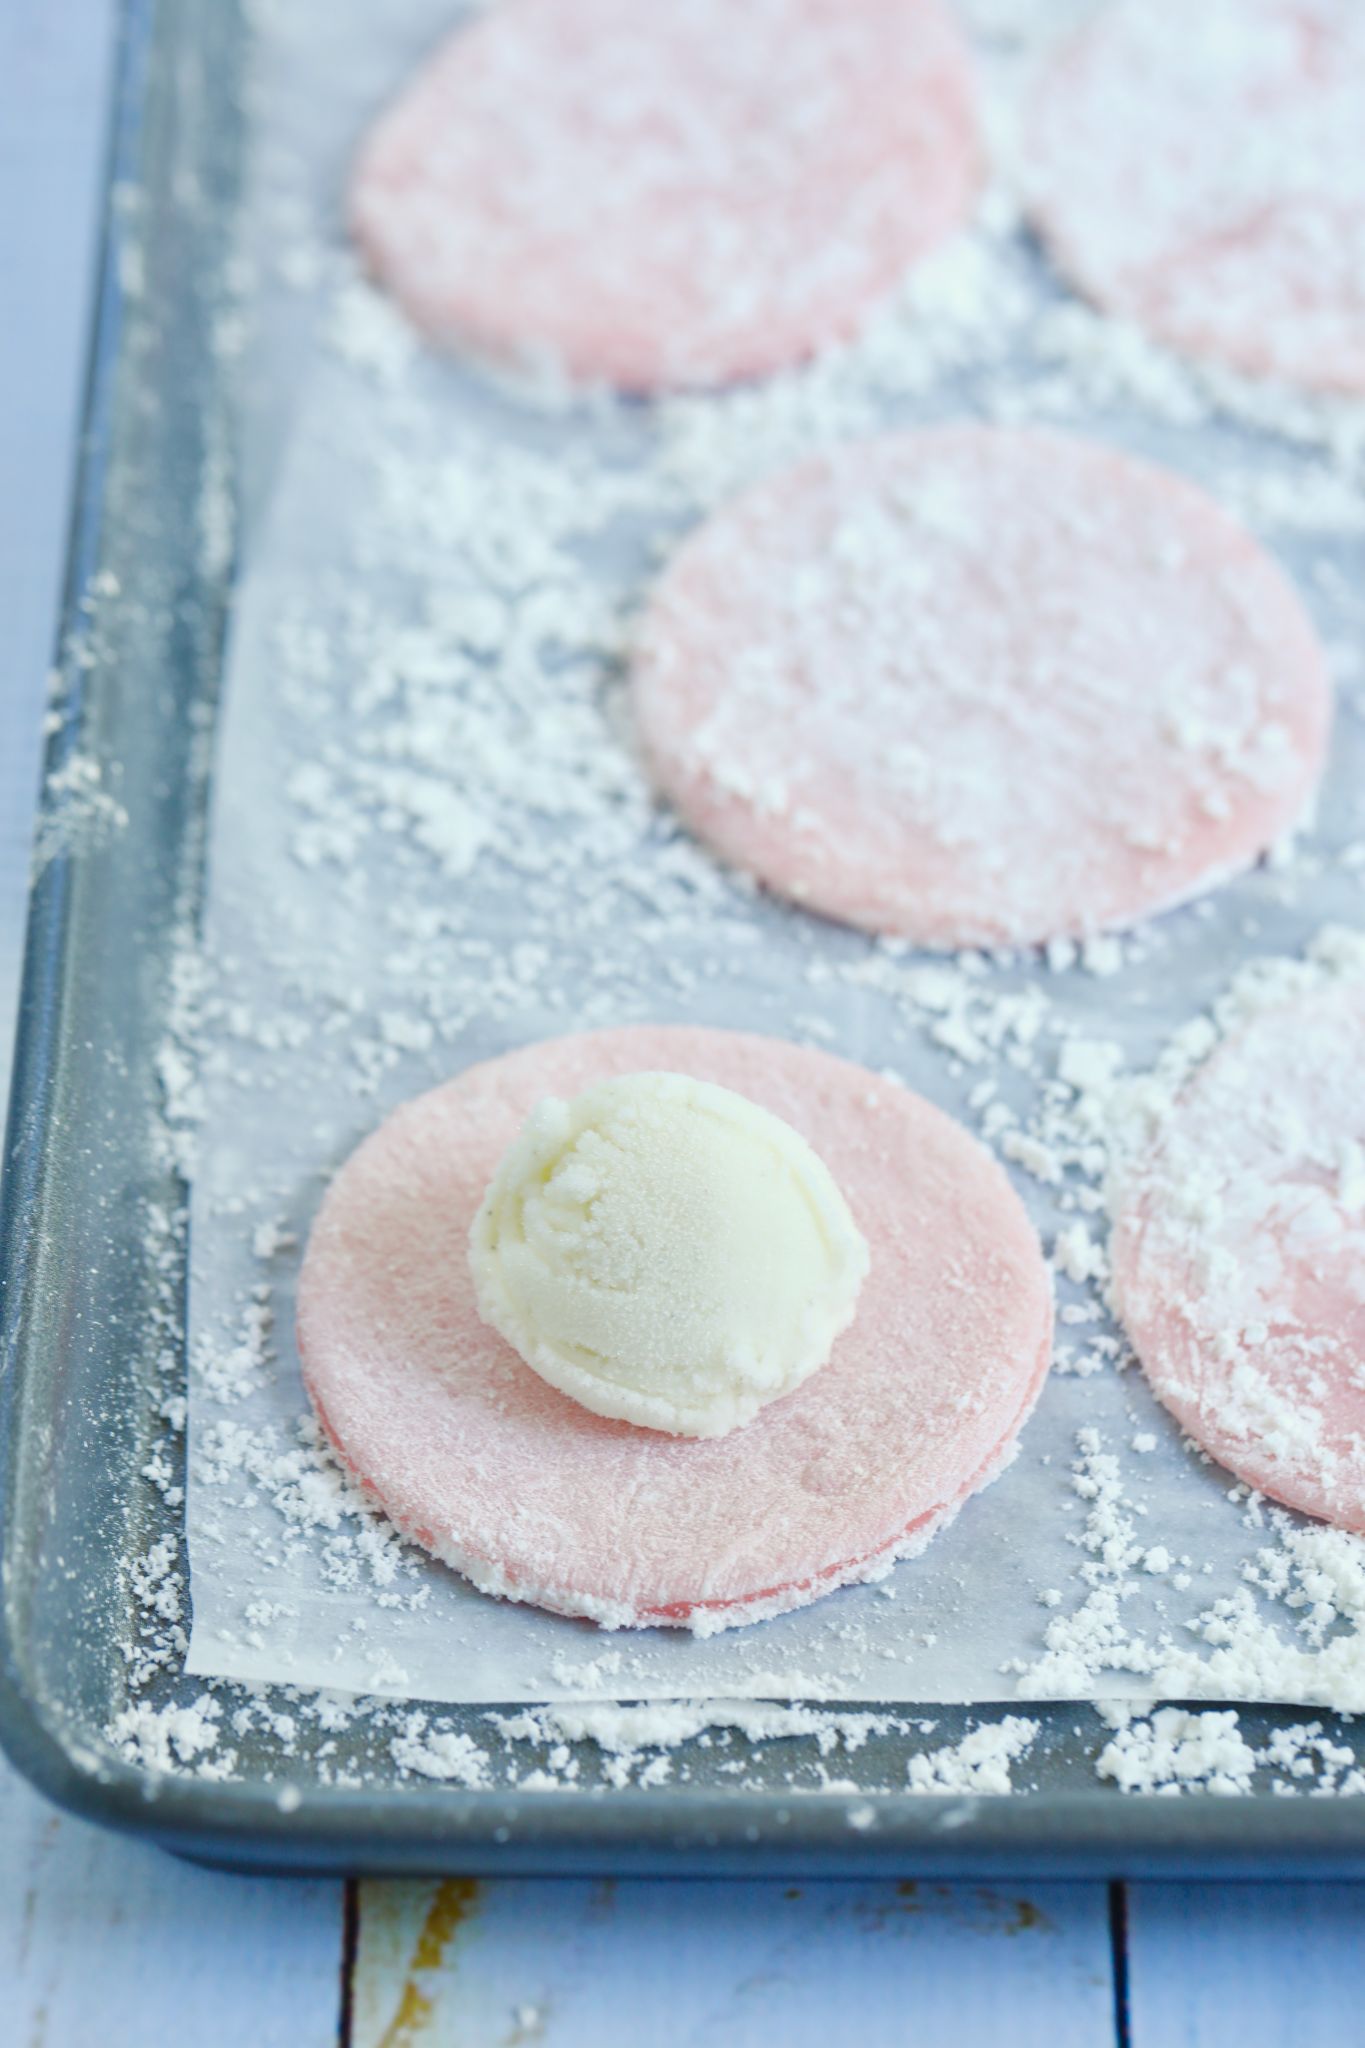
Mochi laid out and ready for ice cream.

What is Mochi Ice Cream?

Mochi is made with glutinous rice, which is turned into flour and eventually into a rice cake. It has a rich history in Japan and, while it’s enjoyed year-round, it’s especially eaten around Japanese New Year.

In this recipe, however, mochi is the sweet rice dough that encases your ice cream of choice. It has an incredible squishy texture and is just slightly sweet, helping to balance out the sweetness of your ice cream of choice. 

What You Need To Make Mochi Ice Cream

  • Measuring cups
  • Small tray
  • Parchment paper and plastic wrap
  • Ice cream scoop or spoon
  • Microwave safe bowl
  • Rubber spatula
  • Food coloring (optional)

My Mochi Ice Cream recipe before rolling.

How To Make Mochi Ice Cream

Mochi ice cream is one of those desserts that may seem out of reach for a person to make — but trust me, it is such a simple process! I had never made it before, either. In fact, this is a great project to get the kids involved in the kitchen. Here’s how you make mochi ice cream (and don’t forget to get the full recipe with measurements, on the page down below):

  1. Using a small ice cream scoop or a spoon, scoop 12 scoops of ice cream, they should be about the size of 2 tablespoons, and place them on a parchment paper-lined tray. Pop this tray into the freezer.
  2. Combine the sweet rice flour, sugar, and water in a large microwave-safe bowl and cover with plastic wrap. Microwave for 1 minute. 
  3. Stir the rice flour mixture with a whisk to get rid of any lumps, then recover with plastic wrap and microwave again for 1 minute. 
  4. Dip a rubber spatula in water and stir the rice mixture again. Don’t use your whisk this time, as the dough will now be very sticky.
  5. Cover the mixture one last time and microwave for another 30 seconds. (Stir in your food dye here, if you are using.)
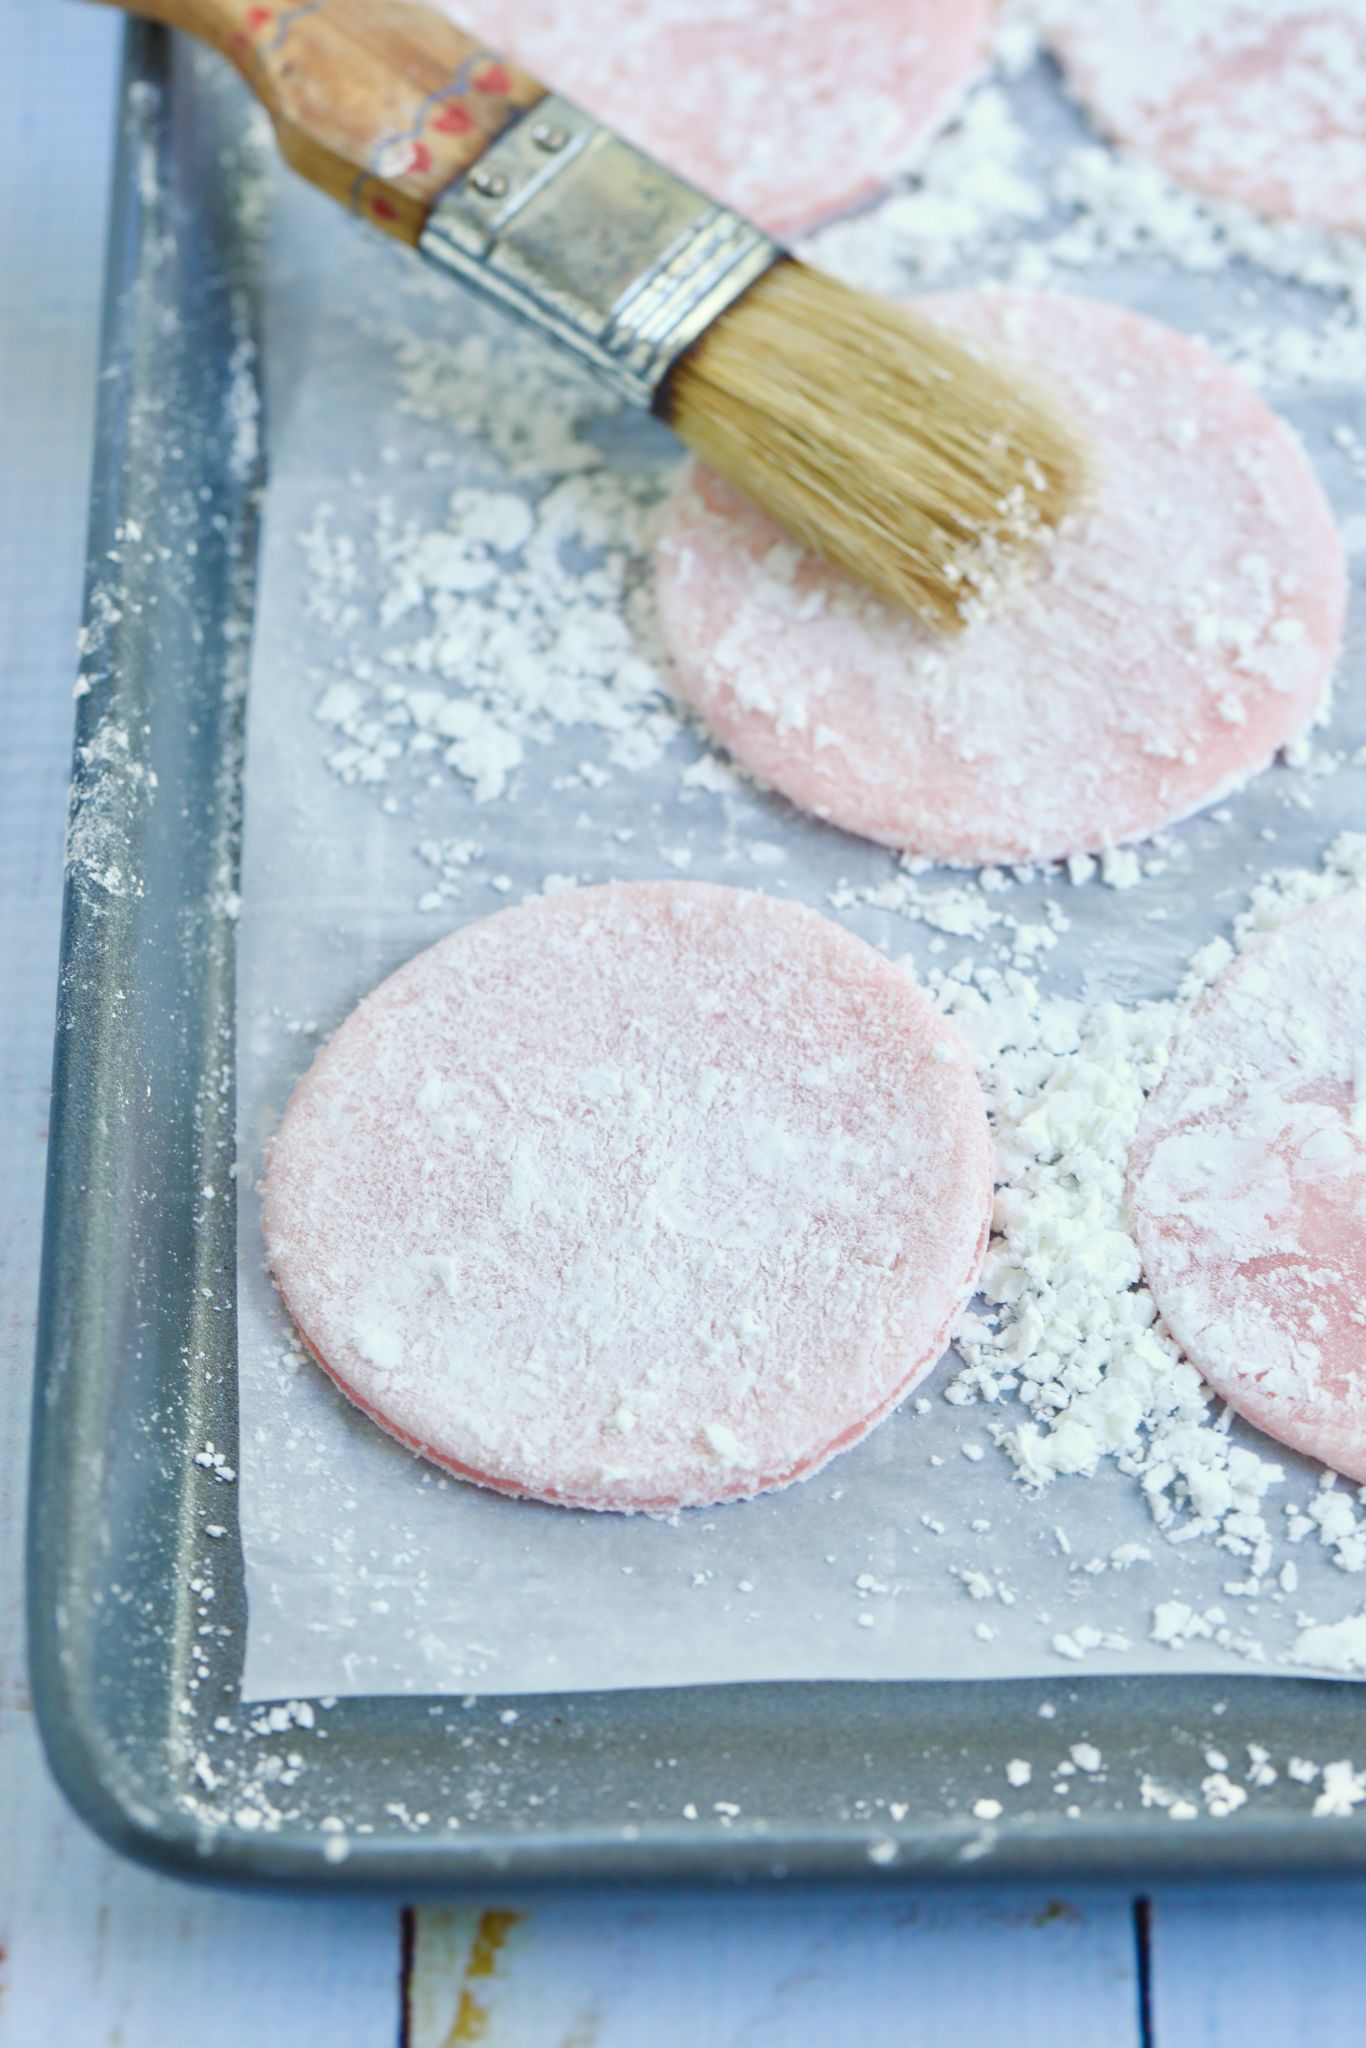
  6. Place a large piece of parchment paper on your counter and cover it with a generous dusting of cornstarch (or potato starch). 
  7. With a wet spatula, scrape the dough out of the bowl and onto the cornstarch. Dust the top of the dough with more cornstarch.
  8. Roll the dough into a rectangle shape, no less than 1/4-inch thick. Make sure you keep dusting the top and bottom of the dough with cornstarch to prevent any sticking.
  9. Once rolled out, place the parchment paper on a cookie sheet and into your refrigerator to set. This will take around 30 minutes. 
  10. After the dough has set, cut circles of the dough using a 3 ¾ inch (9½ cm) cutter. If you don’t have a cookie or biscuit cutter, use an empty tin can or drinking glass. 
  11. Pick up one circle of dough and brush off any excess cornstarch. Now, working quickly, take one scoop of ice cream from the freezer and place it in the center of the circle. Press the dough’s edges around the scoop of ice cream, forming a ball, and squeeze to seal. 
  12. To help preserve its shape, wrap the mochi ice cream ball in cling wrap and place them seam side down back in the freezer to set. Repeat with the remaining circles of dough and ice cream balls.
  13. Allow the mochi to freeze for a minimum of 2 hours. 
  14. When ready to eat, let the mochi ice cream sit for a few minutes to soften. 

Gemma’s Pro Chef Tips for Making Mochi Ice Cream

  • As I’ve said, mochi dough is very sticky, so don’t be shy about using your cornstarch! It will help you handle the dough, and any excess will brush off easily once you’re ready to assemble the mochi balls.
  • Keep your tools and ice cream cold, especially your ice cream scoop, and work with only one ice cream ball out of the freezer at a time. 
  • To help the mochi balls retain their round shape, wrap them in plastic wrap. You can also use an empty egg carton in the freezer to make sure they stay seam-side down.
  • Check the wattage of your microwave, as your cooking times may be slightly different. The times in this recipe were written with my 1200 watt microwave in mind.
  • Regular rice flour will not work for this recipe. You will need sweet rice flour. 
  • Buy sweet rice flour at any local Asian grocery store or find it online! I use Mochiko Sweet Rice Flour, which you can purchase on Amazon.

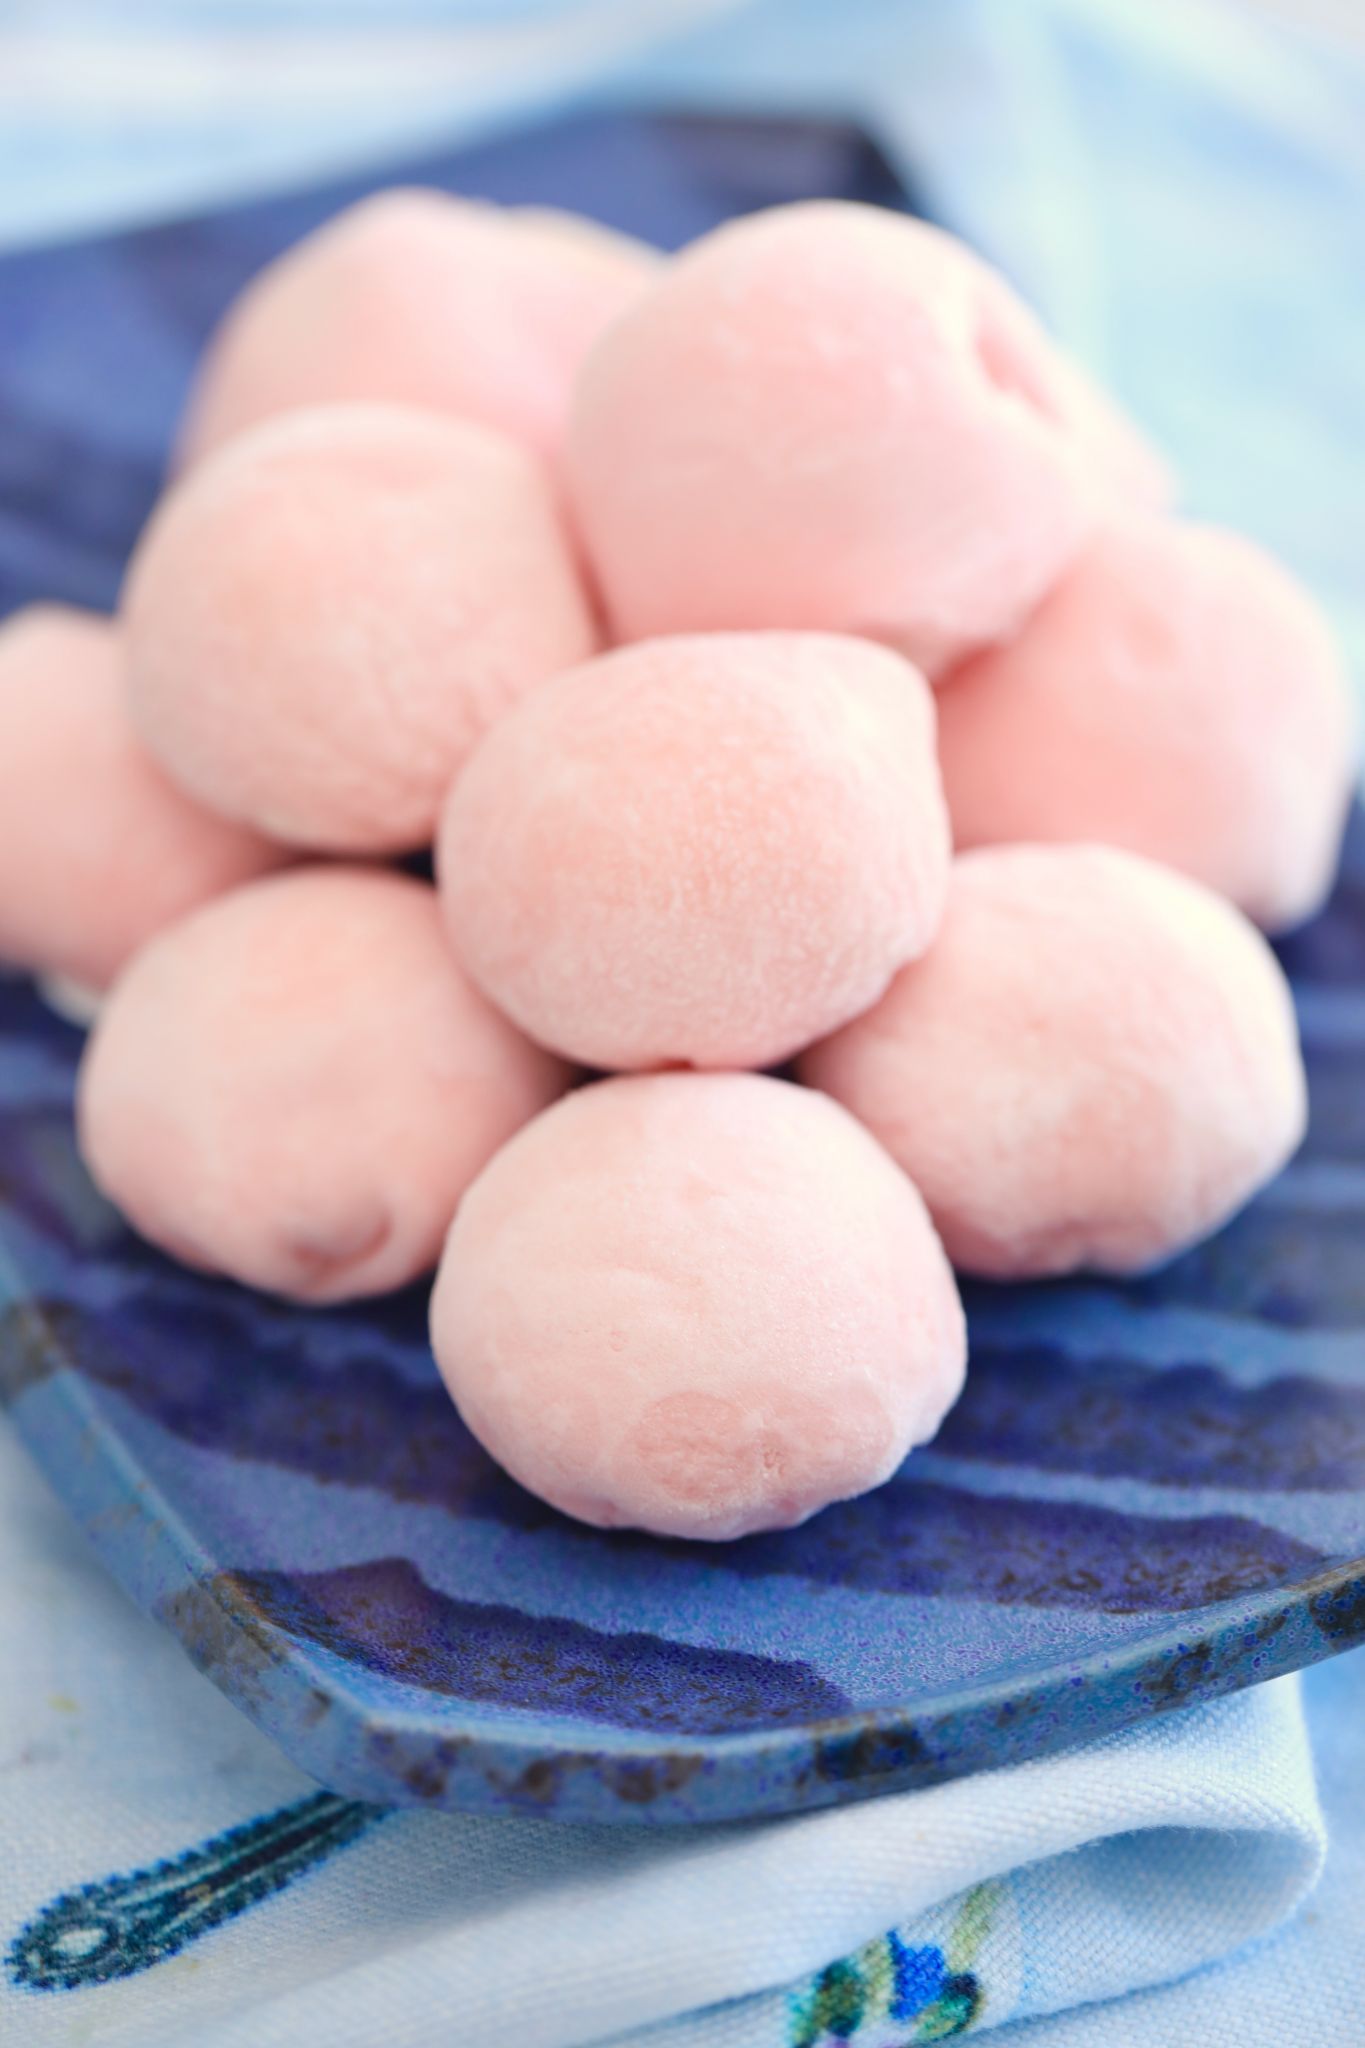
My finished Japanese Mochi Ice Cream recipe, pink, and stacked high.

How Do I Store Mochi Ice Cream?

Homemade mochi ice cream can be kept in an airtight container in your freezer for up to 1 week. Make sure when you’re ready to eat, you let them sit out for a few minutes to soften before biting in! 

Make More Ice Cream!

And don’t forget to buy my Bigger Bolder Baking Cookbook!

Full (and printable) recipe below!

A mound of Japanese Mochi Ice Cream
Print

Simple Japanese Mochi Ice Cream Recipe

My Japanese Mochi Ice Cream recipe takes something that looks complex and simplifies it so everyone can enjoy their little balls of ice cream wrapped in sweet rice dough.
Course Dessert
Cuisine Japanese
Prep Time 20 minutes
Cook Time 3 minutes
Servings 12 mochi
Author Gemma Stafford

Ingredients

  • 1 ½ cups (8oz/225g) vanilla ice cream
  • 1 cup (5½oz/160g) sweet glutinous rice flour
  • 1/4 cup (2oz/57g) granulated sugar
  • 1 cup (8oz/225ml) water
  • A few drops of red food coloring (optional)
  • Cornstarch for dusting (or potato starch)

Instructions

  • Line a small tray with parchment paper.
  • With a small ice cream scoop or spoon, scoop out twelve 2 tablespoon-sized scoops of ice cream (about .75oz /20g) onto the prepared and place in the freezer.
  • In a large microwave-safe bowl combine the sweet rice flour, sugar, and water, cover with plastic wrap and microwave for one minute.
  • Stir the rice flour mixture with a whisk to remove any lumps, re-cover with the plastic wrap, and microwave for another minute.
  • Dip a rubber spatula in water and stir the rice mixture again (do not use the whisk this time - it will be too sticky).
  • Cover the rice mixture one more time and microwave for another 30 seconds. It will now be a sticky dough. If adding in food dye stir it in at this point until it's evenly throughout the dough.
  • Place a large parchment paper on your counter and cover the paper with a generous dusting of cornstarch (or potato starch).
  • With a wet spatula, scrape the dough onto the cornstarch and dust the top of the dough with more cornstarch.
  • Roll the dough into a rectangle no less than 1/4 inch thick (about 12x14inches/30x35cm). Keep dusting the top and bottom of the dough with cornstarch as you roll or it will stick.
  • Once the dough is rolled out, place the parchment paper on a cookie sheet and place in the refrigerator to set for 30 minutes.
  • Once the dough has set, cut circles of dough with a 3 ¾ inch (9½ cm) cutter.
  • Pick up one circle of dough and brush off the excess cornstarch from both sides.
  • Working quickly, take one scoop of ice cream, place in the center of the circle flat side facing you. Press the edges of the dough together around the ice cream ball, squeezing to seal.
  • Wrap the mochi ice cream balls in cling wrap and place seam side down back in the freezer to set. You could use an egg carton to keep them upright. Repeat with remaining circles of dough and ice cream balls. Allow mochi to freeze totally for a minimum of 2 hours in the freezer.
  • When ready to eat, remove from the freezer and let sit for a few minutes to let soften.
  • Store in an airtight container in the freezer for up to 1 week.

Video

The post How to Make Japanese Mochi Ice Cream appeared first on Gemma’s Bigger Bolder Baking.


from Gemma’s Bigger Bolder Baking https://ift.tt/3icO4rd
via IFTTT
May 03, 2016

Pista Ice - Pista Popsicle Recipe

by , in
Pista Ice Popsicle Recipe

Pista Ice/ Pista Kuchi Ice as we call it during our school days is my favorite next to Rose milk Ice. I wanted to post it after rose milk ice but somehow it got missed so this time when I saw this essence at Nilgiris, I atonce picked it up and made it the next day and enjoyed it.

I wanted to recreate the pista ice that I had yrs back and this came close to it.

Pista Ice Popsicle Recipe


Check out other popsicle recipes :
Pista Ice Popsicle Recipe

Pista Ice Popsicle Recipe

Preparation Time:7 hrs | Processing Time : 10 mins | Makes:6
Recipe Category: Popsicles | Recipe Cuisine: Indian

Milk - 3 cups
Pista Essence - few drops
Sugar - 1/4 cup
Pistachios - around 20

Method:

  1. Boil milk and simmer for 5mins until milk is reduced a little.Then cool down completely and add sugar.
    How to make Pista Ice - Step1
  2. Add pista essence and mix well.
    How to make Pista Ice - Step2
  3. Mix well,Set aside.Now take pistachios in a mixer and grind it to a coarse mixture.
    How to make Pista Ice - Step3
  4. Add pista powder to milk and mix well.Whisk it well.Pour the mixture into popsicle moulds or any teacups till 3/4th of the rim.
    How to make Pista Ice - Step4
  5. Cling wrap it with aluminum foil,Carefully prick with a knife then insert icecream sticks.Alternately you can even close it with your popsicle mould lid itself.Freeze it for atleast 8 hrs.Then take it out and carefully show the outer surface under running tap water.Carefully pull out the popsicles.
    How to make Pista Ice - Step5
Serve immediately!
Pista Ice Popsicle Recipe

My Notes:

  • Dont have a popsicle mould?! dont worry use disposable plastic cups or even thick paper cups cling wrap aluminium foil and us icecream sticks and freeze it.It demoulds easily or you can even cut the cups to get the popsicles out.
  • Adding pista powder is optional.
  • I added Pista Elachi essence Bakers brand.
  • Freezing for atleast 6 hrs is required but I kept it overnight.
  • For easy demoulding - show the popsicle moulds in warm water, then pull the stick out slowly to get the ice pops clean.
Pista Ice Popsicle Recipe

Enjoy pista popsicles!!


Pista Ice Popsicle Recipe


Keywords: Sharmis Passions Recipes
September 11, 2014

Mango Ice Cream Recipe

by , in
"Mangoes are the quintessential fruit of India. They come in many different varieties, shapes, colors and sizes, and are enjoyed in many different ways from chutneys, drinks, ice cream, and of course eaten as a fresh fruit. Mangoes make a wonderful Indian ice cream. Indian ice cream is not churned during freezing resulting in a denser textured ice cream. Mangoes improve digestion and help with constipation. They are also high in iron and good for pregnant women and for people with anemia."

Mango Ice Cream Recipe

Serves: 4 to 6
Prep time: 10 minutes
Cook time: 25 minutes + 25 minutes cooling + 3 hours to set in the freezer
Freezer life: 3 weeks

Ingredients:

2 cups (500 ml) whole milk or plain soy milk
Seeds from 5 whole green cardamom pods, crushed
½ cup (100 g) sugar
1 large fully ripe mango (about 1 lb/500 g)

Directions:

1. Pour the milk into a heavy bottomed, medium-sized saucepan. Bring to a rolling boil over high heat, stirring frequently as it comes to a boil. Don’t let the milk boil over and out of the saucepan! Immediately reduce the heat to medium.
2. Add the crushed cardamom seeds and stir to combine. Simmer the milk until it is reduced to ½ cup (125 ml), stirring frequently, about 20 to 25 minutes. If any skin forms on the surface, simply stir it back in. If there is any scorched milk at the bottom of the saucepan, do not scrape it.
3. Add the sugar and stir until it has all dissolved. Remove from heat and let cool to room temperature to avoid adding fresh mango to hot milk.
4. Wash the mango. Using a vegetable peeler, peel the mango. Cut away all of the flesh from the pit. Place the mango flesh in a blender. Blend until pureed smooth.
5. After the milk has cooled to room temperature, add the pureed mango to the milk. Stir thoroughly to combine. Pour the mixture into ice cream bar molds or an ice cube tray or mini muffin pan tray, or any shape mold you prefer. Put in the freezer until frozen, about 3 hours.
6. Remove the frozen ice cream from the molds by tilting the mold or tray sideways and running under hot water until the ice cream is loose and you can take it out. Enjoy!
August 19, 2014

Quick Vanilla Ice Cream Recipe

by , in
"This recipe is perfect for breakfast, an afternoon snack or for serving kids. You can even make this ahead of time, freeze it and save for later. Vanilla ice cream easy and simple to make at home quickly."

Homemade Vanilla Ice Cream Recipe

Serves: 2

Ingredients:

2cups whipping cream
2cups 1/2 and 1/2
1cup sugar
1tbsp vanilla extract

Directions:

  • Combine all ingredients in bowl. Stir until sugar is dissolved. Freeze as directed.

Variations:

Chocolate Chip: 

add 2/3c miniature or chopped chocolate chips immediately after freezing.

Cookies and Cream: 

add 10 crushed chocolate sandwich cookies to ice cream immediately after freezing (or any cookie....)

Tin Roof Delight: 

combine 1/2cup chocolate fudge sauce and 3/4 cup chopped Spanish peanuts. SWIRL into ice cream immediately after freezing