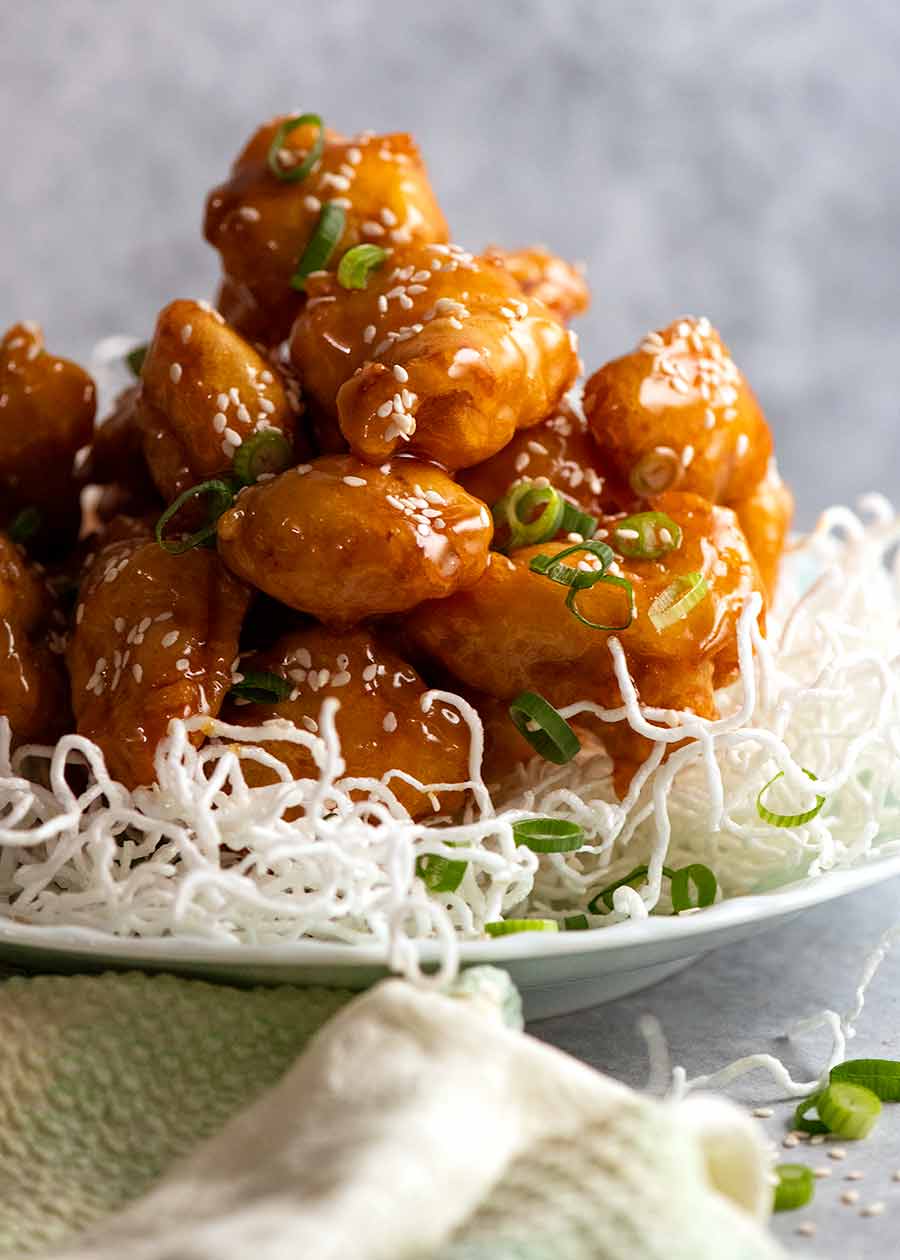
This is a Honey Chicken that’s built to last! This recipe brings together a plethora of Asian cooking secrets for a Honey Chicken that stays crispy for hours, even after tossing in the honey sauce. The Chinese Fry batter yields a crispy, puffy coating that light and not greasy, and requires no special ingredients or equipment!

Built-to-last CRISPY Honey Chicken
“Dude, you’ve cracked it!”
This was my brother’s response on first bite. What we thought to be an allusive “they must be using chemicals!” crispy puffy coating on Honey Chicken that’s not only crisp freshly made, but stays crispy for hours and hours…… turns out anyone can make it at home without special ingredients or tools.
And when I say “this stays crispy for hours”, I mean that it’s crispy even 4 hours after coating in sauce. Not just little wisps of crispy edges. I’m talking MAJOR crunch factor.
CRISPY preview – turn up the volume!!
(And in case you are wondering, yes, my brother calls me dude when excited, and no we are not 18 ).
).
(Also, in case you are wondering, this recipe was a fluke, not scientifically approached. You won’t find any other Honey Chicken recipes online like this one – there’s a handful of unique things about it. It brings together learnings from my mother’s Karaage, Sweet and Sour Pork and Caramel Popcorn (yes, really – read on!).
INGREDIENTS
1. Built-to-last crispy puffy Chinese fry batter
Here’s what you need to make a crispy Chinese fry batter that will stay crispy even overnight in the fridge (no exaggeration) and for hours once tossed in the Honey Chicken Sauce:
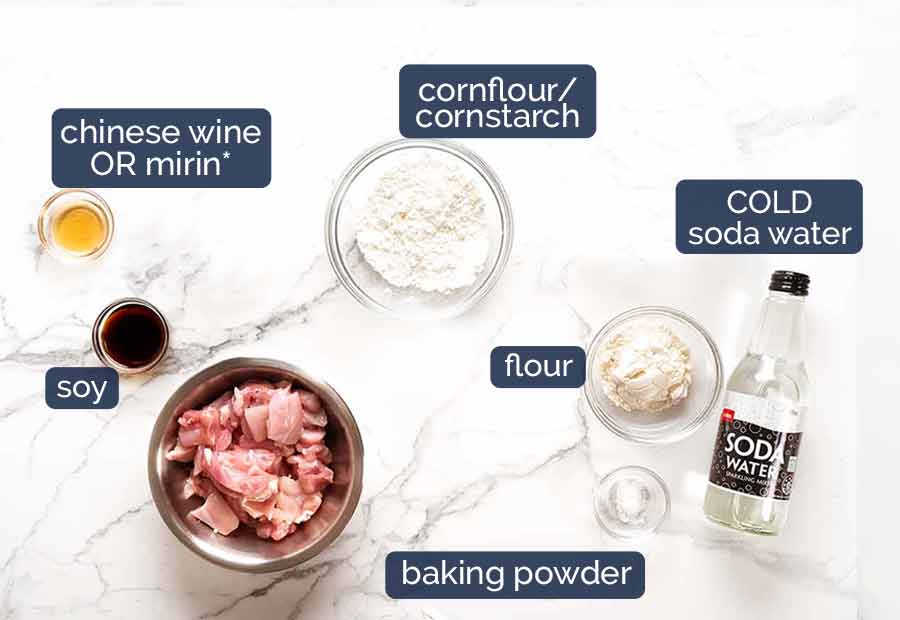
Notes on ingredients for stay-crispy puffy Chinese fry batter:
- COLD soda water or club soda or seltzer water – NOT sparkling mineral water which is naturally carbonated (ie fizzy). We want something that has man made bubbles in it which is fizzier. The fizz helps with the puff, the cold is key for ultra crispy: the shock of the cold batter hitting the hot oil = super crispy virtually immediately;
- MORE cornflour/cornstarch than flour – flour has gluten which causes crispy batters to soften. Cornflour is gluten free, so using this in the batter is key for crispiness. Why not just use all cornflour? Because it becomes like a thick glue that’s not workable as a batter, and also because cornflour stays white when fried. We want a nice golden colour for Honey Chicken;
- Flour – less flour than cornflour, but essential to activate the baking powder to make this crispy coating puffy (baking powder doesn’t work on cornflour) and also so the chicken pieces fry up nice and golden; and
- Baking powder – key ingredient to give the batter some lift so it’s puffy, rather than a thin coating that’s fully adhered to the chicken like in Sweet & Sour Pork.
2. Chicken & marinade
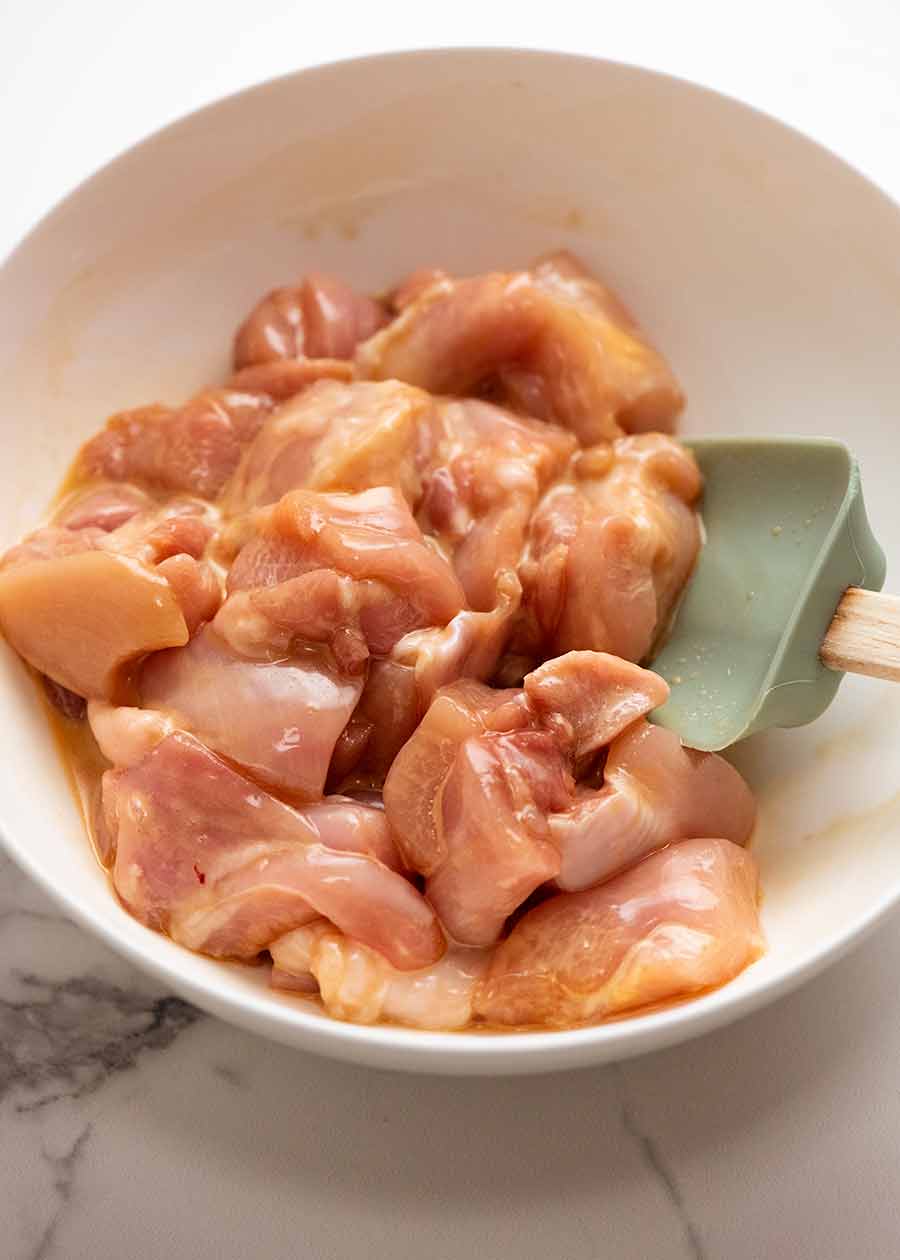
Chicken Marinade:
- Chicken thighs are best here, because they’re juicier than breast and tenderloin which means you have more room for error with the fry time which is very handy for people who aren’t highly experienced with deep frying. Chicken breast – if you must, see recipe notes for extra tenderising tip using baking soda (Velveting Chicken);
- Soy sauce – light soy sauce is best, to keep the honey sauce as clear as possible. All purpose will work fine too but will make the sauce a wee bit darker. Do not use dark soy sauce – way too strong;
- Chinese cooking wine – essential ingredient to make food taste truly like Chinese restaurants (they use it by the gallon, it’s in literally every Chinese recipe). Sub with a tiny bit of chicken stock/broth; and
- Cornflour/cornstarch – this acts as a tenderiser as well as slightly thickening the marinade so when dusted with cornflour before frying, it makes it stick.
3. Honey Sauce
Here’s what you need for the sauce. The two key things here for stay-crispy chicken are: glucose or corn syrup for thickening no soaking, and no water. More below.
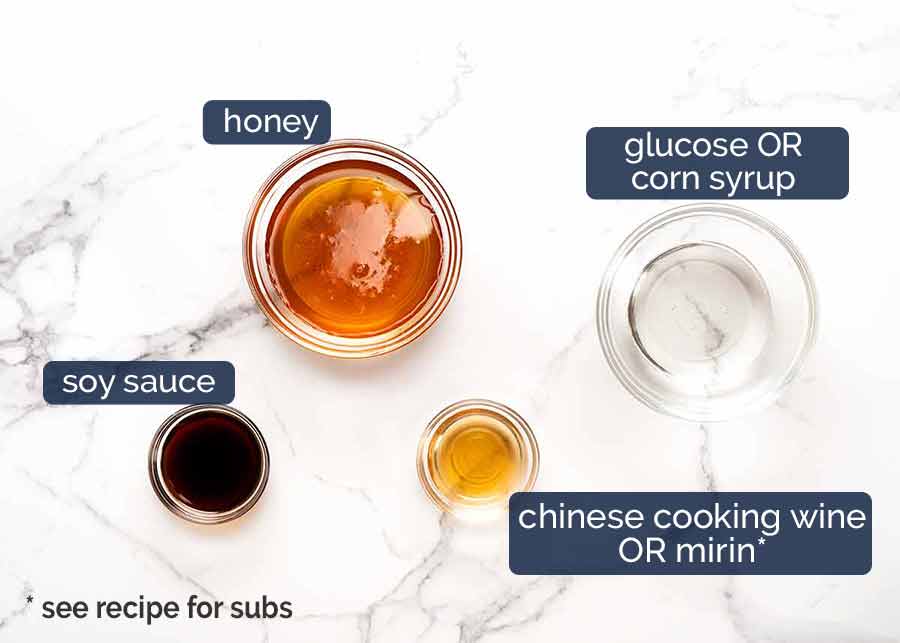
1. NO water – most Honey Chicken sauces include water and cornflour/cornstarch for thickening. Crispy Coating and water are not friends! Give the water a miss;
2. Glucose or corn syrup – this makes the honey coating almost “candy” like, something you might’ve observed at Chinese restaurants. This is key for a Honey Chicken that stays as crispy as possible – just like the secret to Caramel Popcorn that stays crispy for weeks (no exaggeration!).
Both glucose and corn syrup become thin when warm so you can toss to coat the chicken, but as you toss and it cools, the sauce thickens quickly so it becomes a sticky coating that sits ON the chicken rather than soaking INTO the chicken and making it soggy.
Soy sauce and Chinese cooking wine add salt and a hint of Chinese restaurant flavour into the sauce so it’s not just a plain honey sauce. The water component in these largely cooks out when simmered, so it doesn’t compromise the crispiness!
Glucose or corn syrup is a key ingredient here to make a Honey Sauce that coats rather than soaks into the crispy crust.
How to make Built-To-Last Crispy Honey Chicken
Here’s how to make it. Commentary on each step is below these process photos:
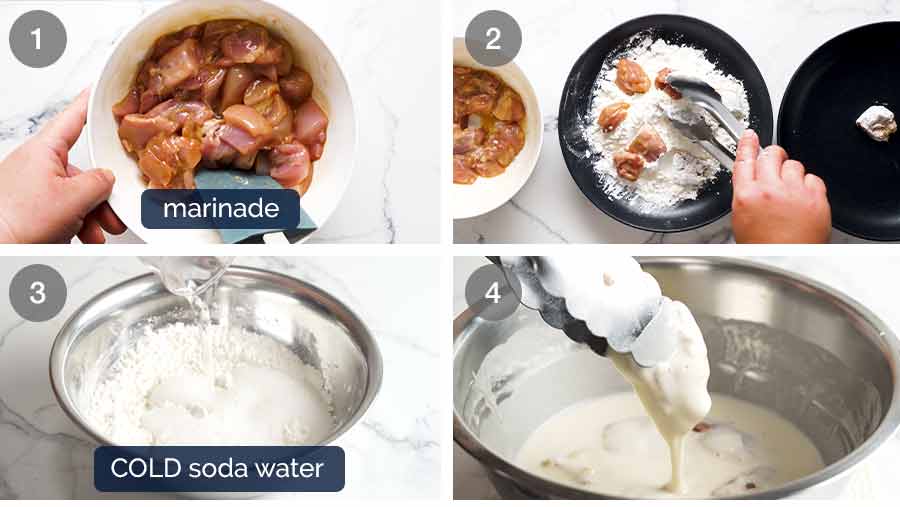
- Marinade chicken – to add seasoning into the pieces and also to tenderise so each piece is ultra tender inside. This also gives us room for error in the frying time which is essential for ordinary folk who aren’t experienced fryers!
- Cornflour/cornstarch coating – provides an extra layer to seal in the juiciness of the chicken so it doesn’t soften the crispy coating. Method utilised in Sweet and Sour Pork;
- COLD batter – key step for ensuring ultra crispy is COLD batter because the shock of the cold batter hitting hot oil = crispier chicken. The batter is made cold by making it just prior to frying, and using fridge cold soda water / club soda. For extra insurance, you can also chill the bowl and dry ingredients before mixing in the water – good tip for beginners;
- Dip in batter – drop in a handful of chicken pieces, then coat in batter. Ready to fry!
This recipe utilises a double coating method for extra crispy. Dusting of cornflour to seal the chicken, then a batter for crispiness!
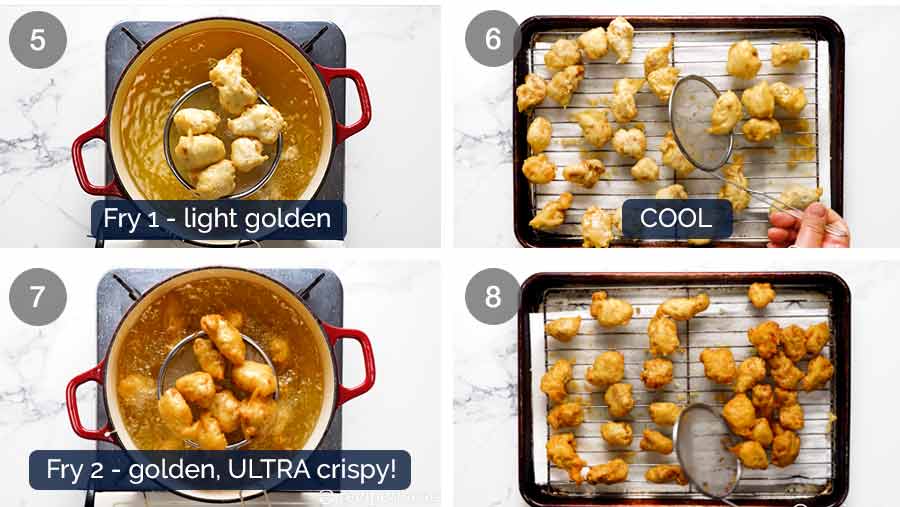
5. Fry 1 (3 minutes)- 3 minutes at 180C/350F until LIGHT golden. It will be unusually pale because of the cornflour in the batter (which doesn’t brown) but a touch is all it takes to know it’s SUPER crispy!! This step is to cook the chicken through. The chicken is already very crispy, but it won’t stay crispy for more than 10 to 15 minutes once coated in sauce;
6. COOL before double fry – another key tip to make the crispiness built-to-last! I do not know the science behind this, all I know is that double-frying cold chicken is crispier AND stays crispy for longer. Possibly the same reason why cold batter = crispier chicken?
7. Double fry (90 sec) – fast becoming the worst kept Asian secret, a quick double fry is THE secret to ultra crispy less greasy fried food (more examples: Sweet and Sour Pork, my mother’s Chicken Karaage). It also solves the batch-cooking issue (ie first cooked goes cold) because you can crowd the pot for Fry #2 so all the chicken is reheated in one or at most, two batches. Prefer to skip this? Just do Fry #1 at 200C/350F for 4 minutes until golden, and keep chicken warm in the oven. Directions in recipe. Still ultra crispy even once sauced. Double fry is just even better – plus all the chicken is piping hot, freshly cooked.
8. Drain on rack – we’ve gone to all this effort for crispy chicken, now is not the time to drain on paper towels, making the underside sweaty and soft!  Elevate the chicken with a rack to drain it and ensure it stays crispy.
Double fry doesn’t mean double grease. It’s actually LESS greasy than single fry because higher temp = less greasy.

How to make the Honey Sauce
Plonk-and-simmer job!
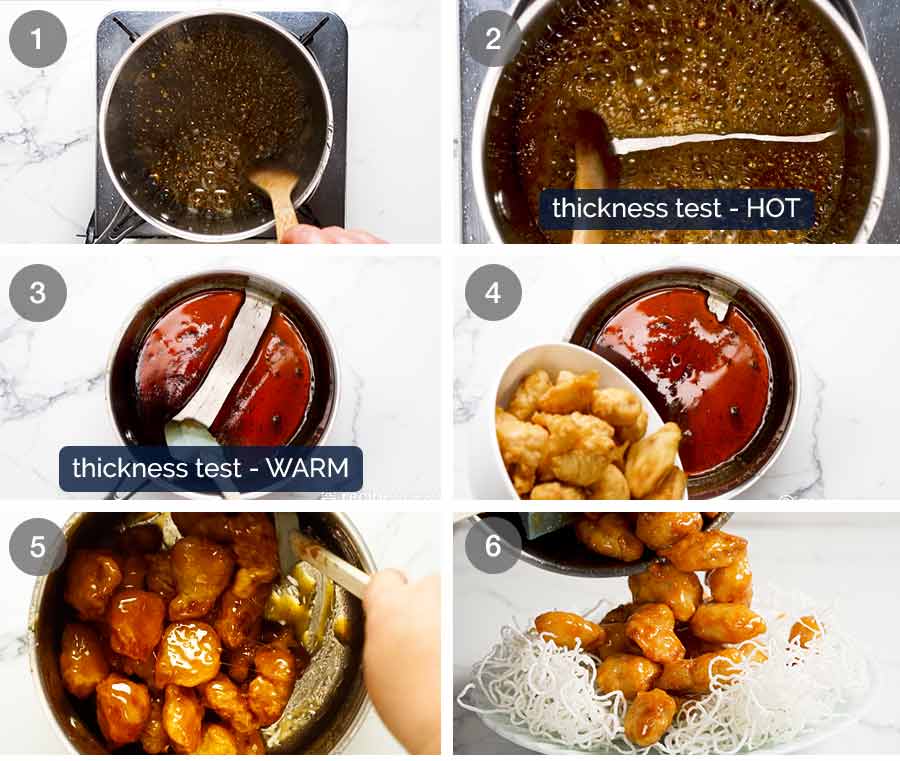
It will be thin like maple syrup when hot, will thicken to honey consistency once off the stove for 5 – 10 minutes, then as you toss the chicken through, it becomes like a thick sticky toffee that sticks on the surface on the chicken which is exactly what we want as opposed to soaking into the crispy crust.
See how sticky the sauce is? And also notice how sauce isn’t dripping down onto the noodles – it’s all stuck on the chicken!
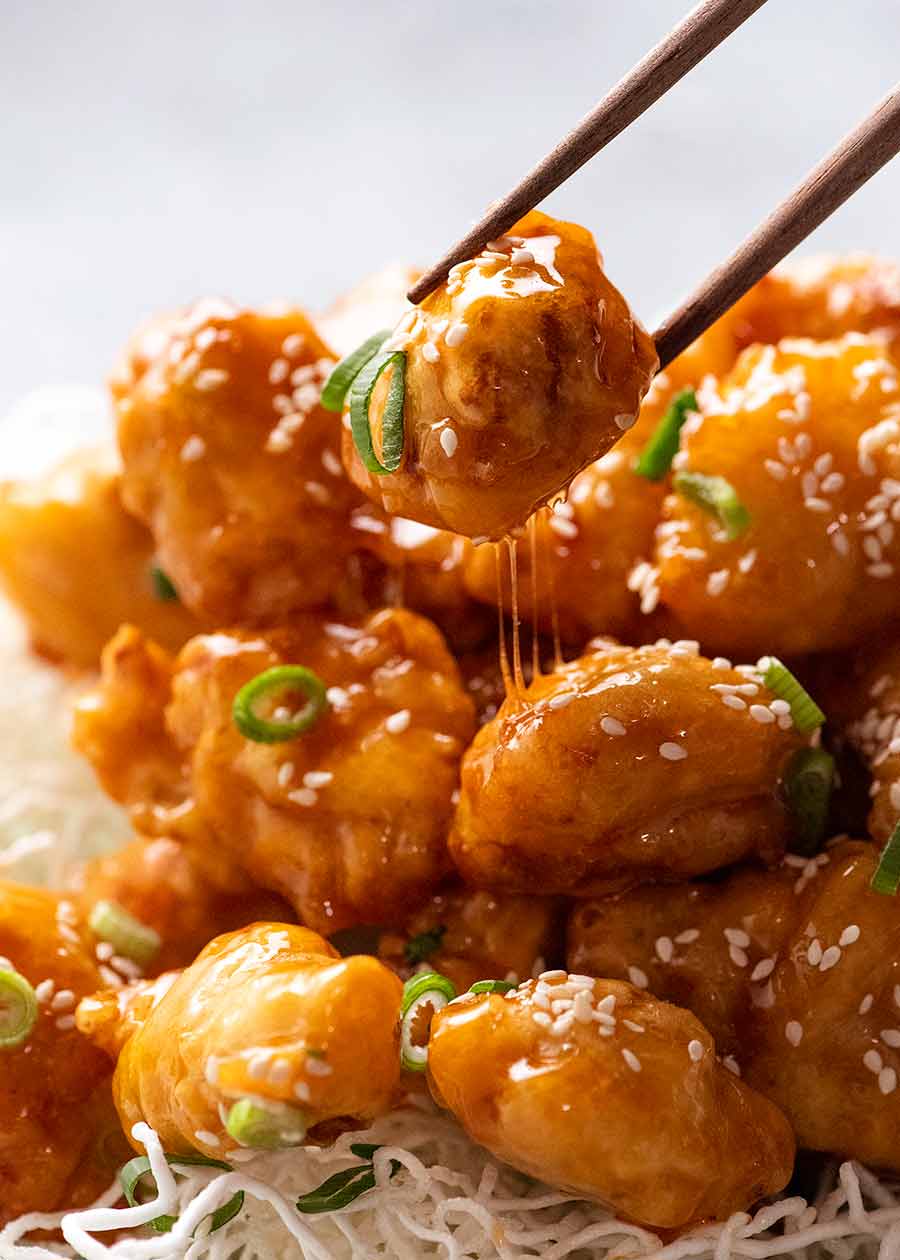
Puffy White Noodles!
Speaking of the noodles! Here in Australia, the typical suburban Chinese restaurant serves Honey Chicken and Honey Prawns on a bed of the pictured puffy white noodles.
They’re just vermicelli rice noodles that have been fried. Too greasy to eat and they aren’t flavoured at all, it’s really just more about sentimental authenticity – and the fun of making it (which takes all of 3 seconds):
Purely optional – but seeing as you’ve got the oil out anyway, why not?? 
How long does the crispiness last, really?
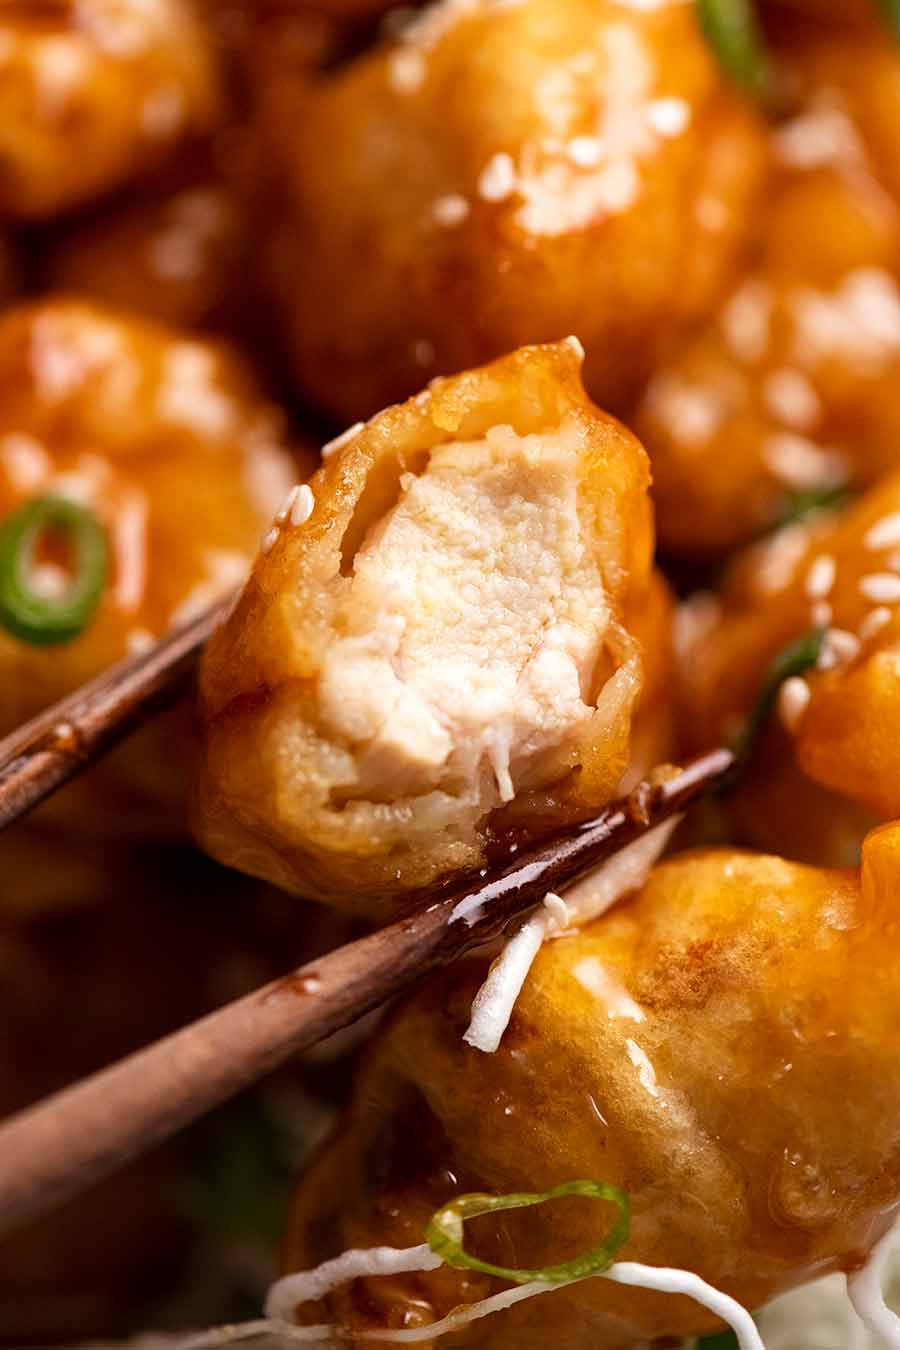
Hand on heart, after tossing with the sauce, it stays crispy for 4 hours. Of course the sauce soaks in a bit, but not enough to affect the overall serious crunchy experience.
In the video and at the top of the post (the looping short video) where you see me cutting in a honey coated piece of chicken and you hear how crunchy it is, that was at the end of the video shoot so probably around 40 minutes after I tossed it in sauce.
Once refrigerated though, it stays a bit crispy but when reheated, it gets soggy. BUT, it can be made ahead…. read on!
How to make Honey Chicken ahead (100% perfect!)
All you do is fry the chicken per the recipe – double fry. Cool, refrigerate. Make sauce, store in container. The next day, take the chicken out of the fridge – it will still be crispy, but it’s cold – then bake 7 minutes it to heat up and make it even crispier!
Microwave or reheat sauce using other chosen method, toss and serve. It’s just like freshly made!
What to serve with Honey Chicken
For a full blown Chinese banquet, start your feast with one of these:
Then for the main, choose a couple of sides – here are a few ideas:
Though this Honey Chicken recipe only calls for 300g/10oz of chicken, once coated in the puffy batter it substantially increases in volume and it’s quite rich, being fried and coated in the sticky Honey sauce.
Enjoy! – Nagi x
Watch how to make it
Built-to-last CRISPY Honey Chicken
Ingredients
Chicken & Marinade:
- 300g/ 10oz chicken thighs , skinless boneless, cut into 2.5cm/1" pieces (Note 1)
- 1 tbsp light soy sauce (or all purpose, NOT dark soy)
- 2 tsp Chinese cooking wine (or more soy)
- 2 tsp cornflour/cornstarch
Dredging:
- 1/2 cup cornflour/cornstarch
Stay-Crispy Puffy Batter:
- 6 tbsp cornflour/cornstarch
- 4 tbsp flour , plain/all purpose
- 7 - 8 tbsp COLD soda water or club soda (NOT sparkling mineral water, Note 2)
- 1/4 tsp baking powder (NOT baking soda, Note 3)
- 1/4 tsp salt , kosher/cooking (halve for table salt)
Oil, for frying:
- 2 - 3 cups vegetable oil (or canola)
Honey Sauce:
- 1/2 cup (150g) honey
- 1.5 tbsp (25g) glucose
- 1 tbsp light soy sauce
- 2 tsp Chinese cooking wine
Garnish / serving:
- 25g / 2 oz Vermicelli rice noodles a wad of it (not bean, must be rice)
- Sesame seeds, finely sliced green onions
Instructions
Recommended step for beginners:
-
Place batter mixing bowl in the fridge with the flour, baking powder and salt. (Helps keep batter cold = crispier chicken)
Marinade & Dust Chicken:
-
Mix Chicken and Marinade in a bowl. Refrigerate for 30 minutes.
-
Dust: Spread 1/2 cup cornflour/cornstarch out on a shallow plate. Scatter over chicken pieces, toss to coat, shake off excess, put on a plate.
Cold Batter & Fry #1:
-
Rack: Place a rack on a tray (for draining, Note 3)
-
Heat oil to 180°C/350°F in a small pot or large saucepan (or until chicken starts sizzle straight away when you dip in to check).
-
Make Cold Batter: Whisk together flour, baking powder and salt. Pour in 7 tbsp water, then do minimum whisks just to combine (10 or so) - few lumps ok, better than whisking too much (changes coating texture).
-
Batter thickness: should fully coat, not be see through, but not super thick - see video at 44 seconds. Use extra water 1 teaspoon at a time to achieve right thickness.
-
Dredge: Drop 8 or so pieces of chicken into the batter. Turn to coat, then carefully place in oil.
-
Fry #1: Cook for 3 minutes until pale golden and crispy - when you pick them up, you can tell it's very crispy (and not fragile).
-
Drain & repeat: Place on rack, repeat with remaining chicken - I cook in 4 batches, don't crowd the oil, brings temp down too much.
-
Cool chicken for 20 minutes (Note 4). Meanwhile, make Sauce.
Fry #2 - for ultra crispy!
-
Heat oil to 200°C/390°F.
-
Add in half the chicken (you can crowd the pot for Fry #2). Cook for 90 seconds until it changes from pale golden to very golden (but not dark golden), then remove onto rack.
-
Repeat with remaining chicken.
Toss in Sauce & Serve:
-
Tumble into saucepan with sauce, use rubber spatula to quick toss until coated with sauce. (Sauce starts thickening if you take too long).
-
Pile over crispy noodles (if using), scatter with sesame seeds and green onion and serve!
Honey Sauce:
-
Place ingredients in a large saucepan over medium heat. Bring to simmer, then leave to simmer for 3 minutes.
-
Consistency should be like maple syrup - see video at 1 min 11 sec. Turn off stove, place lid on to keep warm.
Puffy Crispy Noodles:
-
At any point while oil is hot, drop wad of noodles into hot oil, wait 3 seconds until it puffs up, then remove with tongs.
-
Drain on paper towels, place on plate to top with chicken!
Notes
 7. Nutrition - impossible for this one, I'm afraid! Let's just say it's got more calories than a lettuce leaf.
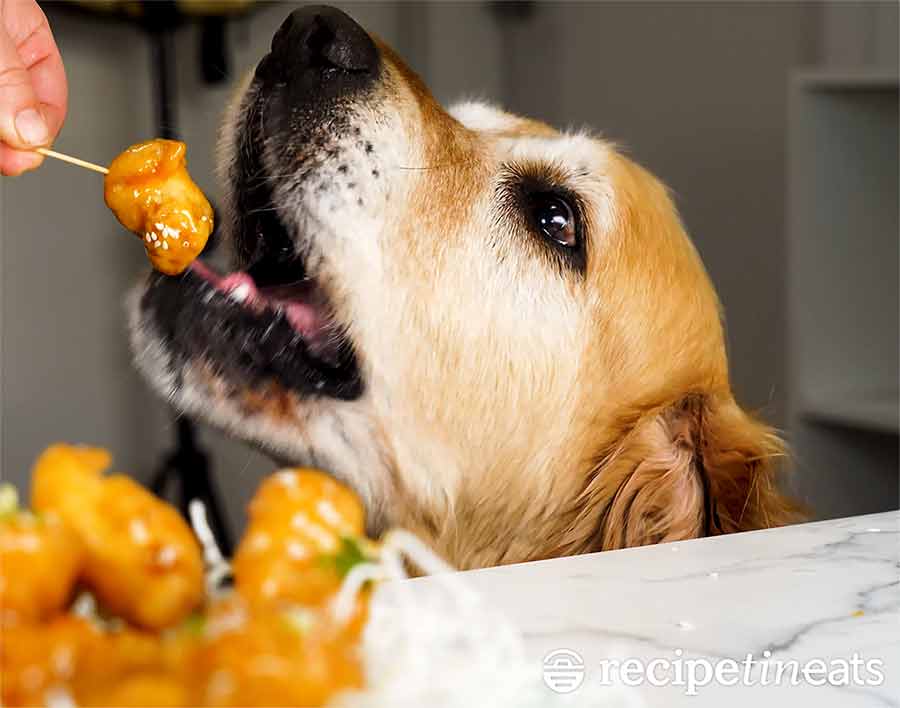
Life of Dozer
I imagine you will have the same look in your eye when you’re eating this Honey Chicken….
The post Honey Chicken – STAYS CRISPY for hours! appeared first on RecipeTin Eats.
from RecipeTin Eats https://ift.tt/2EazGkM
via IFTTT



No comments:
Post a Comment